 Software built by a broker, for brokers
Software built by a broker, for brokers
Software built by a broker, for brokers
Staff user guide
This is the public guide for Survey Management. It mirrors the in-app help. If something is not working, contact support and we will do our best to get back to you quickly.
Survey Management is where you schedule and track a marine survey across a deal, and send one clean, branded email to everyone involved. You create a survey, add the buyer, the other broker, and the vendors doing the work (surveyor, captain, haulout facility), then email the details to the whole group and resend or send a test whenever you like. When the work is done you mark the survey Completed and rate every vendor on it in one pass, and those ratings feed the shared vendor list. It uses the same sign-in as the rest of Yacht Broker Support, so if you are already signed in to Vendor Management you are signed in here too. This guide covers creating a survey, the required fields, the full form, saving and emailing, the status lifecycle, rating the vendors, ownership and views, and the automatic reminders.
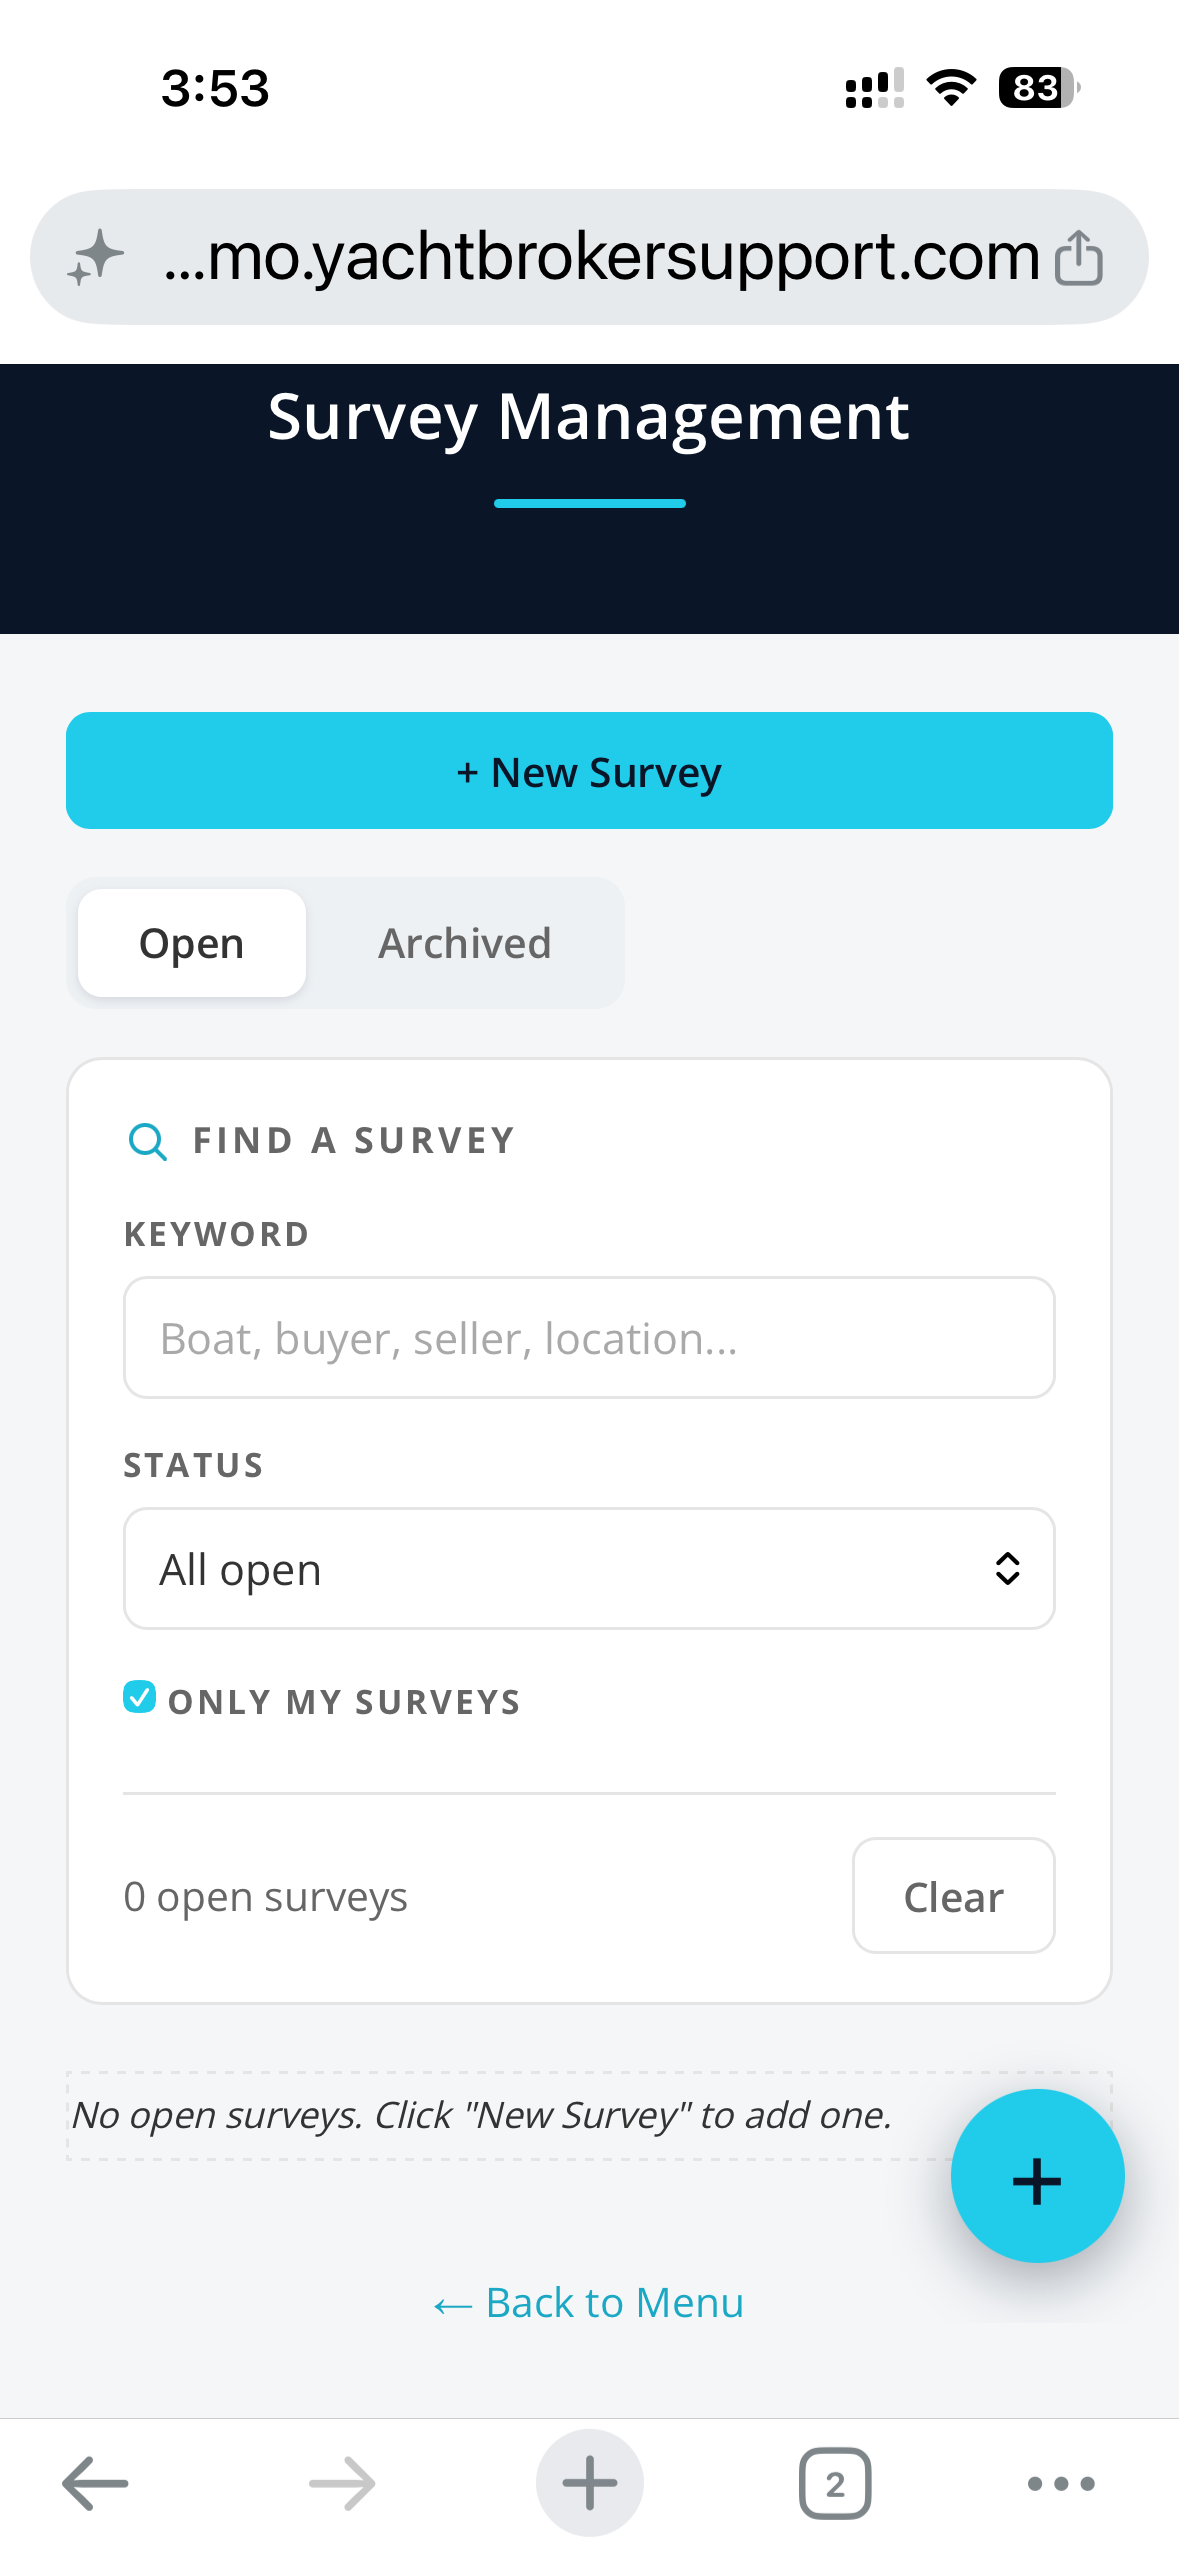
Survey Management is a private, staff-only app for your broker network. It is not public and it is not on the open web. Only signed-in brokers can see it, opened from the Survey card on the launcher menu.
Whether the card shows for everyone or reads "coming soon" is a provider setting your administrator controls. When it is live, any broker can open it, create their own surveys, and view everyone else's.
Click + New Survey at the top of the list. A form opens with the boat, dates, the buyer and seller, the brokers, the vendors doing the work, and the haulout schedule. Your own contact details are filled in automatically from your profile.
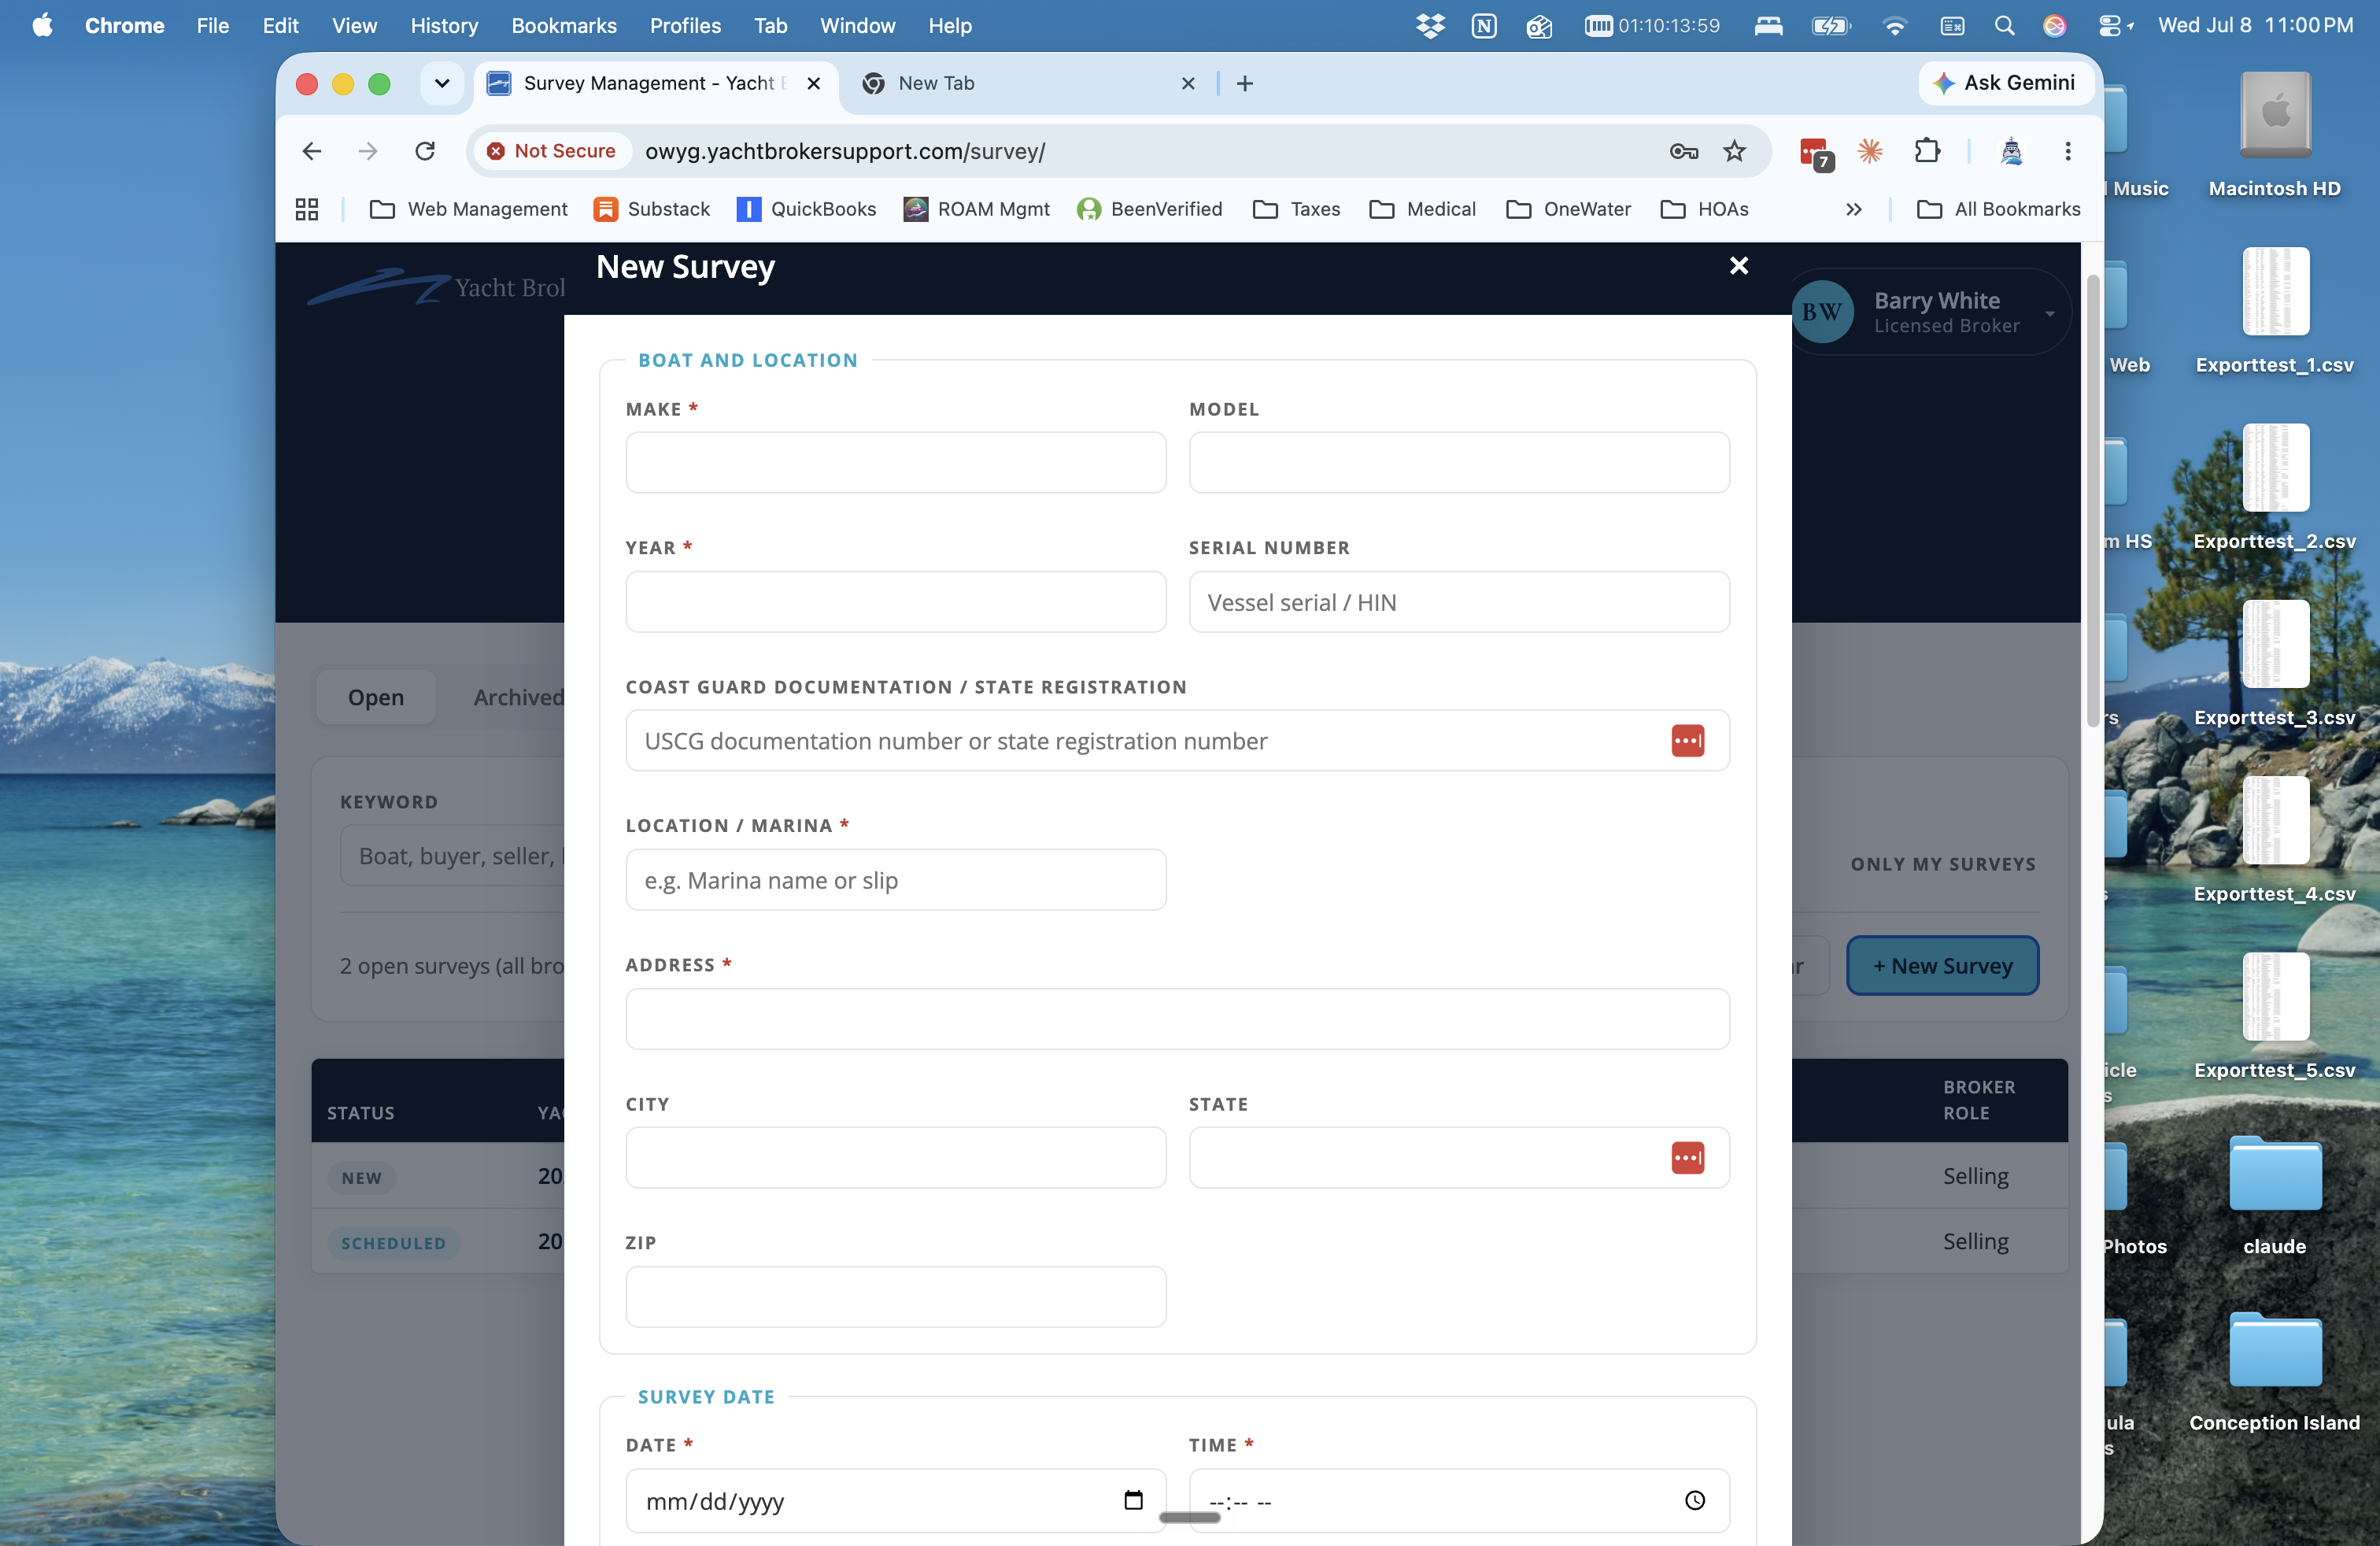
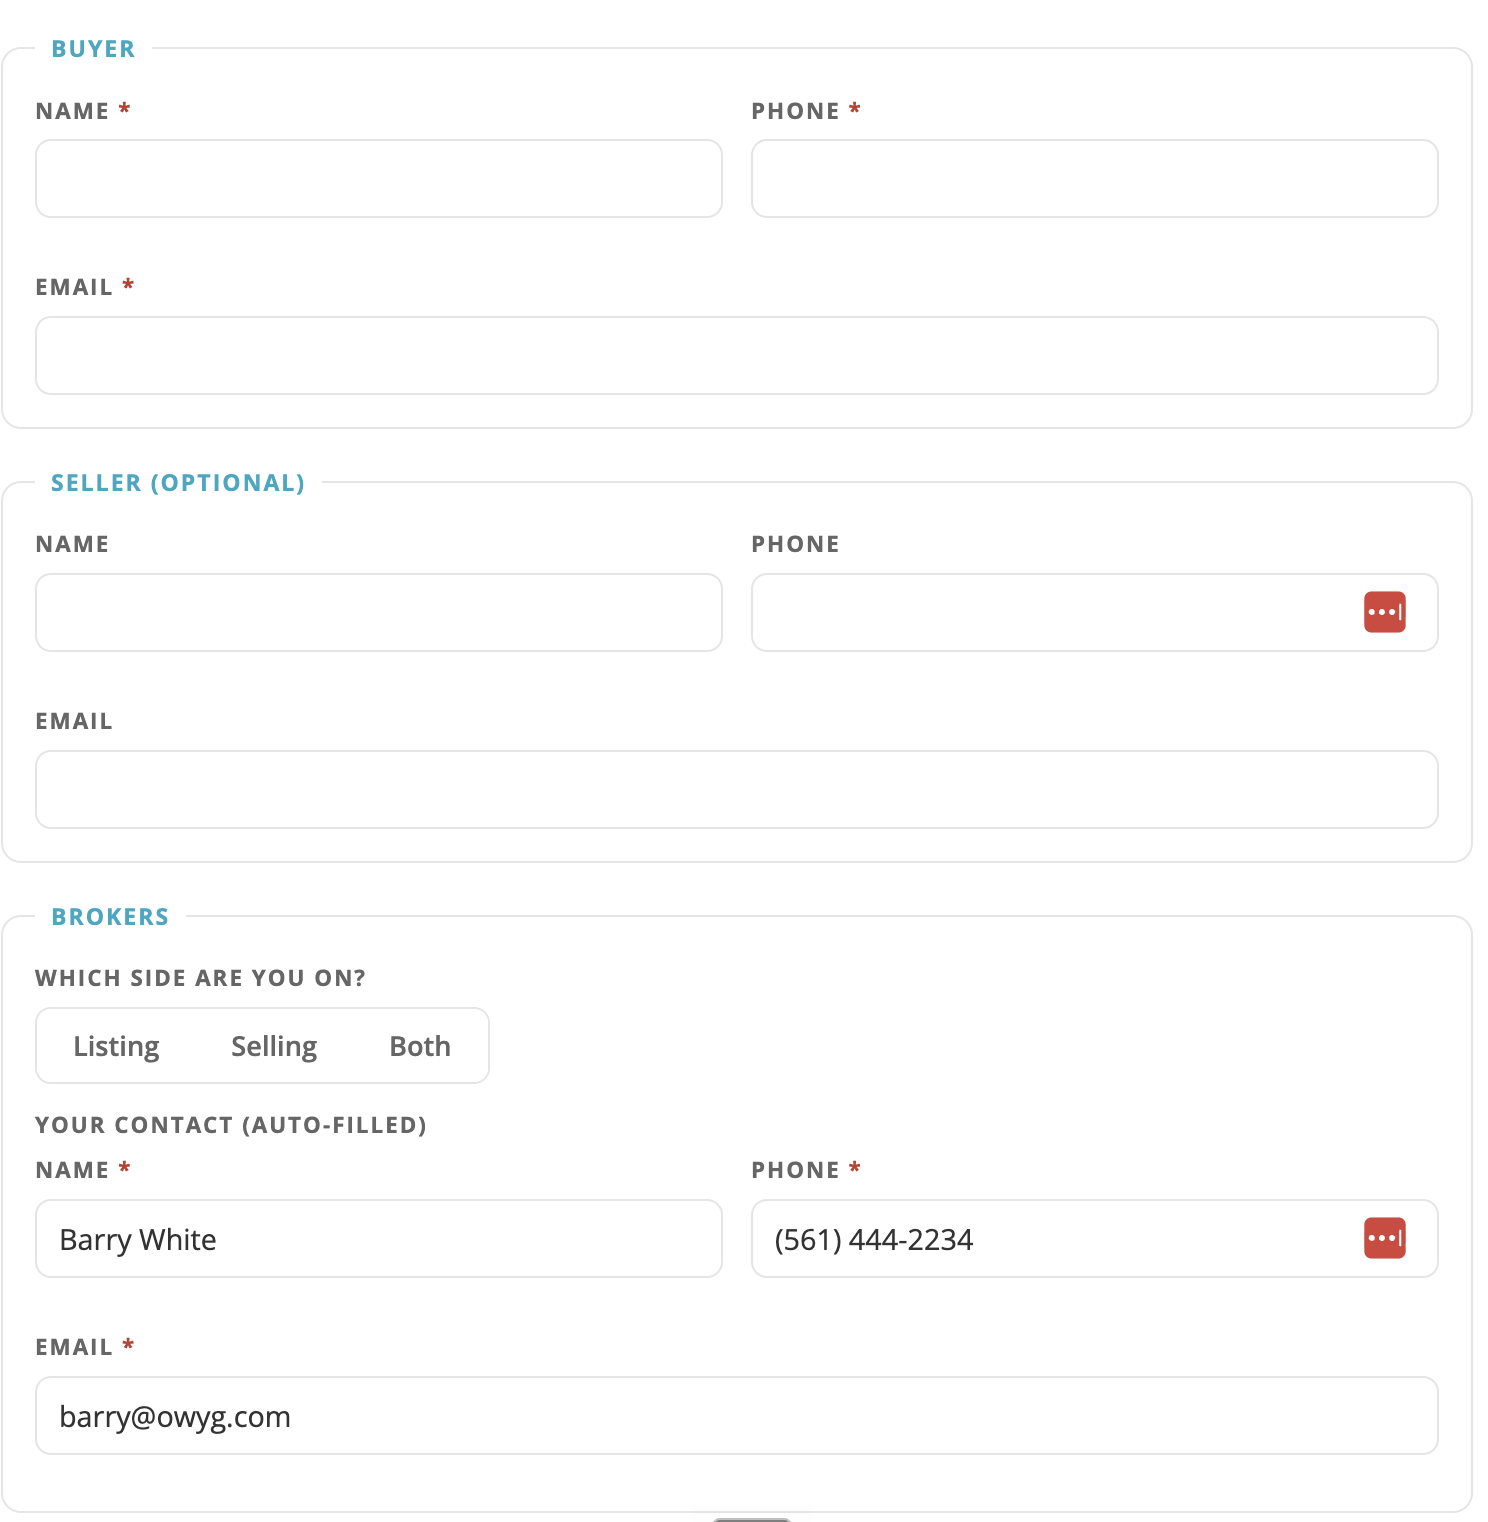
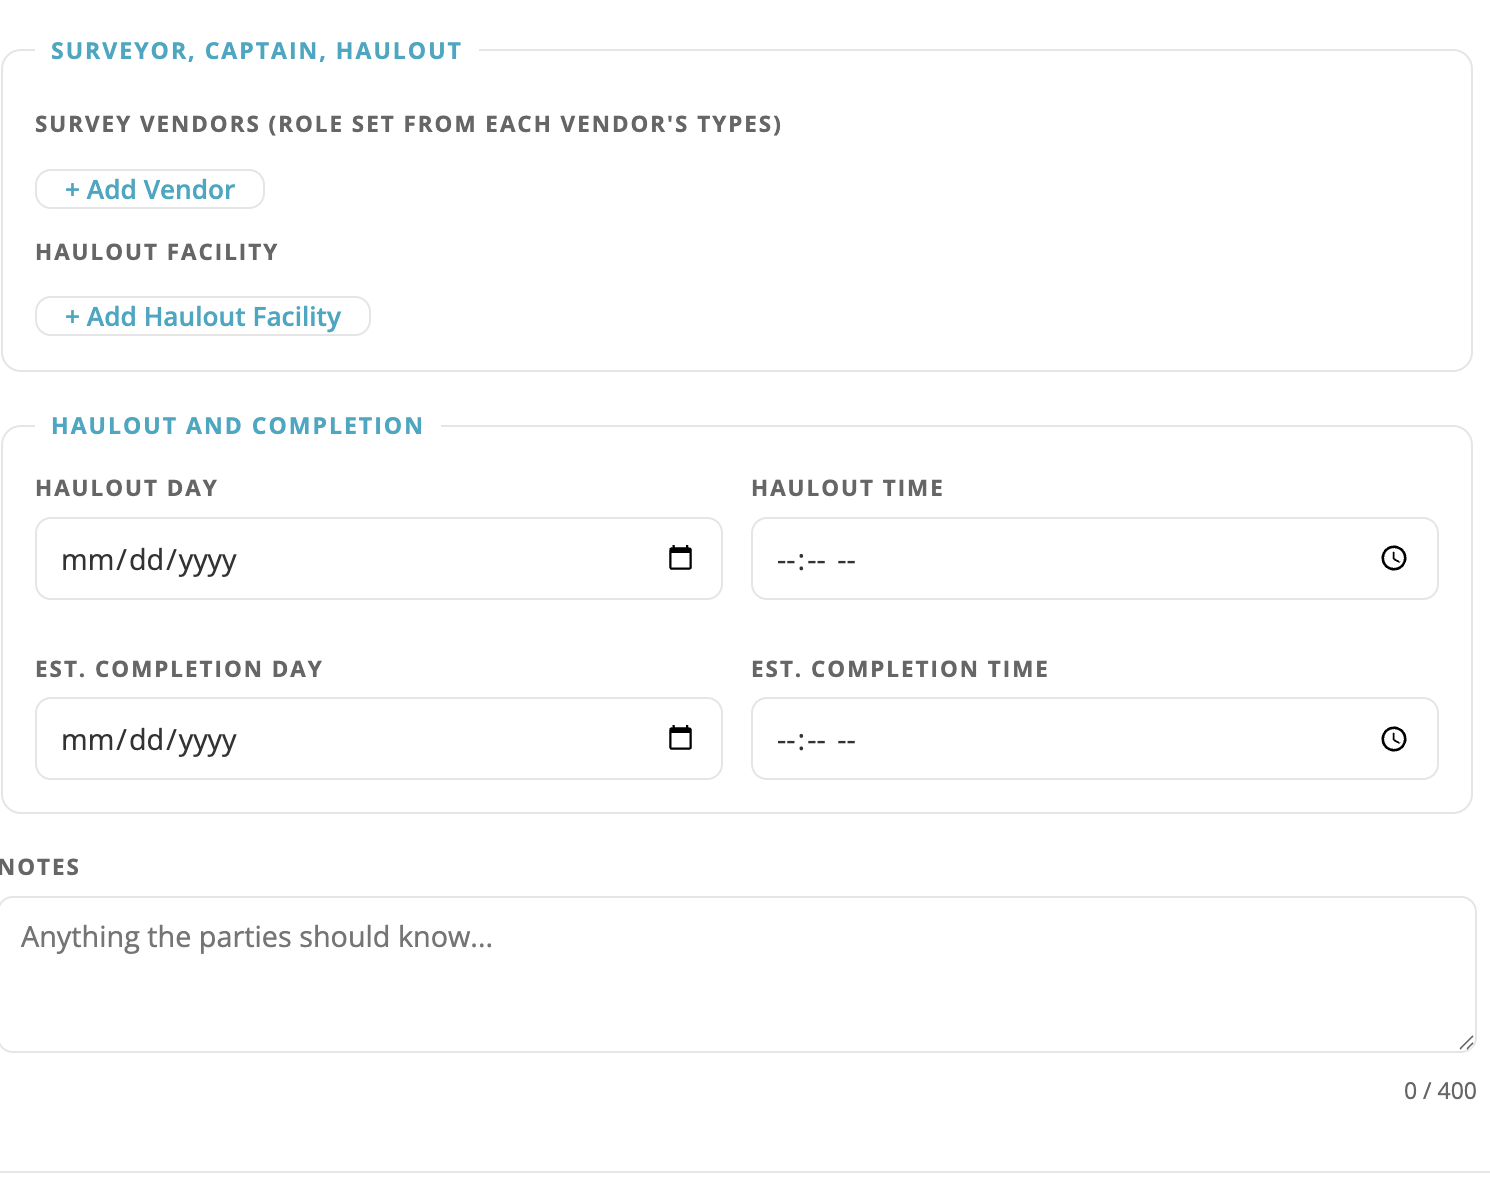
A survey cannot be saved until the essentials are filled in. The required fields are marked with a red asterisk on the form:
If any of these is blank when you click Save, you get a clear message that names exactly what is missing, for example "Please fill in: Start Time, Buyer Email." The missing fields are highlighted and the form scrolls to the first one. Nothing is saved until they are all filled in.
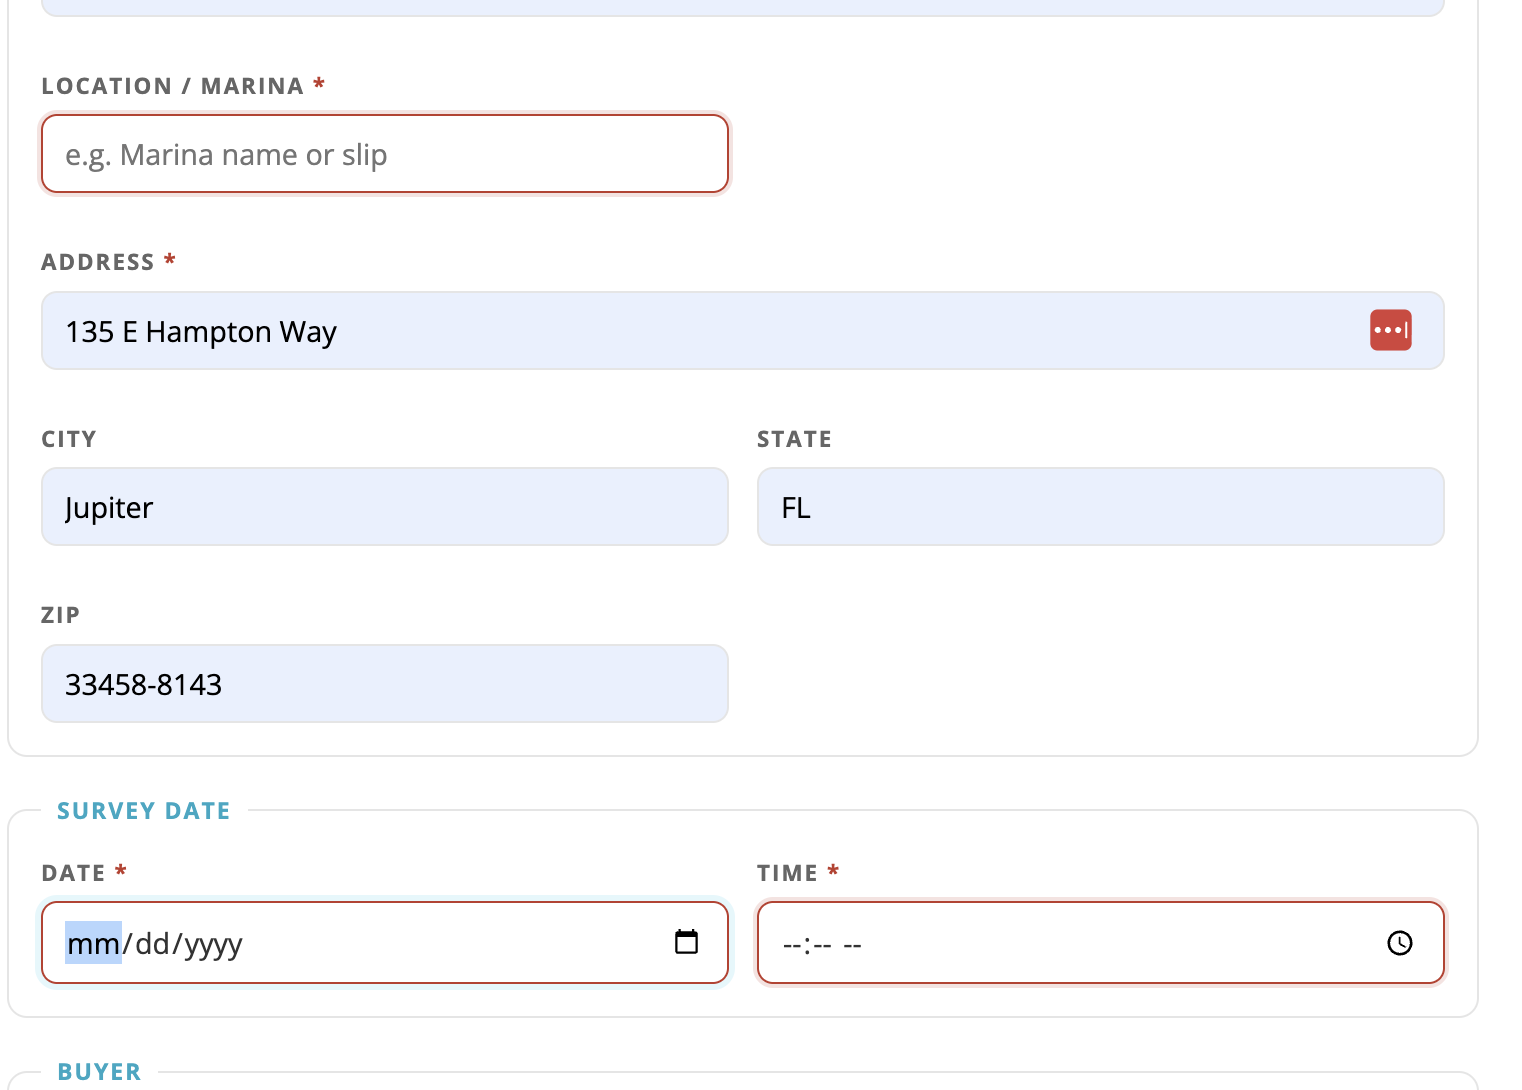
Pick the Date and the Start Time of the survey. The time shows in the email as a readable clock, for example "Jul 10, 2026 at 9:00 AM."
Location / Marina is the marina name or slip, and Address is the street address. City, State, and ZIP are optional extras.
Make and Year are required; Model is optional. There are also two optional identifiers: the HIN (the hull identification number, stamped on the transom) and Coast Guard Documentation / State Registration (the USCG documentation number or the state registration number). When you fill these in, they appear in the email.
If your firm has Listing Prep and the boat is already in it, you do not have to type any of this twice. Beside the HIN field there is a Find in Listing Prep button.
Press it and you get your Listing Prep boats in a proper table - boat name, then year, make and model, then the hull number - with a search line above them, so you can type part of a name, a builder, a model or a hull number instead of scrolling. Pick the boat and the make, model, year, documentation number and HIN come across from the record you already built.
Two things worth knowing. It never overwrites anything you have already typed, so a correction you made stays made, and it tells you afterwards exactly which fields it filled. And if you already know the hull number, type it into the HIN box and press Enter to go straight to that boat without opening the list.
The list is your own Listing Prep boats. Archived ones are left out, and a boat whose hull number has not been captured yet still shows - it reads "not captured" in the hull column.
The buyer's name, phone, and email are all required. The buyer receives the survey email, so a real email address matters.
The seller section is optional. If the seller is not attending or you do not have their details, leave it blank. An absent seller is simply left out of the email and is never flagged as missing anything.
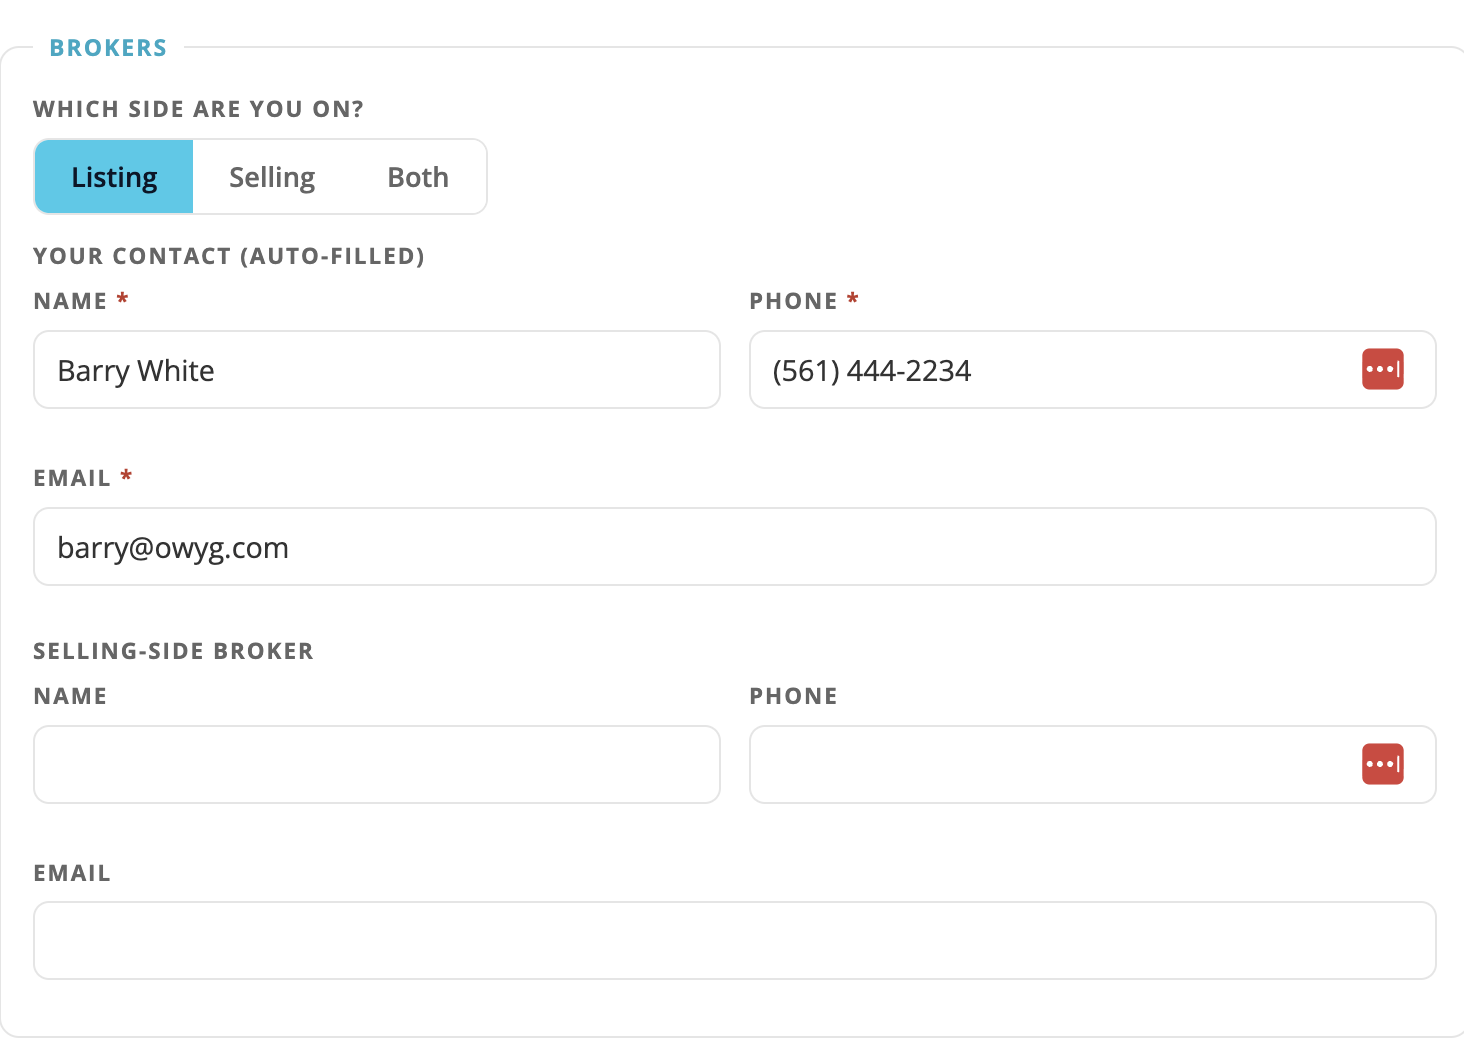
Choose your side with Listing, Selling, or Both. When you are one side of the deal, a second block appears for the other broker's name, phone, and email. Your own contact block is auto-filled from your profile and is editable on the form.
Set the Haulout day and time and the Estimated completion day and time. These are optional and appear in the email when set.
If you set a haulout day but leave the time blank, the app asks you to confirm before it saves. It is only a check, not a block - if the yard has not given you an hour yet, save it without one and add it later. The reason for the nudge is that the email then shows the yard and the surveyor a haulout date with no hour on it.
Add any Notes the group should see. Notes appear near the end of the email, after the people list.
The Survey Vendors section is where you add the people doing the work - the surveyor, the captain, and anyone else. There is one button, + Add Vendor, and one flow for all of them.
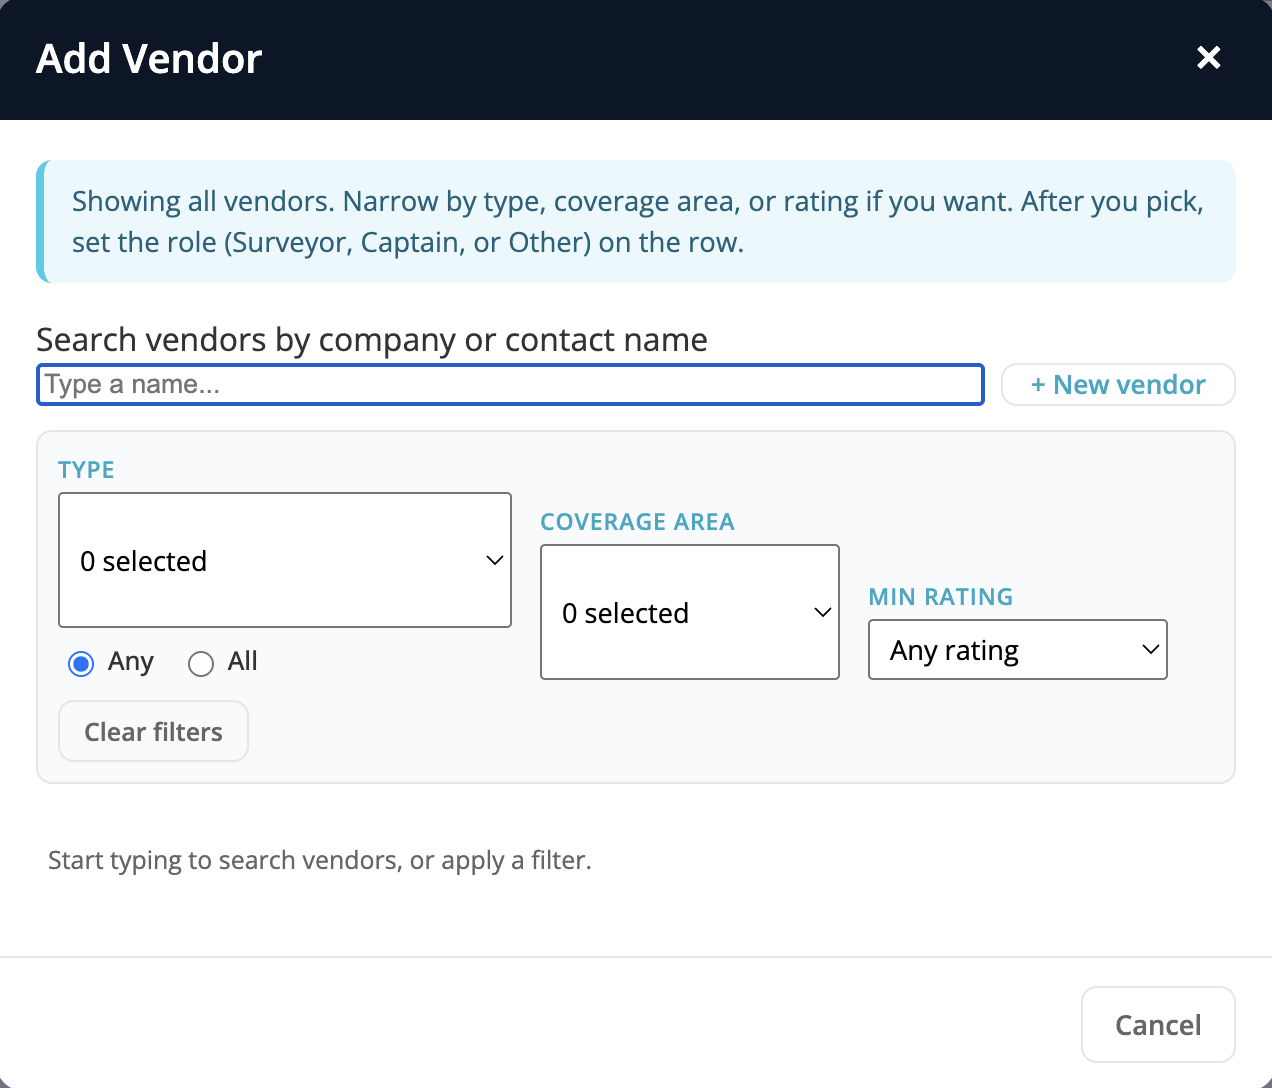
The picker shows every vendor on your firm's bench as soon as it opens. If that is a long list, narrow it three ways, in any combination:
These are the same controls as the main Vendor Management screen, and they behave the same way. Nothing is filtered until you ask for it, a vendor you have already ticked never disappears behind a filter, and Clear filters puts it all back.
+ Add Haulout Facility opens the same picker, so everything here applies to it too.
Each vendor row has its own Name, Email and Phone. Leave them blank and the survey uses whatever is on the vendor record. Fill one in and it applies to this survey only, which is what you want when the surveyor is sending a different assistant this time.
As soon as you type one, a checkbox appears underneath: Also save these to the vendor record. Tick it and the change is written back to the shared vendor file for everyone. Leave it off and the change stays on this survey. You will not see that checkbox at all until there is actually something to write back, so an existing vendor you did not change stays a single clean line.
Click Save Survey. If a required field is missing you get the "Please fill in..." message and nothing is saved. When the save succeeds you see a green "Survey saved" confirmation and the form closes back to the list.
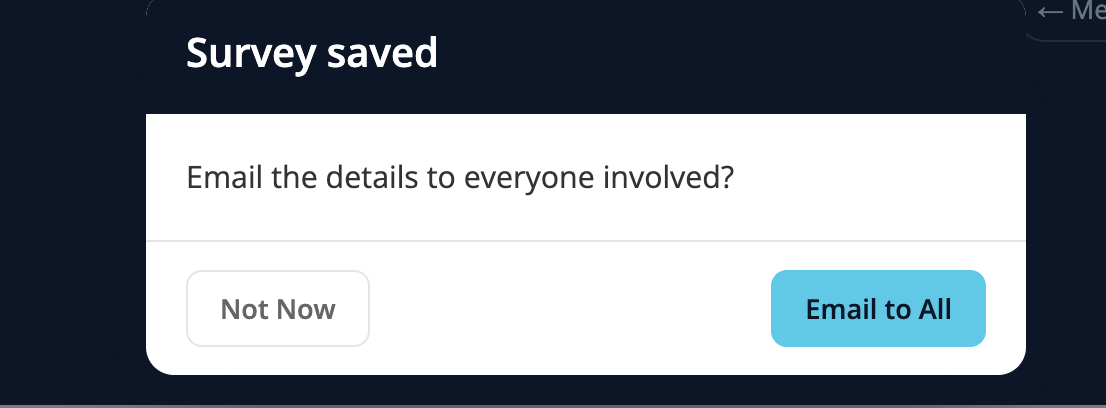
Right after a successful save, a short prompt asks "Email the details to everyone involved?" with two choices:
The Discard Changes button on the form closes it without saving, so it is clear that leaving is never the same as saving.
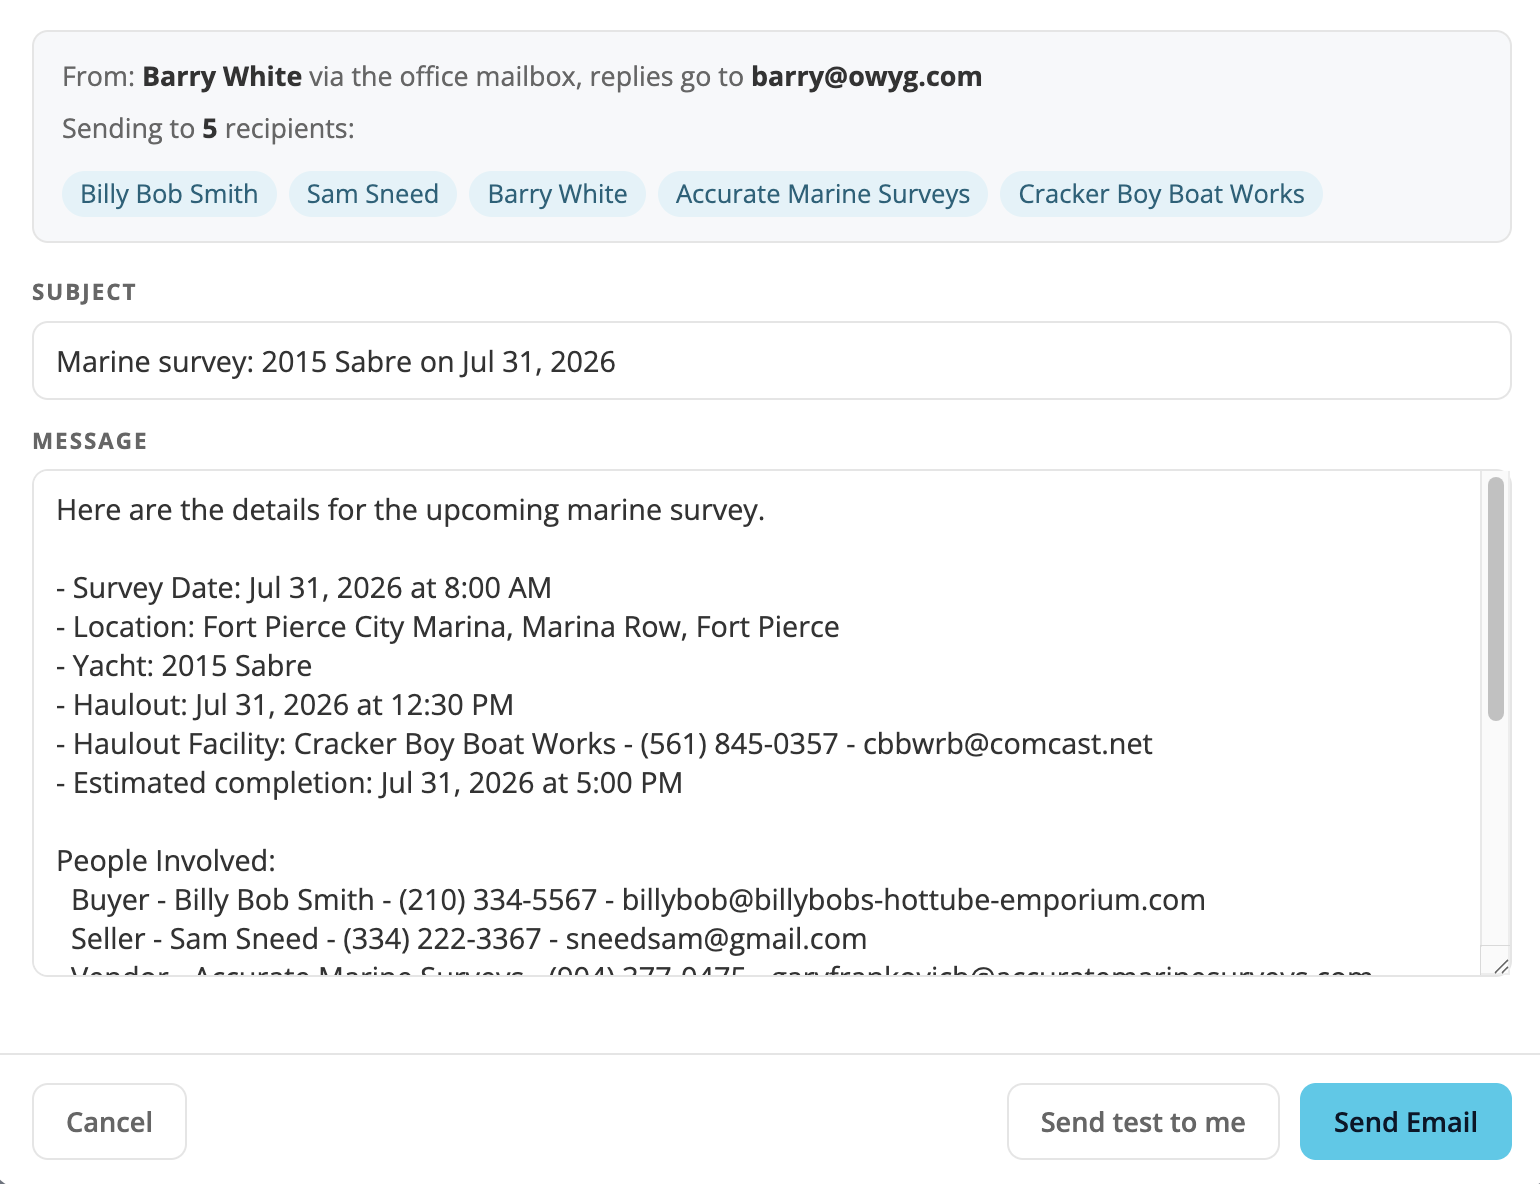
The survey email is one branded message sent to everyone involved. It has:
You can edit the subject and body before sending, and you can resend the email at any time later by opening the survey and choosing Email. A few things worth knowing:
The survey itself shows an Email block listing every email that has gone out about it, newest first, and each line says which route it went by - a person pressing Email, or the app's own automatic reminders (see Automatic reminders). For example:
Only a survey where nothing has gone out by any route reads "Not yet emailed." A line that says "time not recorded" is an automatic send from before the app started recording send times; it still went out.
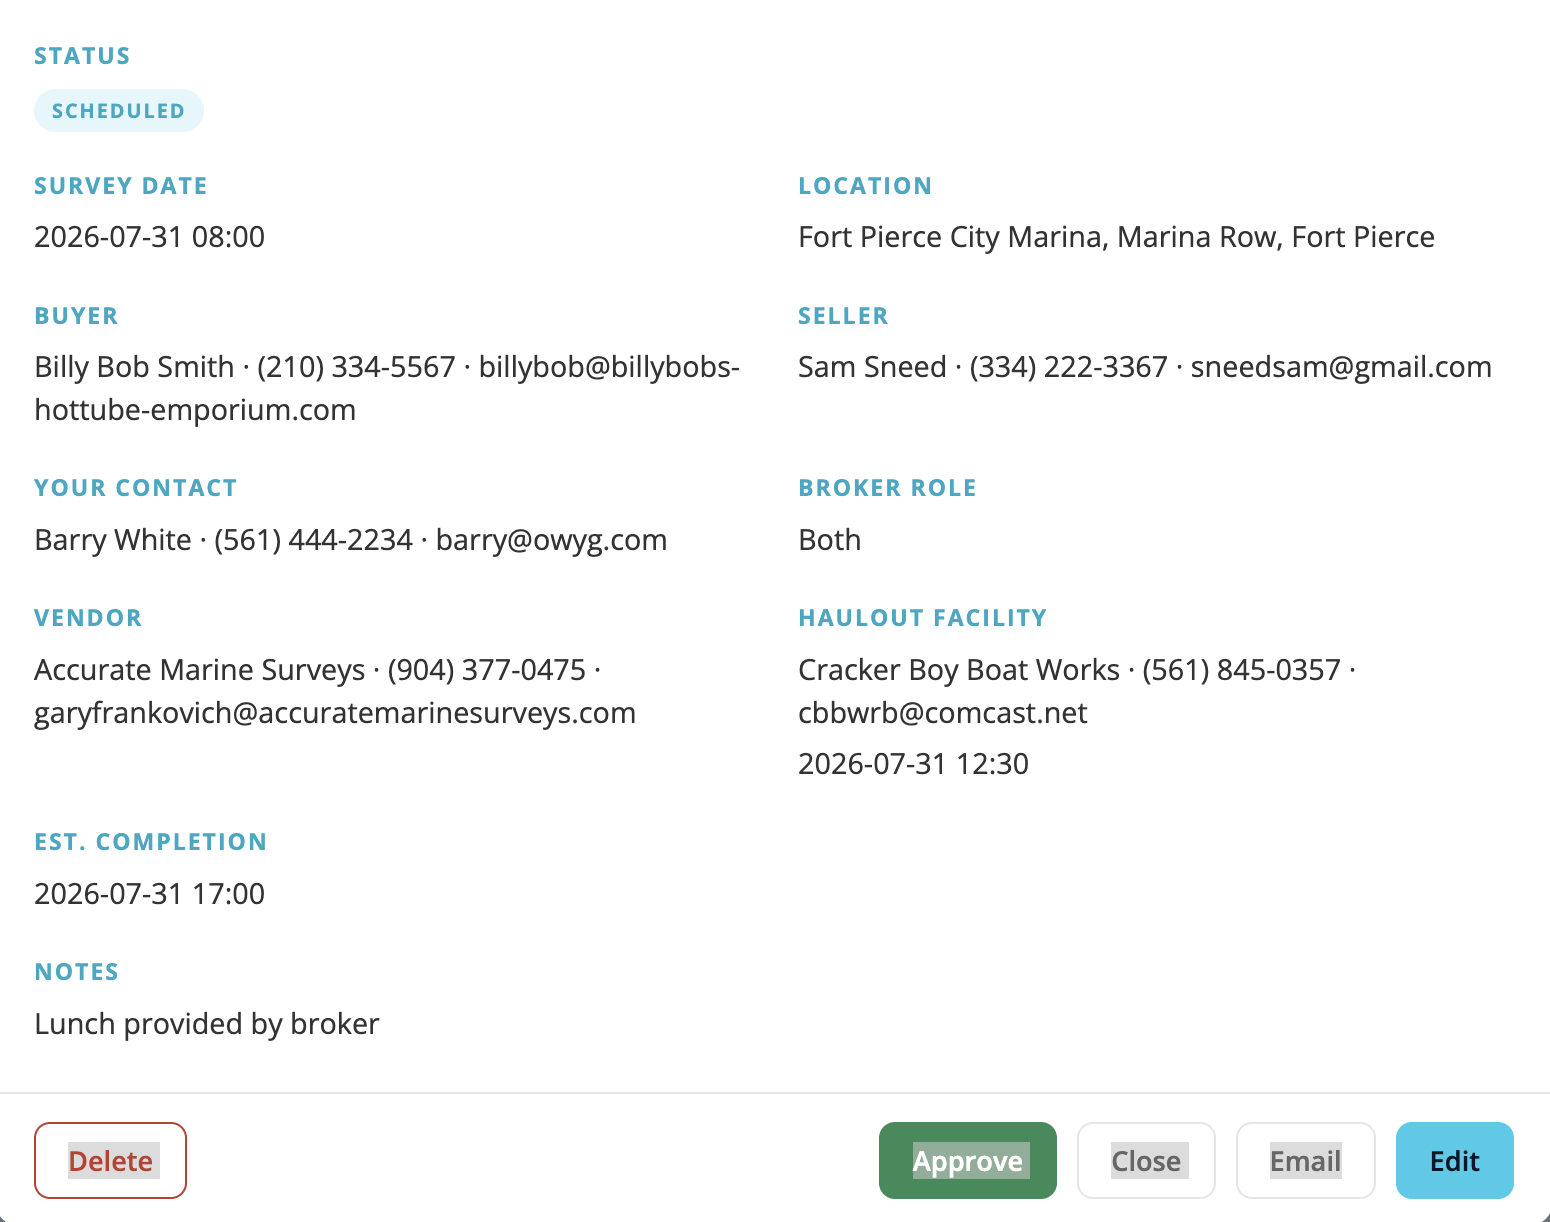
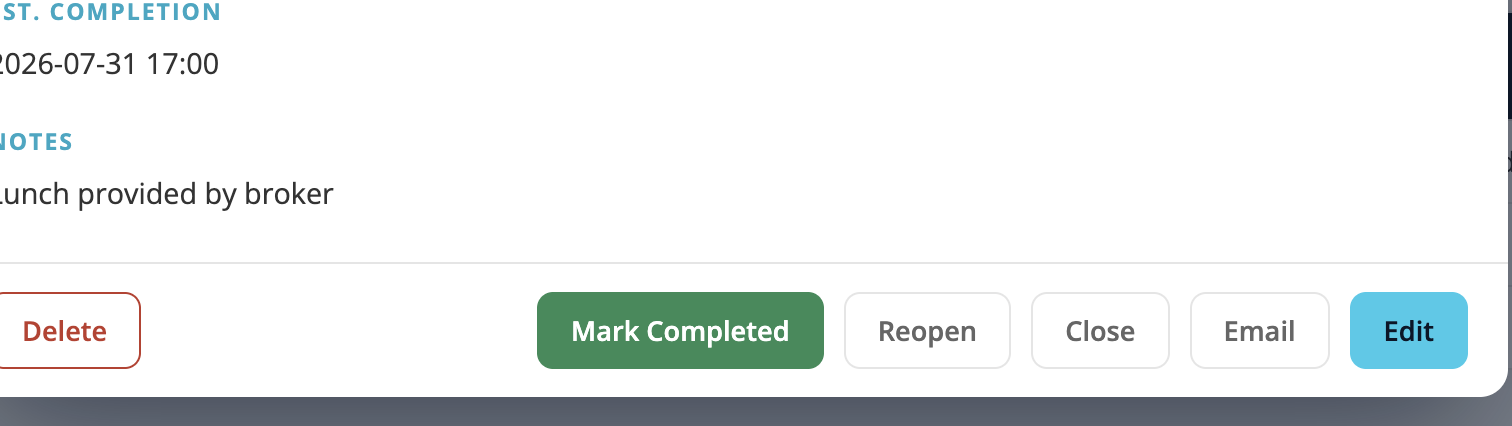
A survey moves New → Scheduled → Completed → Archived:
Marking a survey Completed opens the Rate the vendors dialog so you can rate everyone who worked on it in one pass (see the next section). You can reopen a survey from the Archived tab if plans change; the status is recomputed from the data (New or Scheduled) and it returns to the active list.
A survey whose date has passed but that has not been marked Completed is flagged Past Due and sorts toward the top of the Open list so it stands out. If a Past Due survey is left open 45 days past its date, the app auto-archives it, marks it "Past Due - Auto-Archived," and emails the owning broker a one-time notice. An auto-archived survey is not gone - you can reopen it from the Archived tab at any time.

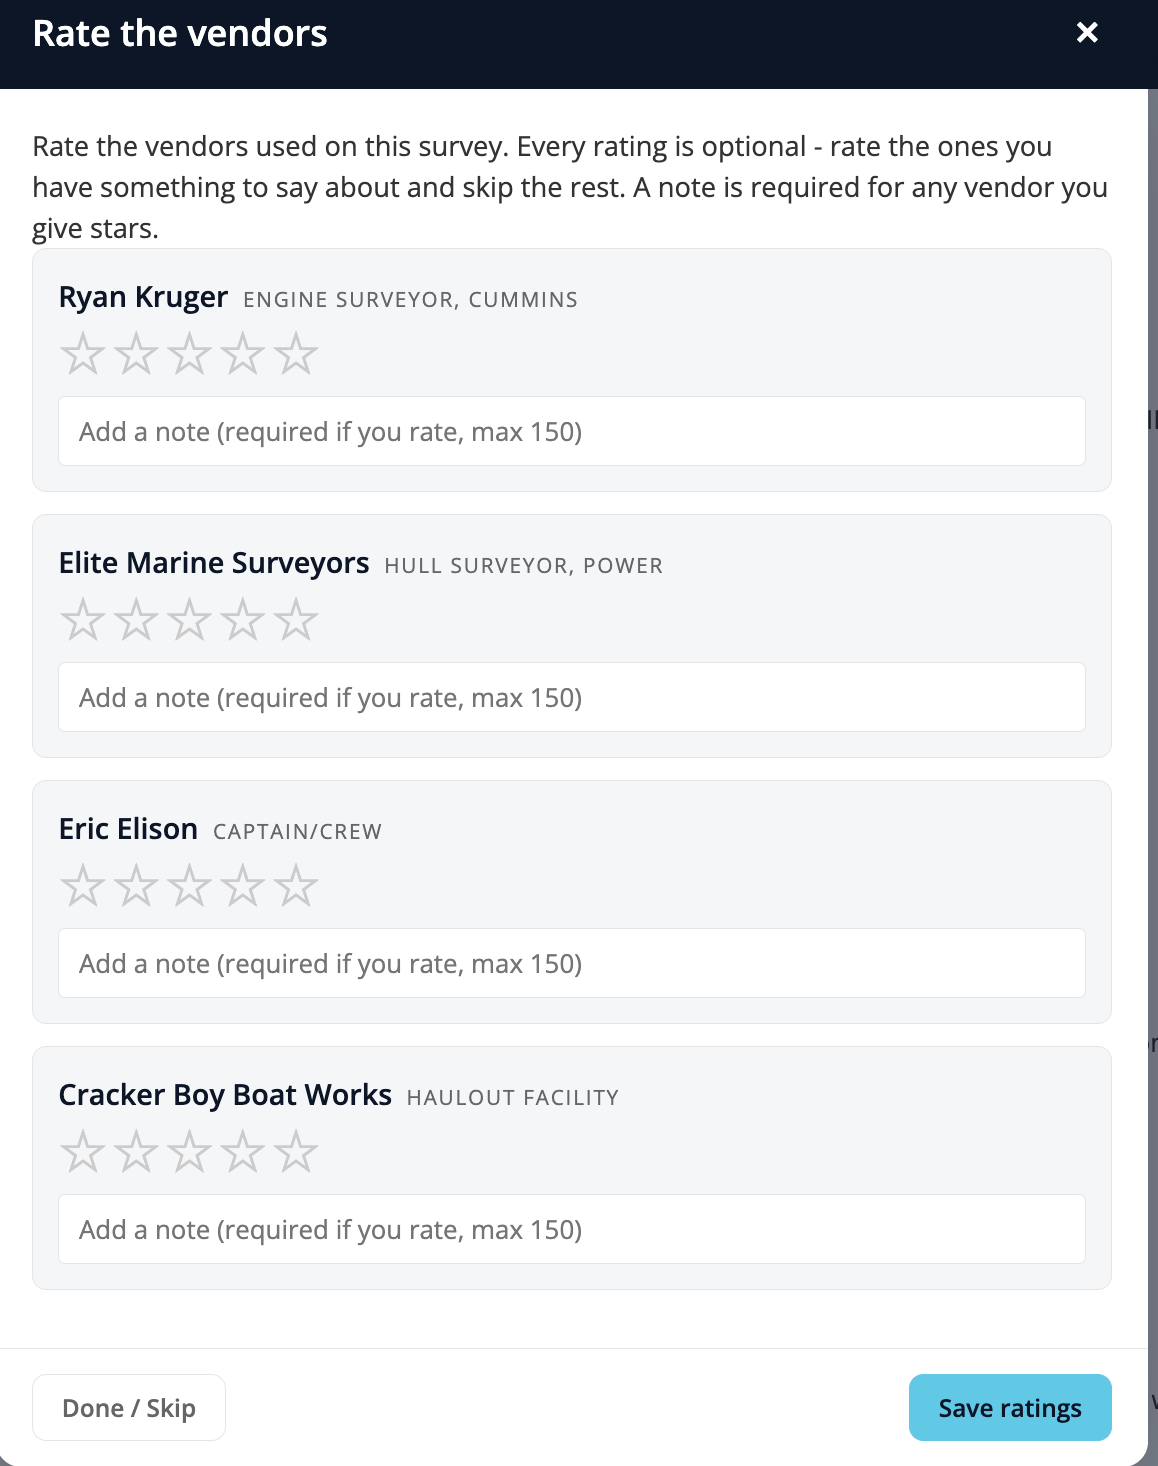
When you mark a survey Completed, a Rate the vendors dialog opens listing every vendor on the survey - the surveyor, captain, haulout facility, and anyone else - so you can rate them all at once. For each vendor, click the stars for a 1 to 5 rating and add a short note (the note is required on any vendor you give stars to). Leave a vendor's stars blank to skip it. Click Save and the ratings post to the shared vendor list, where the whole team sees them.
You do not have to do it at completion time. Every survey also has a Rate Vendors button that opens the same dialog, and it works even after the survey is completed or archived, so you can go back and rate the vendors whenever it is convenient.
Every survey belongs to the broker who created it. On the list:
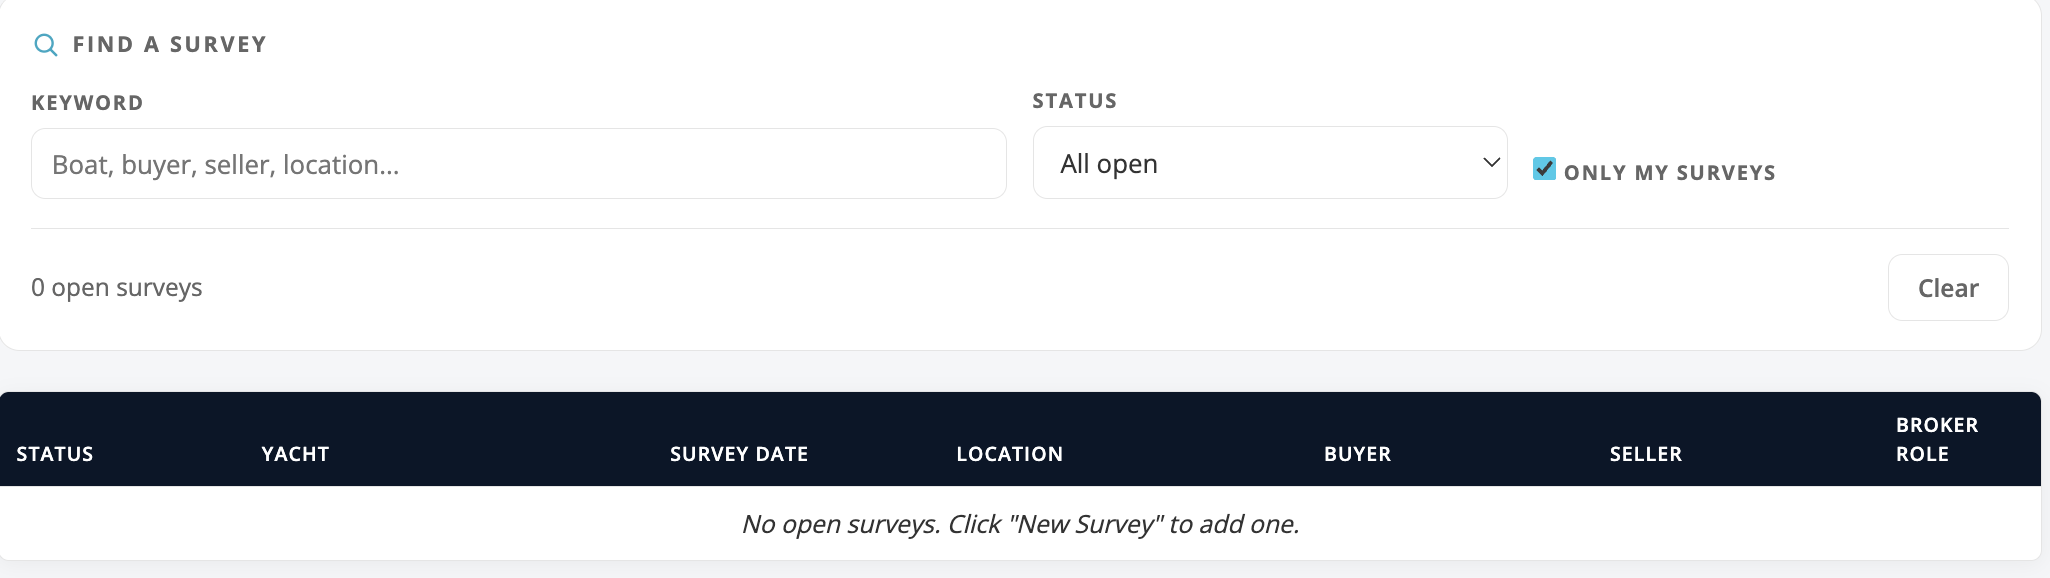
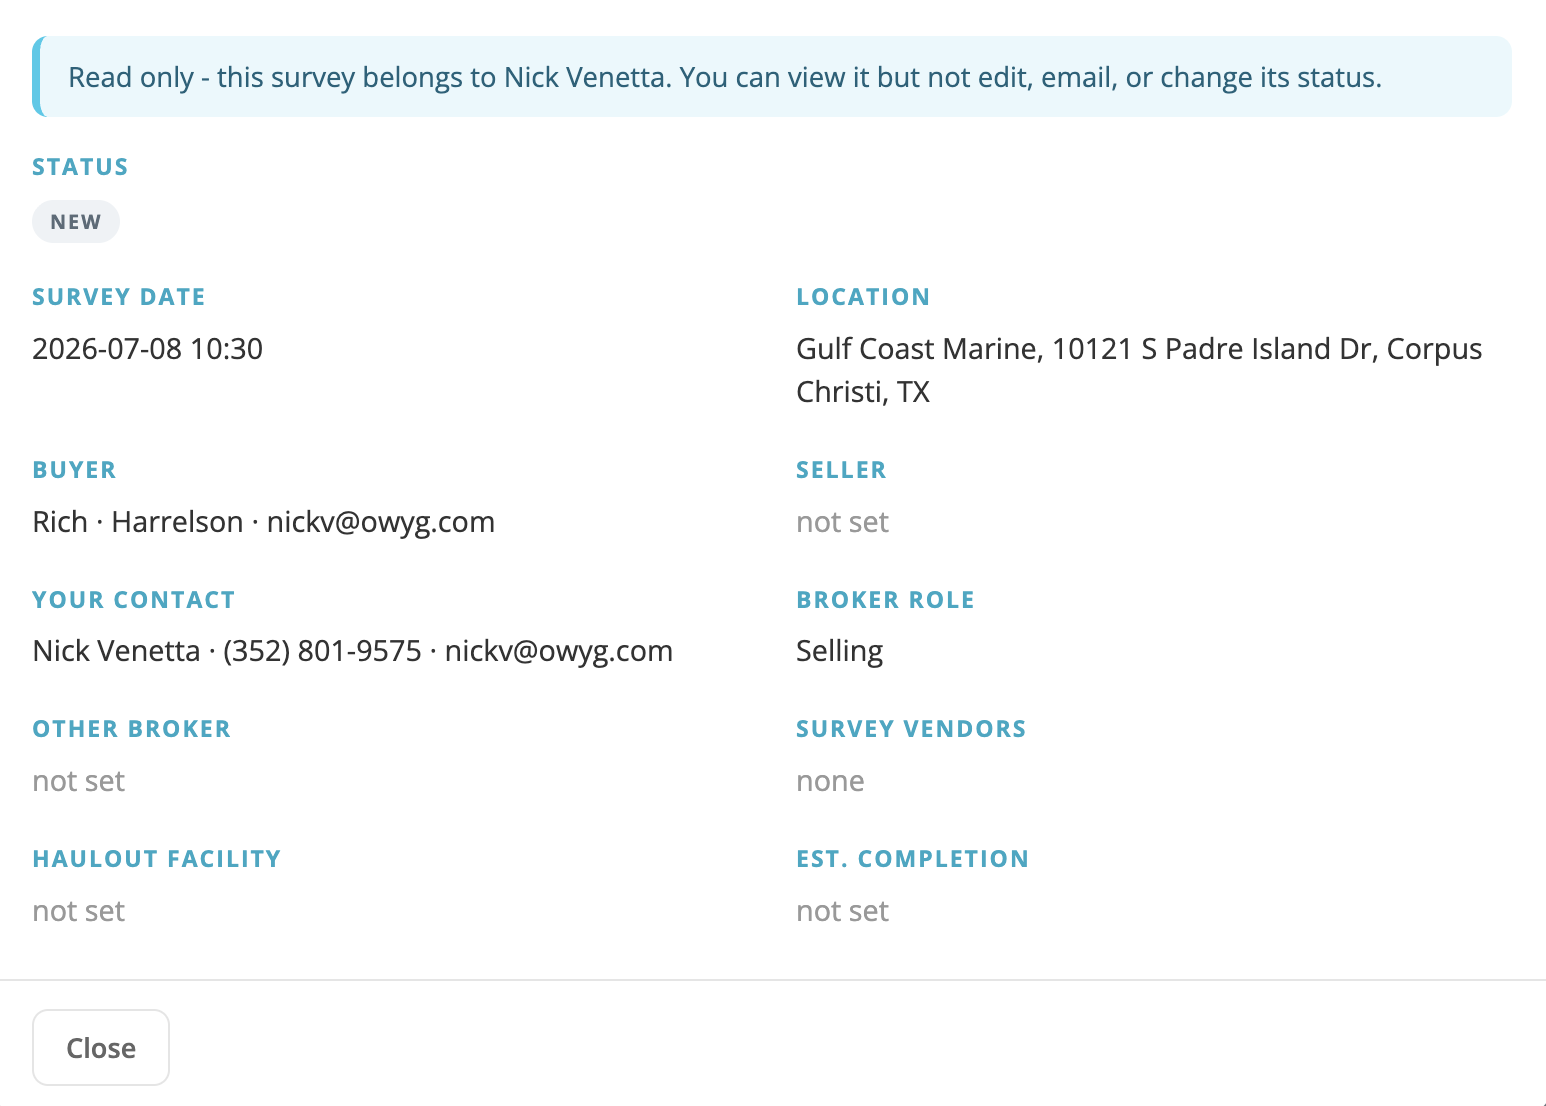
The app sends three automatic reminders around the survey date:
The 1 day before reminder goes to everyone on the survey, vendors included, whether or not you ever pressed Email yourself - with one exception: if you emailed the details yourself within the 24 hours before it would go out, the app skips it rather than send everyone the same message twice. Send the details two days out and the reminder still goes. The send screen tells you which of the two is about to happen. Every one of these sends is listed in the survey's Email block, marked "sent automatically", so you can always see what the app sent on your behalf; a reminder that was skipped is not listed, because nothing was sent.
If something is not working or you are locked out, contact your firm's administrator and they can help.