This is the public guide for Vendor Management. It mirrors the
in-app help. If something is not working, contact
support and we will do our best to get back to you quickly.
Vendor Management is the shared staff directory of surveyors, mechanics, and trade vendors. Everyone on the team uses the same shared list, so when one person adds a good surveyor or rates a mechanic, the whole group sees it. This guide walks through signing in, finding a vendor, adding and editing records, rating vendors, and pulling vendor info into a client email.
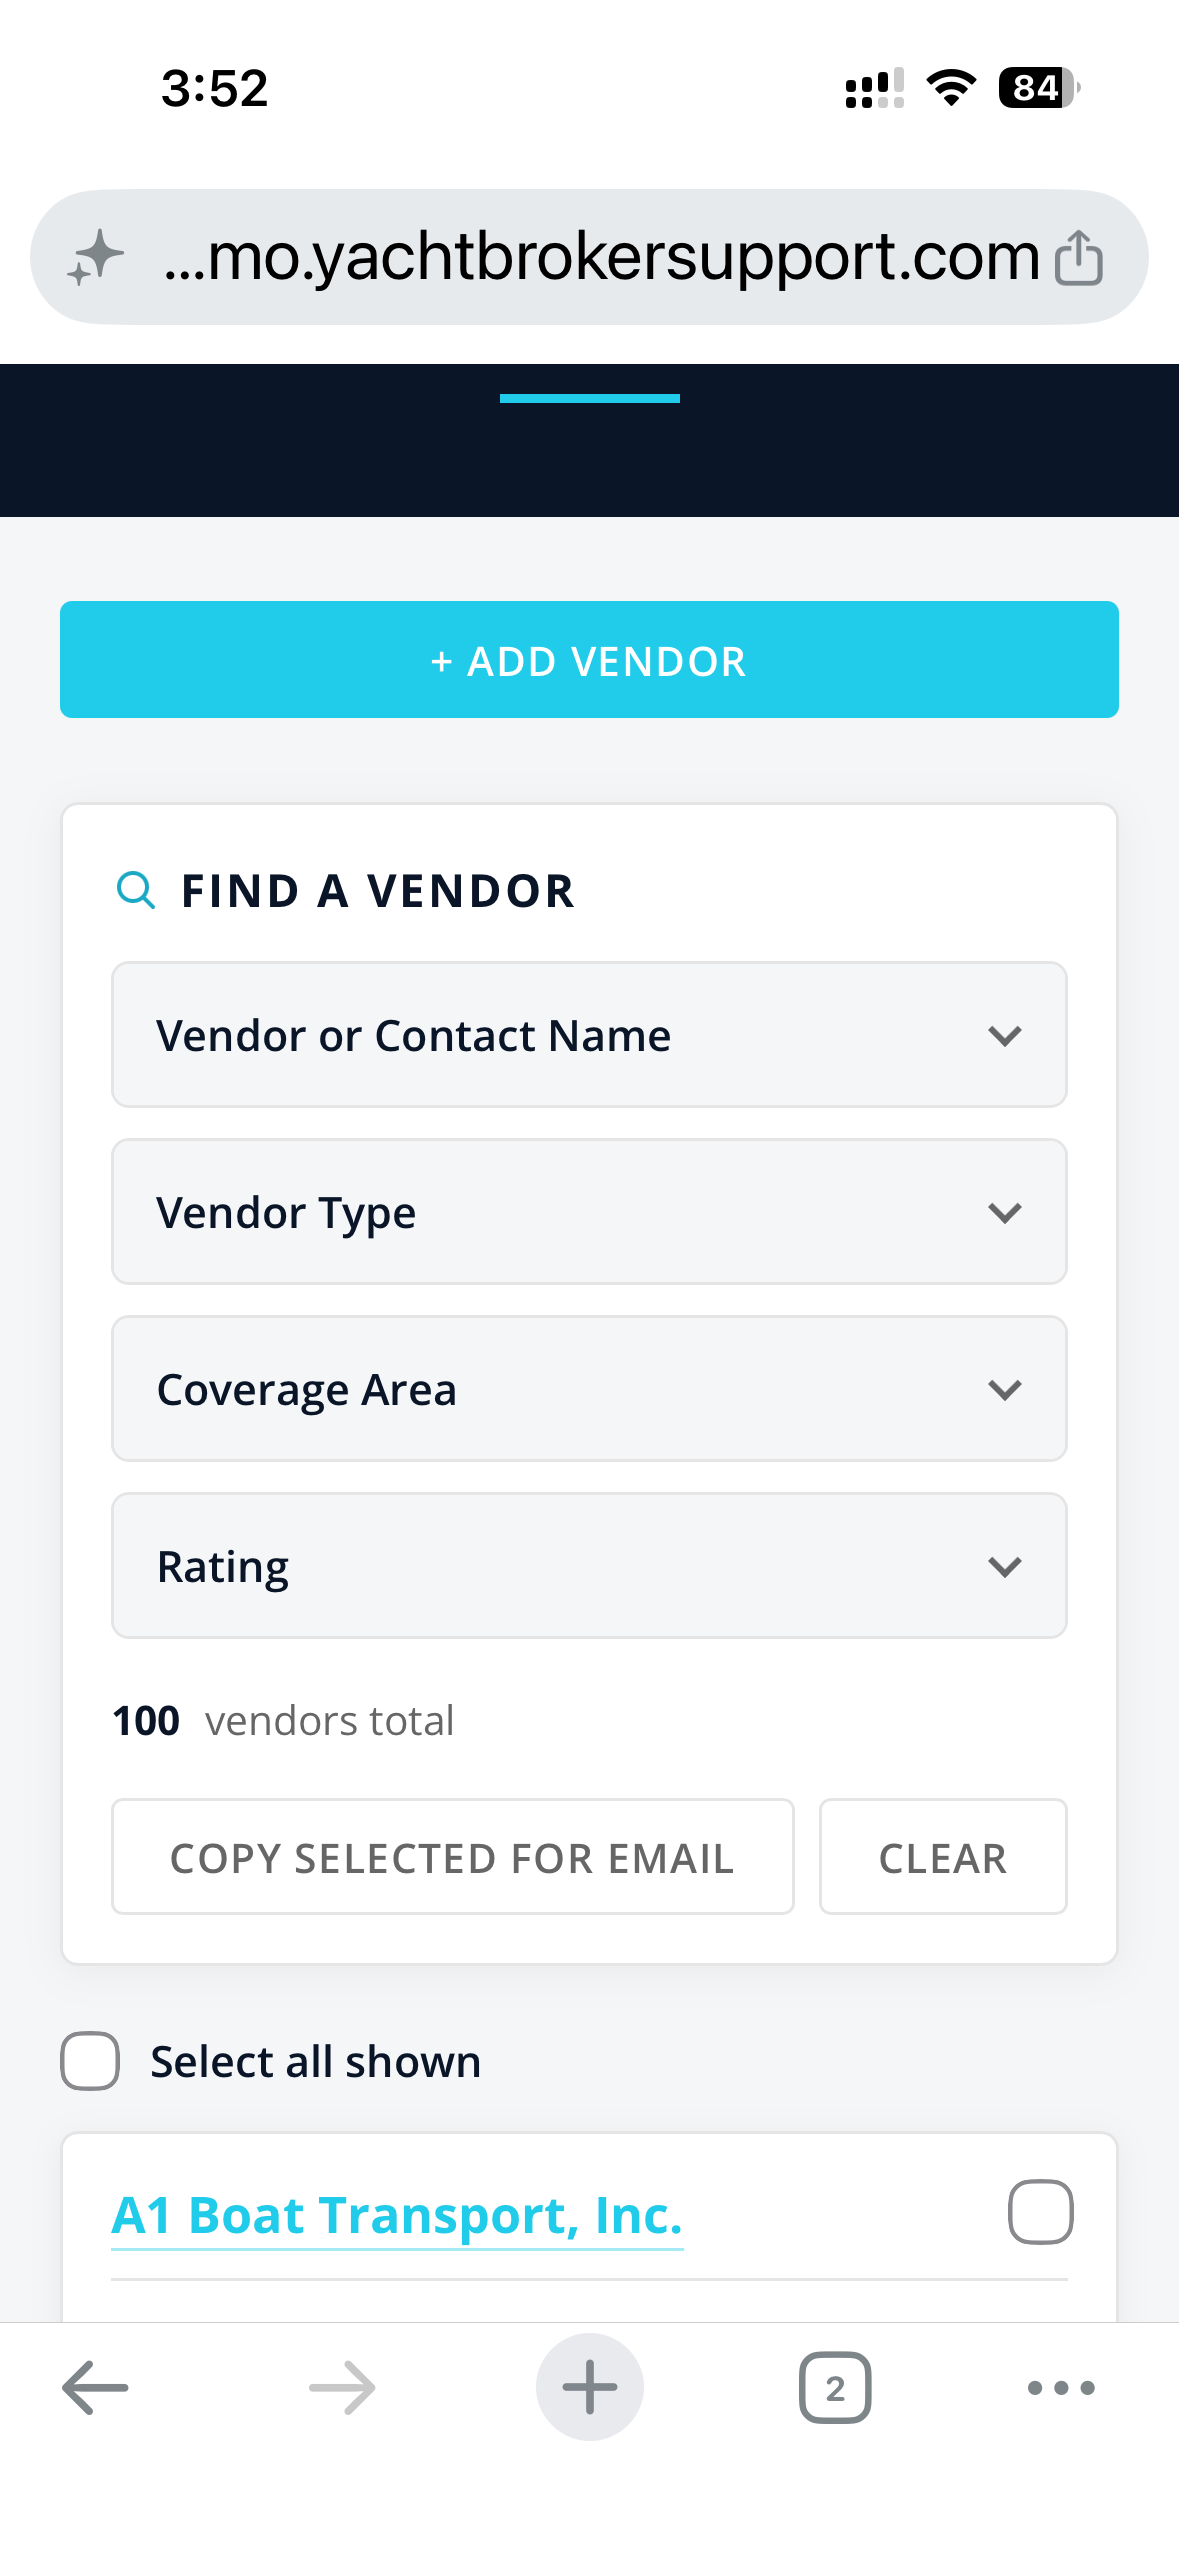
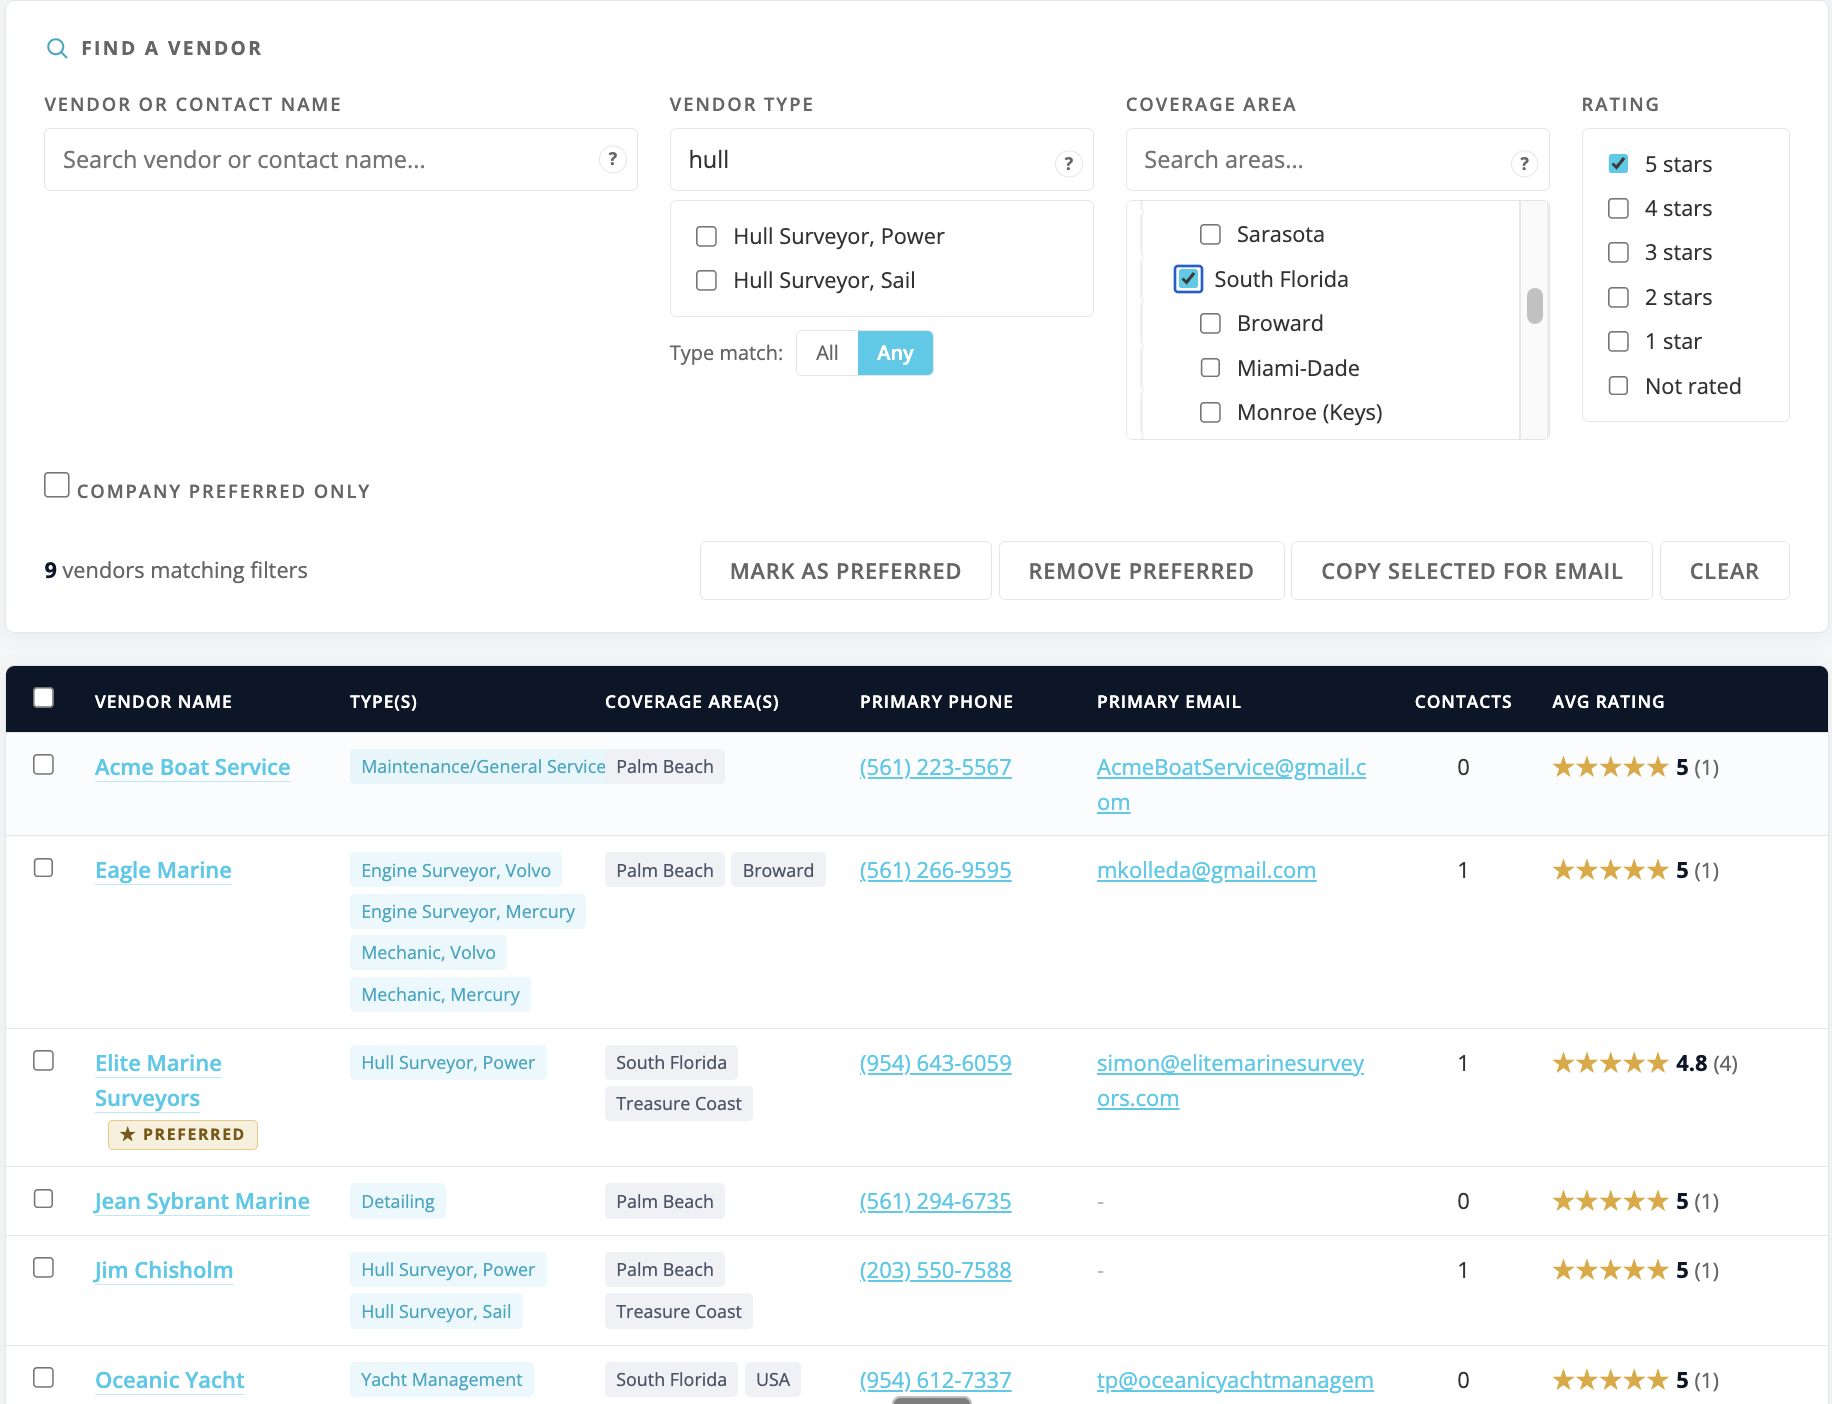
the Vendor Management main screen
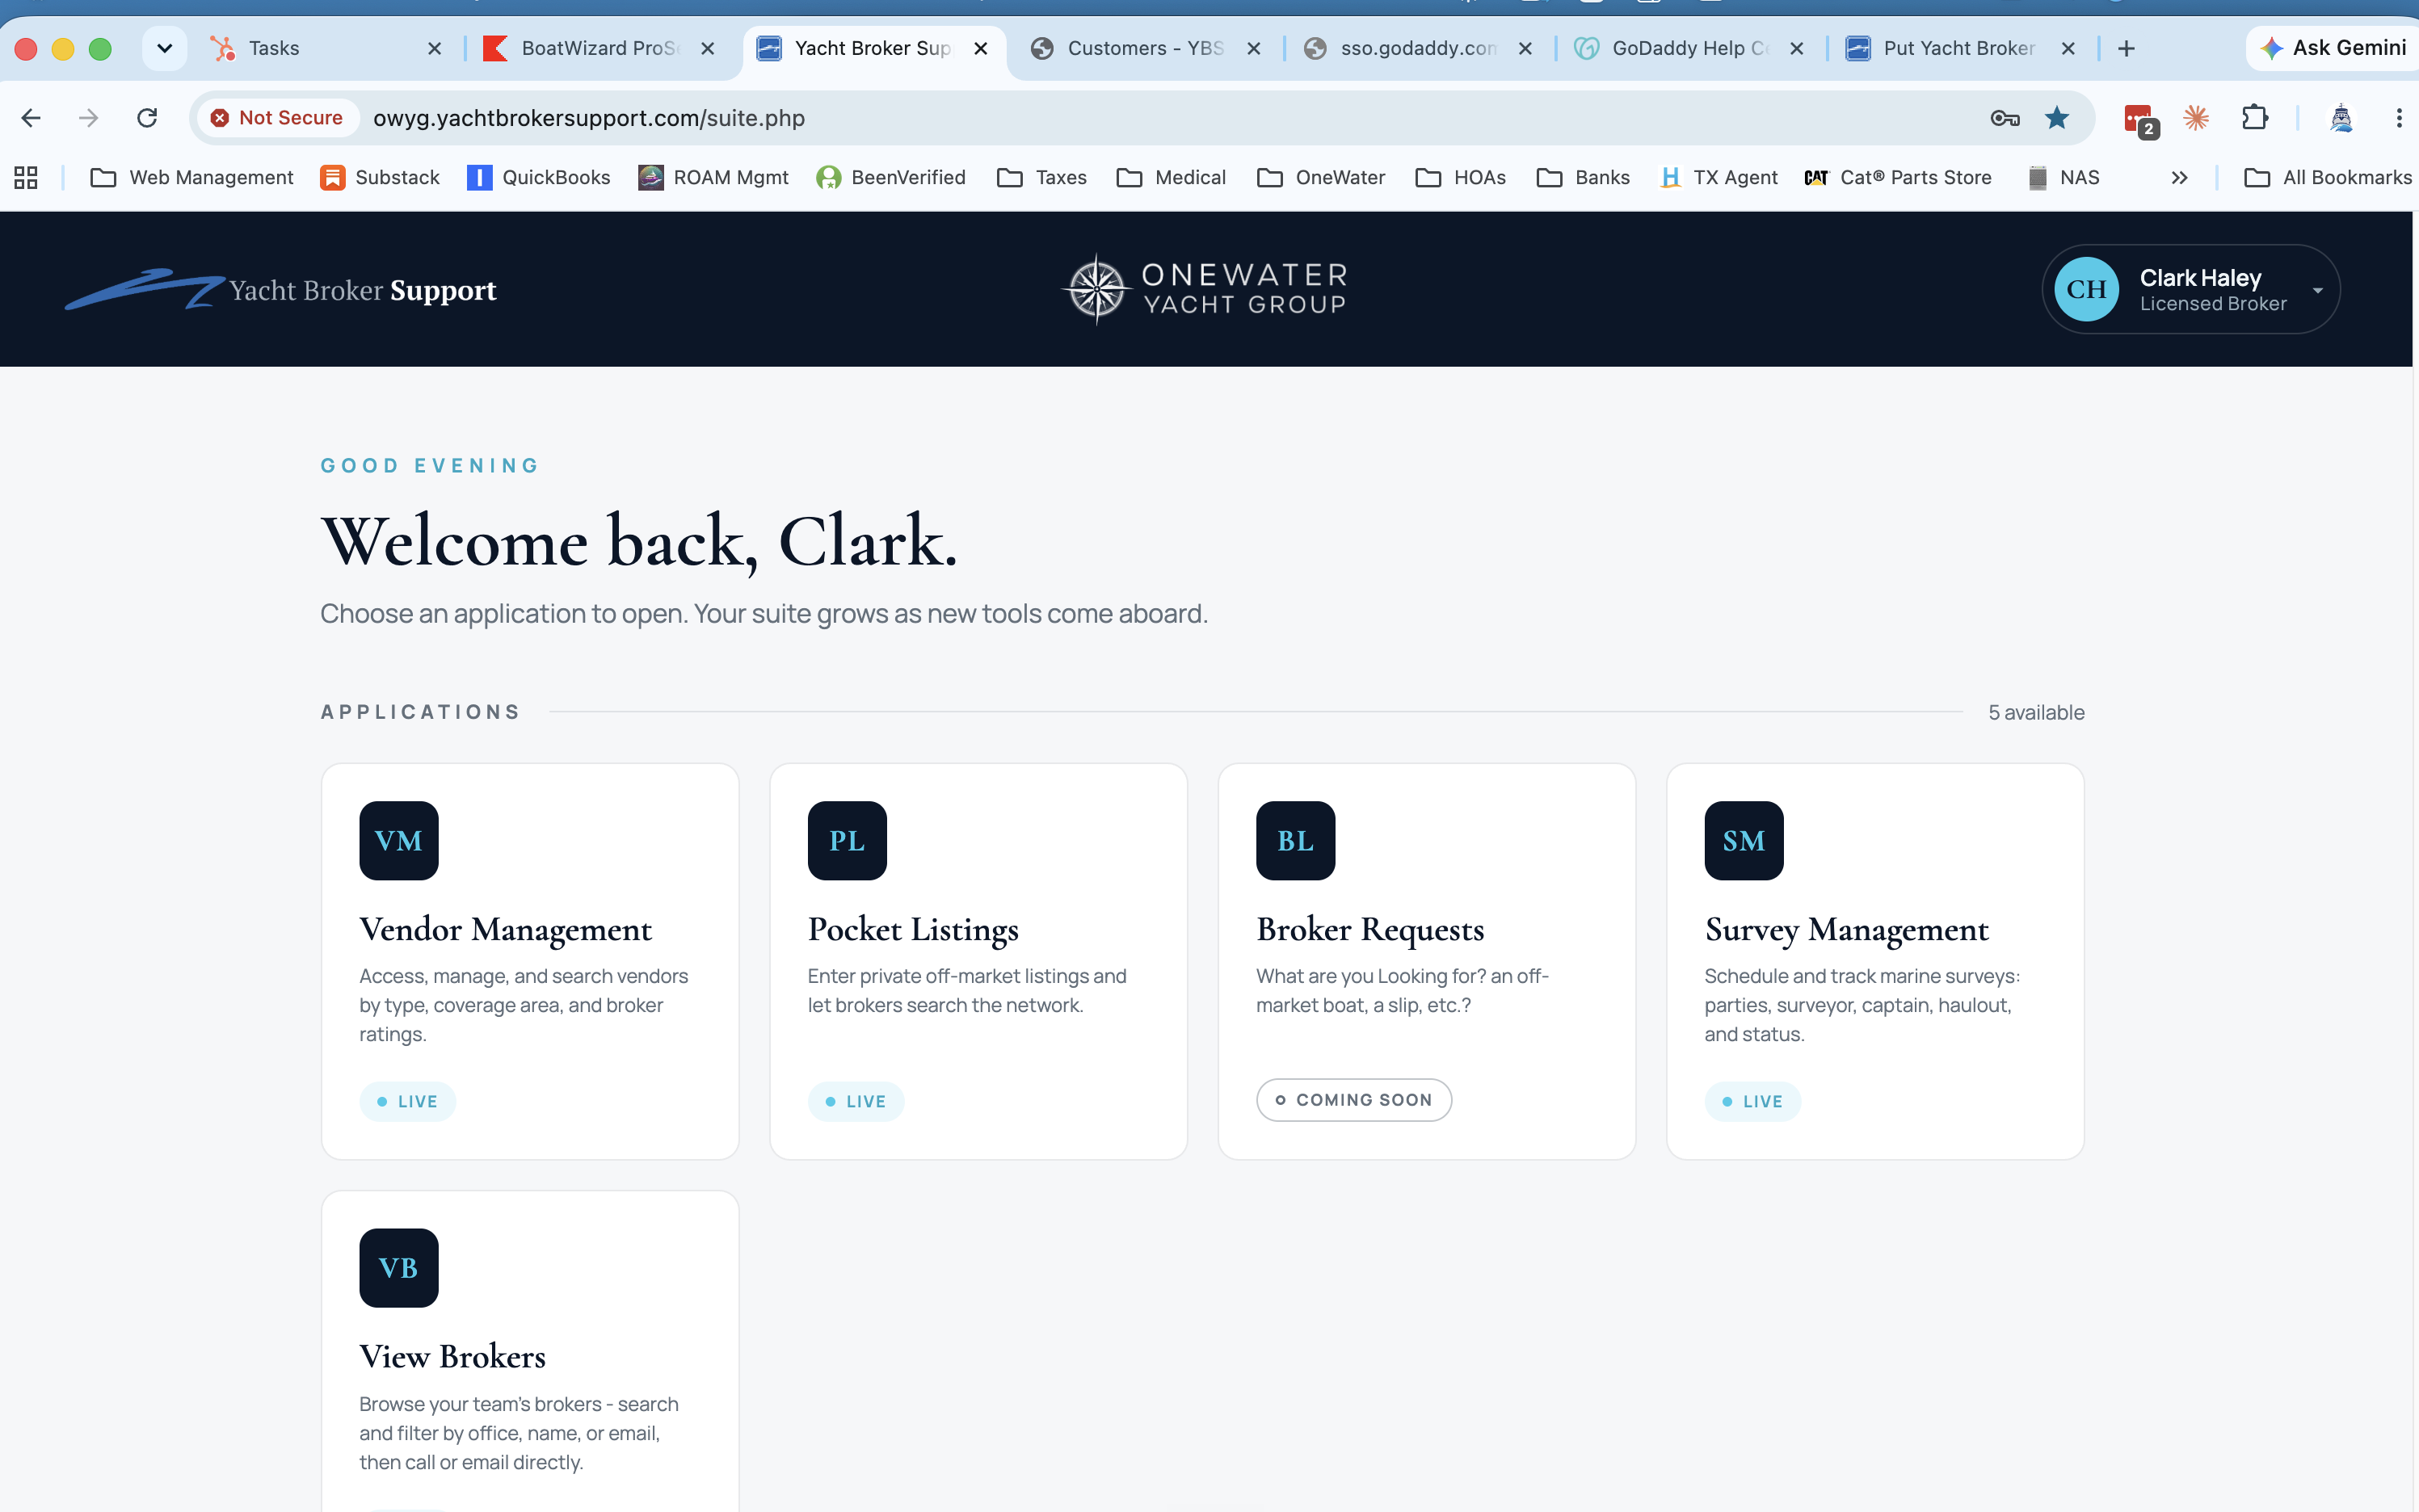
The launcher (app tiles)
After you sign in, the launcher shows the tools available to you as tiles. Depending on your access, you may see:
Vendor Management - the shared vendor list this guide covers.
Off Market Deals - the private, off-market listings board (see its own in-app Help).
Broker Requests - for posting what you are looking for, such as an off-market boat or a slip. (This tile was formerly labeled "Broker Looking For.")
View Brokers - your company's broker directory, always available (see below).
A tile marked Coming soon is shown but not yet clickable. The old Add Application tile has been removed.
the launcher with its app tiles, including Broker Requests and View Brokers
Getting in
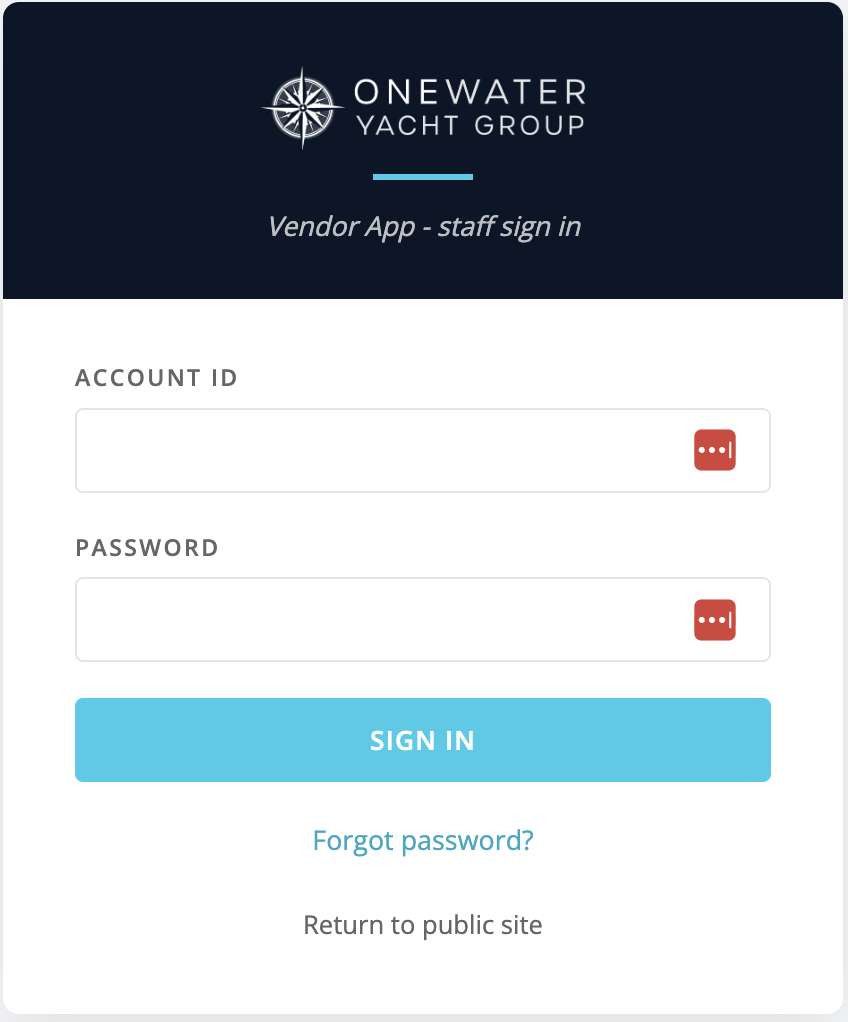
Signing in
Open the Vendor App. You will land on the sign-in screen.
Enter your Account ID. This is your work email address.
Enter your password.
Click Sign In.
the sign-in screen with Account ID and Password fields
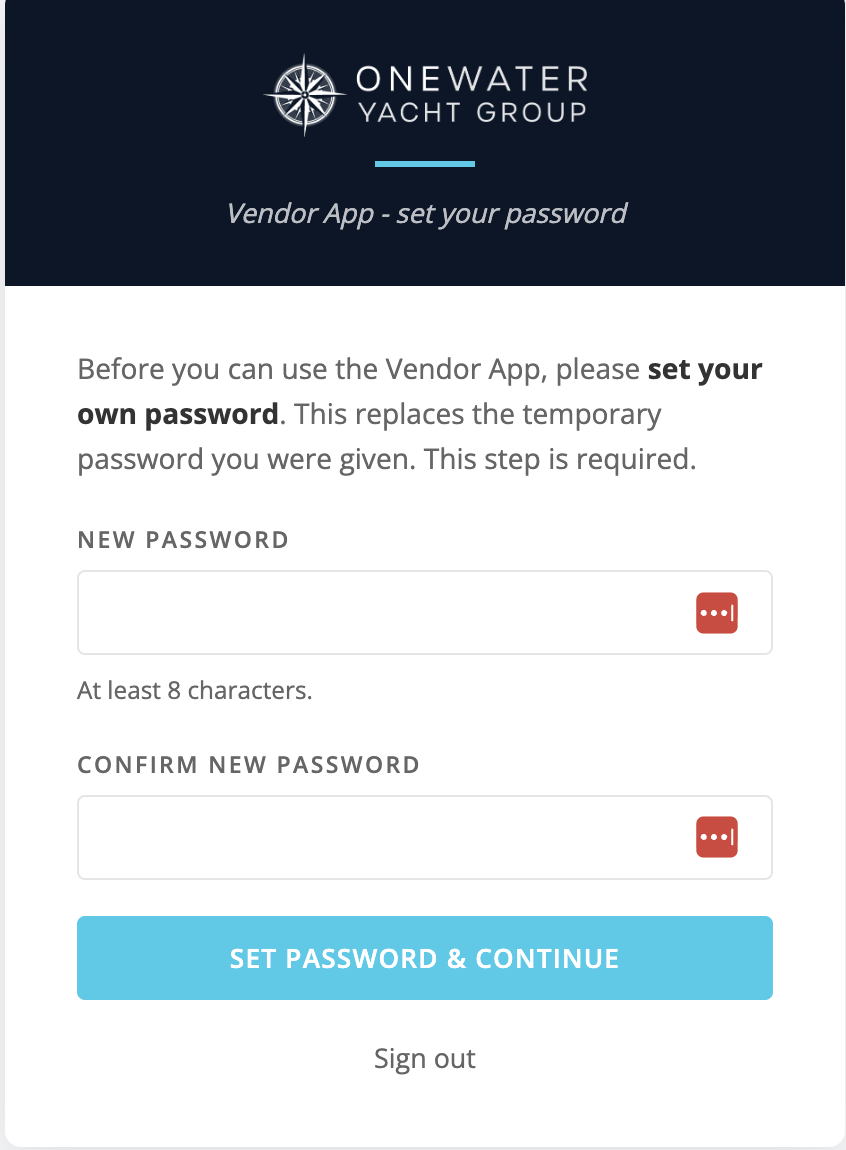
First-time sign-in (set your own password)
The very first time you sign in, you use the temporary password an administrator emailed you. The app then requires you to set your own password before you can go any further.
Sign in with your Account ID and the temporary password.
On the "Set Your Password" screen, type a new password (at least 8 characters), then type it again to confirm.
Click Set Password & Continue. You go straight into the app.
This same step happens again if an administrator ever resets your password for you. There is no way around it except to sign out, so plan to set a password you will remember.
the "Set Your Password" screen
Signing out
Click Log out in the top-right corner whenever you are done. This ends your session right away.
The 2-hour inactivity timeout
For security, the app signs you out after 2 hours with no activity (no clicks, typing, or scrolling).
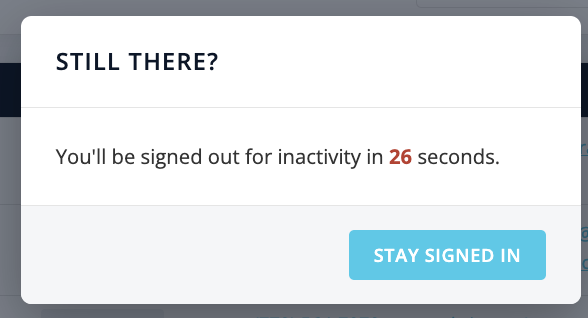
Shortly before the 2 hours are up, a "Still there?" box appears with a short countdown.
Click Stay signed in to keep working. The timer resets.
If you do nothing, the app signs you out and returns you to the sign-in screen at the end of the countdown.
As long as you are actively clicking and typing, you stay signed in.
the "Still there?" inactivity warning box
Forgot your password
If you cannot remember your password:
On the sign-in screen, click Forgot password?
Enter the email on your account.
Click Send Reset Link.
Check your email for a message from Yacht Broker Support with a reset link.
Click the link, set a new password (at least 8 characters, entered twice), and you are sent back to sign in.
The reset link expires in 1 hour. If it expires, just request a new one from the sign-in screen.
For privacy, the app always shows the same confirmation message whether or not the email is on file, so the screen will not tell you if you typed the wrong address. If no email arrives, double-check the address with an administrator.
Finding a vendor
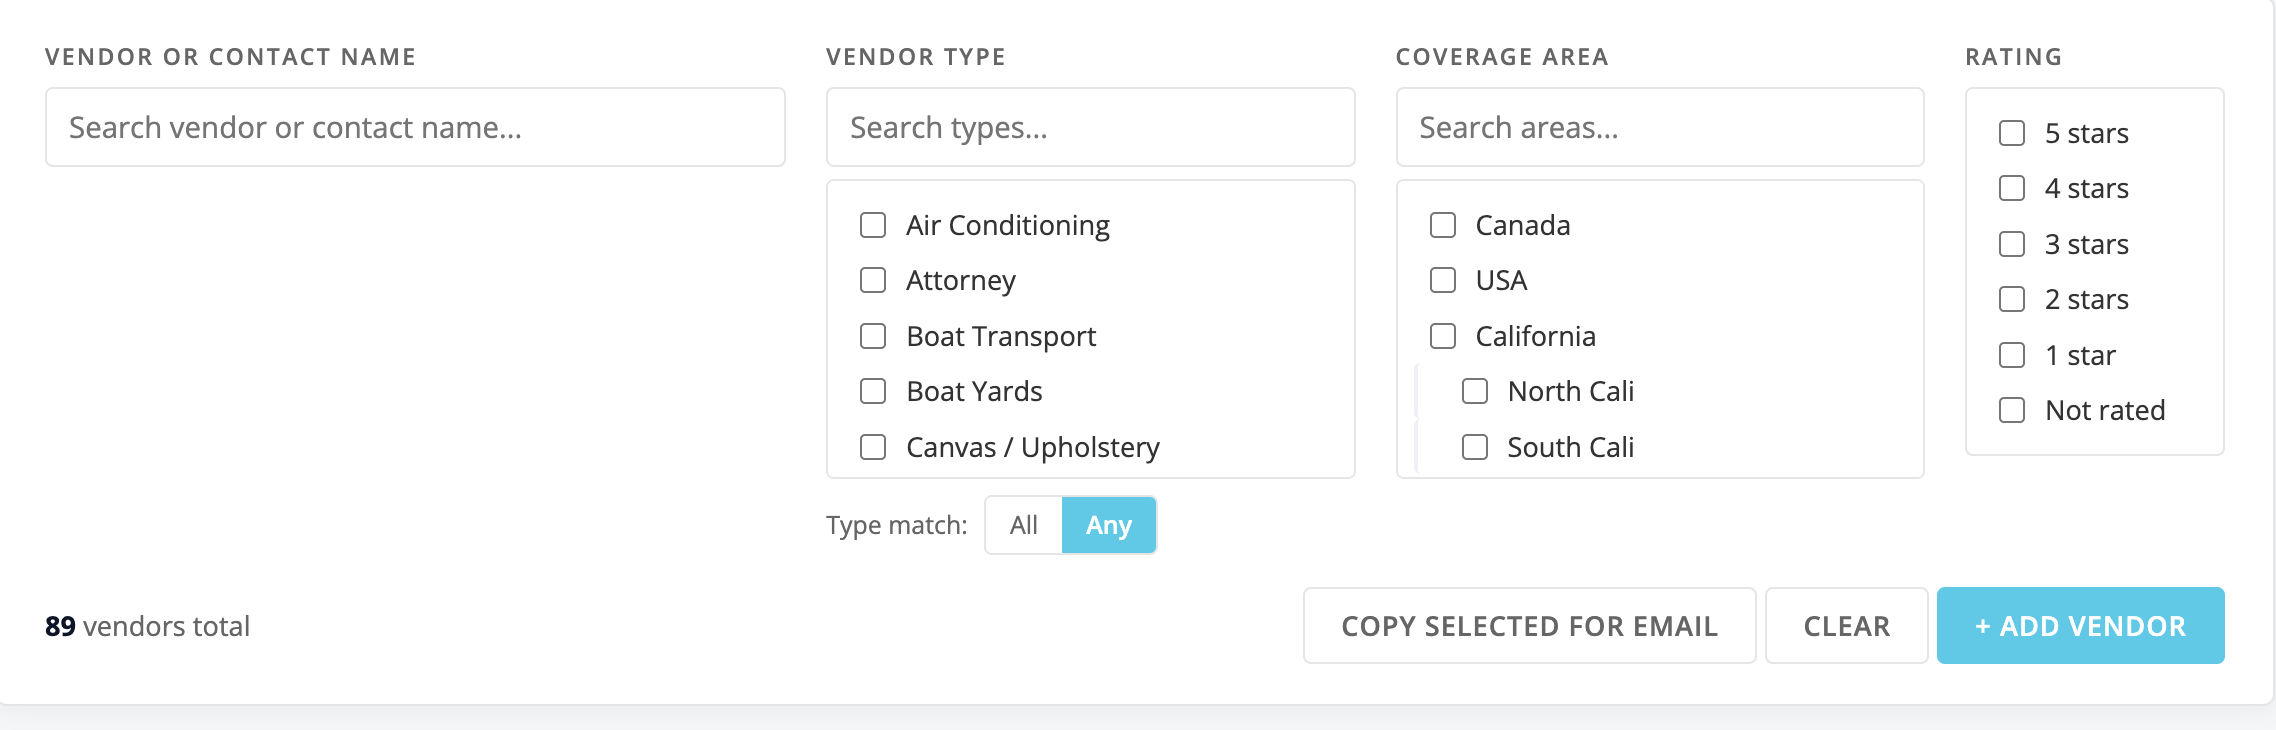
The top of the main screen is the search-and-filter bar. You can use one filter or stack several together. The result count under the bar updates as you go.
the search-and-filter bar with all four filters labeled
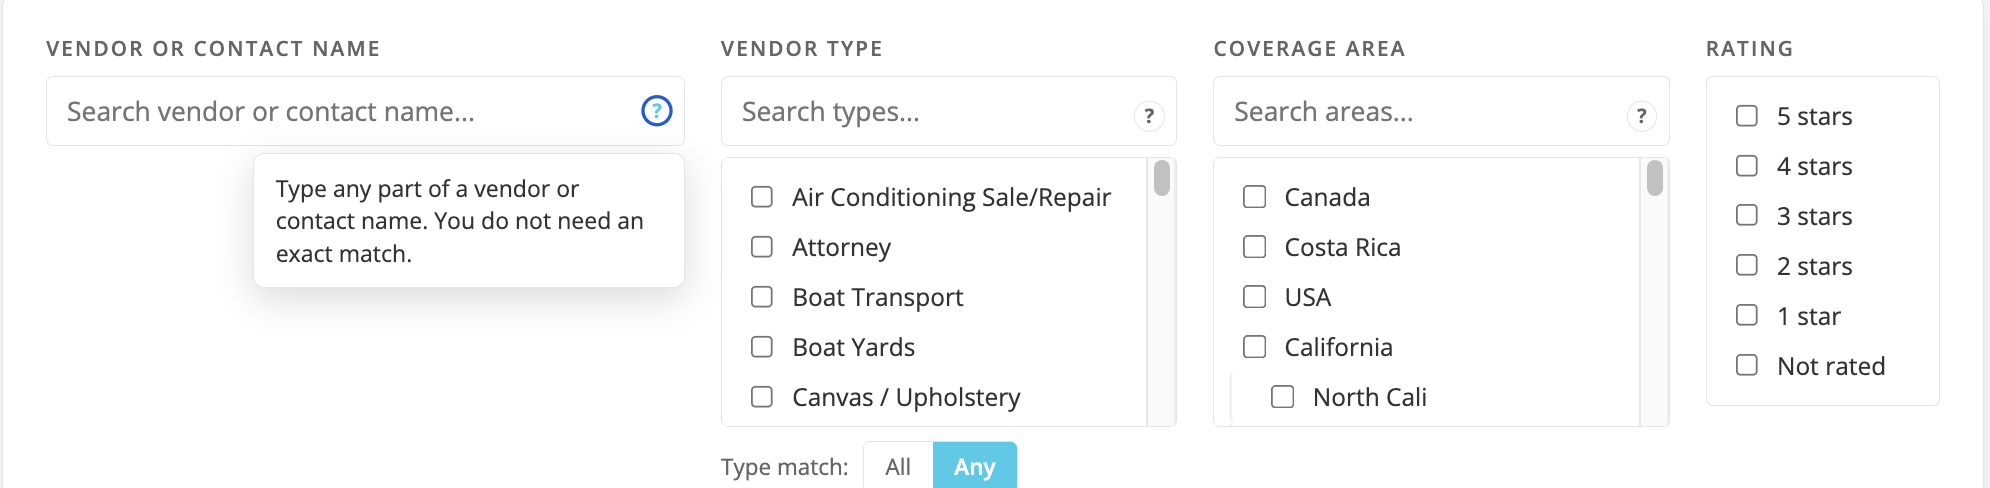
Wherever there is a search box, matching is partial: type any part of a name and it does not need to be an exact match. For example, typing repair in the type search finds every type that includes Repair. Each search box has a small ? in its corner. Click or tap it any time for a quick reminder of how it works, and click it again (or tap outside it) to close it.
the small ? on a search box, opened to show the partial-match reminder
Search by name
The Vendor or Contact Name box matches either the vendor's name or the name of one of its contacts. Type any part of the name and the list narrows as you type.
Filter by Vendor Type
Use the Search types... box to narrow the long list of types.
Check one or more types.
The Type match toggle controls how multiple types combine:
Any (the default): show vendors that have at least one of the checked types.
All: show only vendors that have every checked type.
Filter by Coverage Area
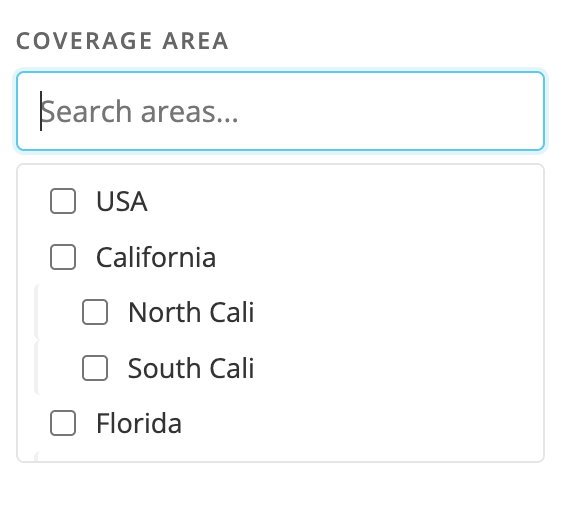
Coverage areas are organized in tiers, from broad to specific:
USA (Nationwide) at the top
State
Region
County
The list is indented to show this structure. Checking an area is smart about the tiers in both directions:
Pick a broad area (like a state) and you also get vendors tagged to areas inside it (its regions and counties).
Pick a specific area (like a county) and you also get vendors tagged to the broader areas that contain it (its region, state).
Any vendor tagged Nationwide shows up for any area you pick, since they cover everywhere.
So you rarely have to guess the exact tier. Pick the area you care about and the app fills in the rest.
the Coverage Area filter showing the indented USA / State / Region / County tiers
Filter by Rating
Check one or more rating buckets to narrow the list:
5 stars, 4 stars, 3 stars, 2 stars, 1 star
Not rated for vendors that have no ratings yet
A vendor lands in a bucket based on its average rounded to the nearest whole star.
Results, sorting, and clearing
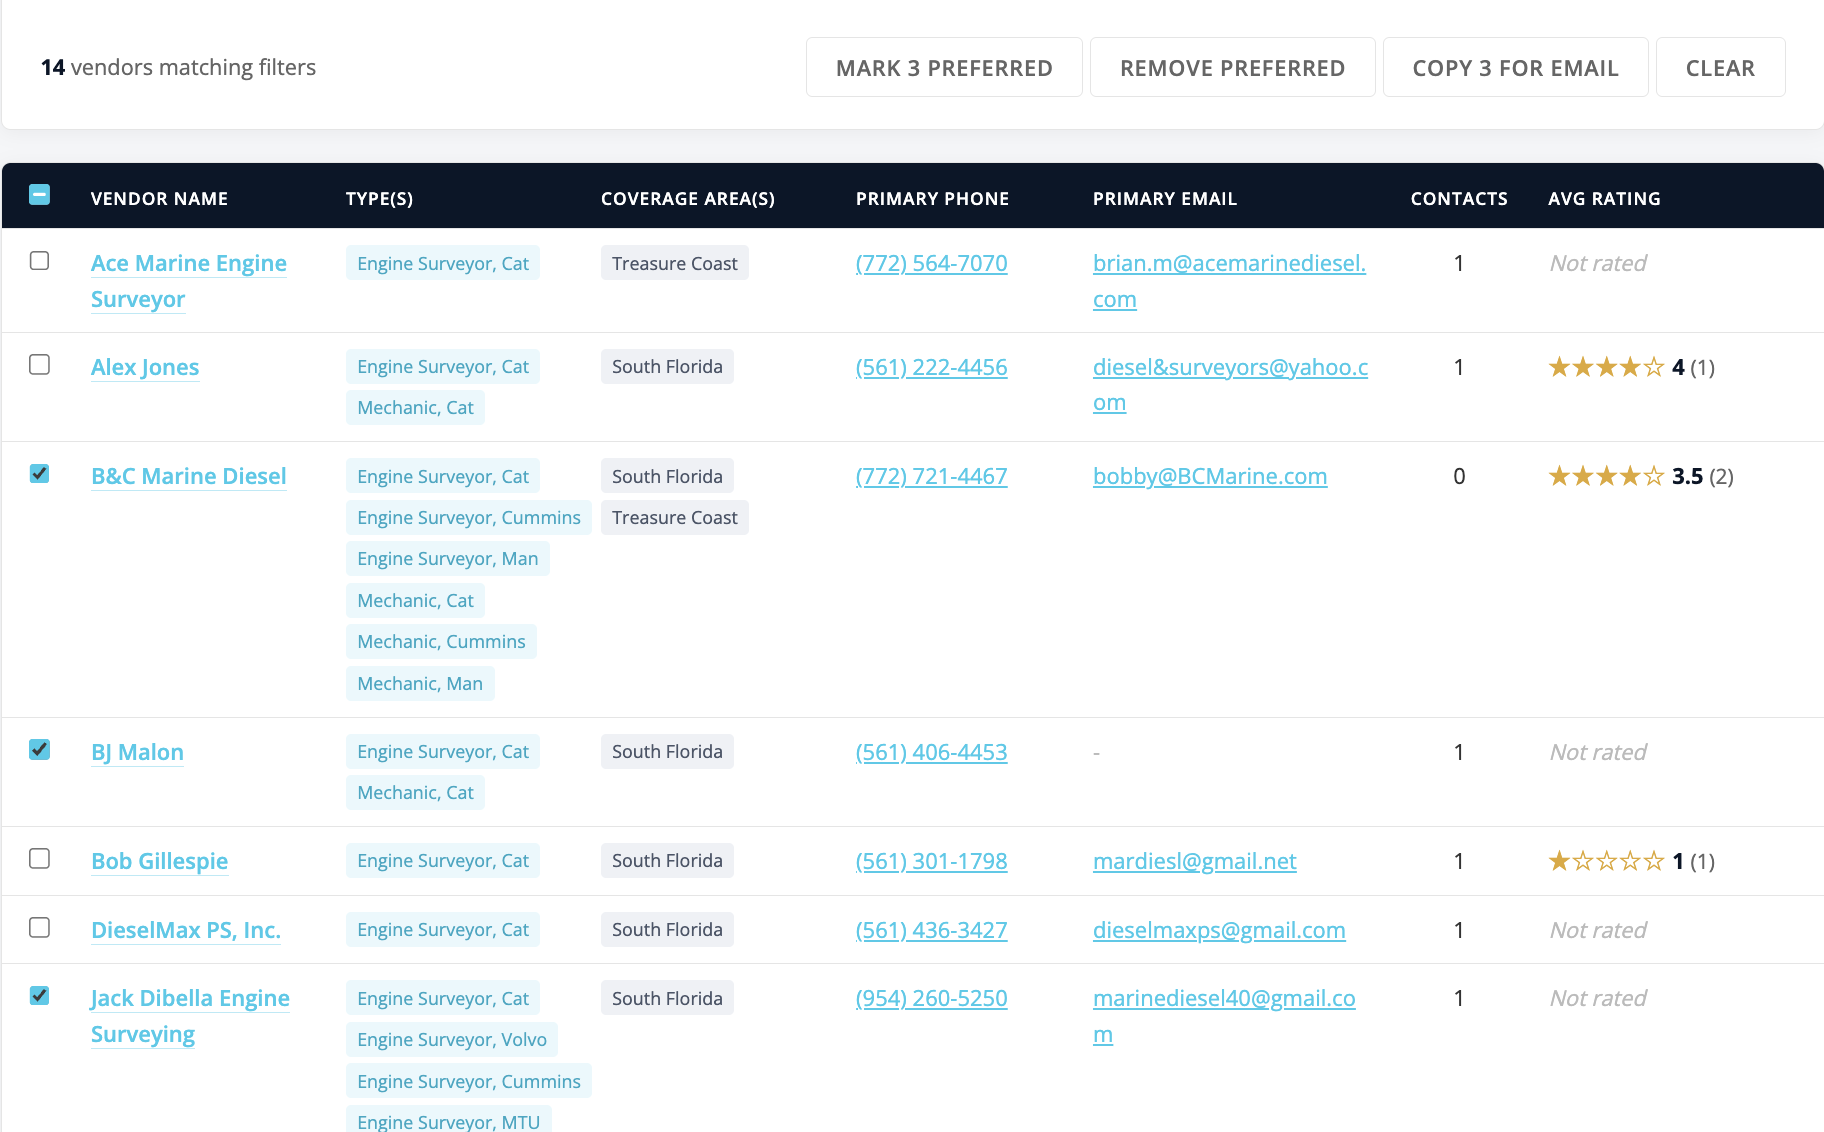
The result count above the table tells you how many vendors match.
Click any column header (Vendor Name, Type(s), Coverage Area(s), Primary Phone, Primary Email, Contacts, Avg Rating) to sort by it. Click the same header again to flip between ascending and descending. A small arrow shows the active sort.
Click Clear to reset every filter, the search boxes, and the sort, and start fresh.
Company Preferred vendors
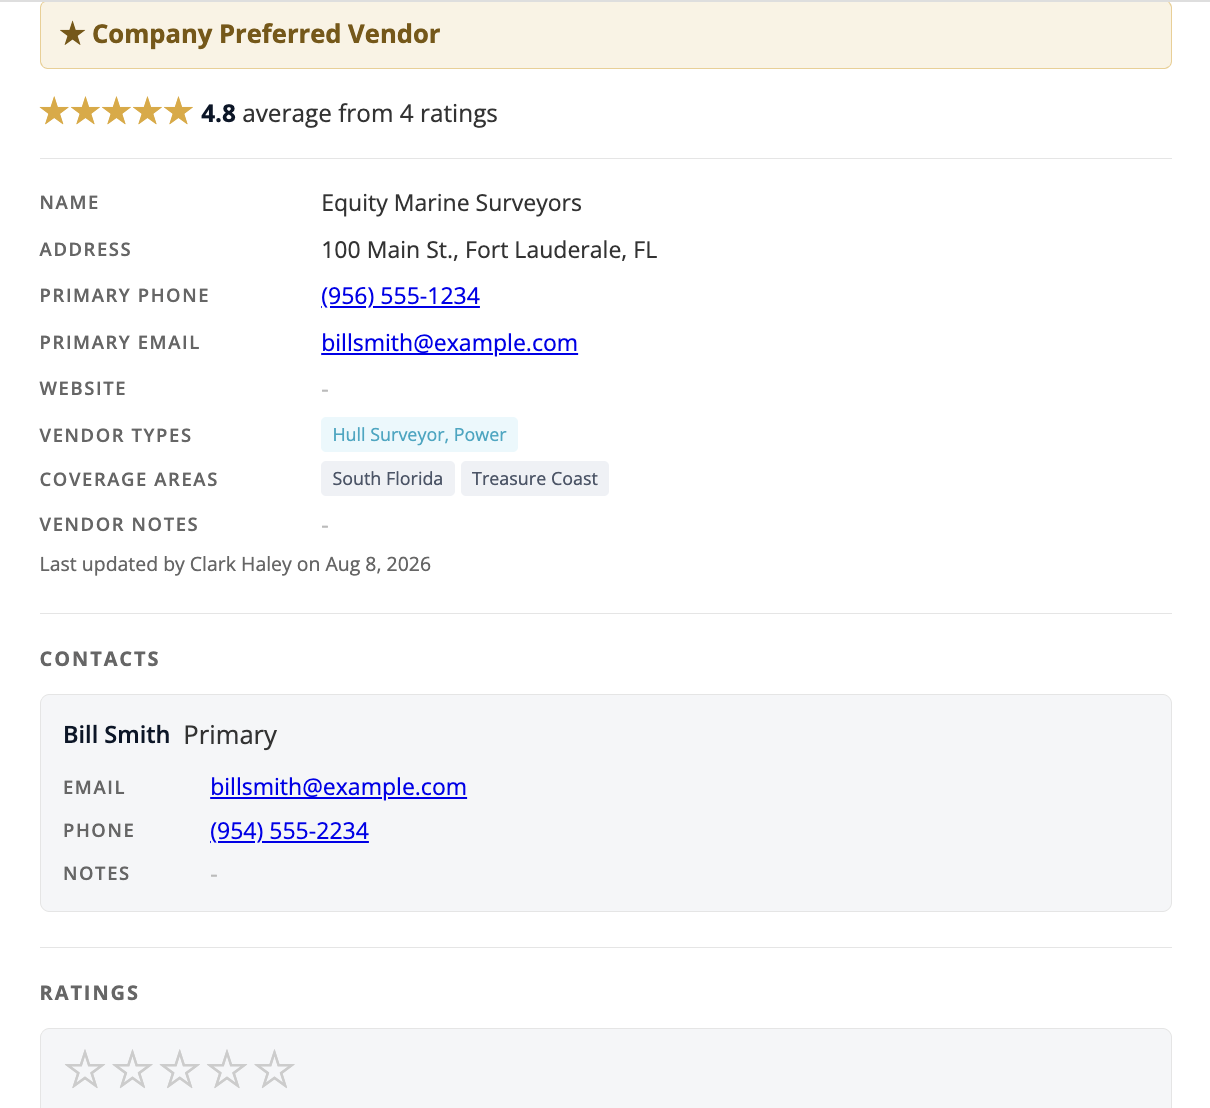
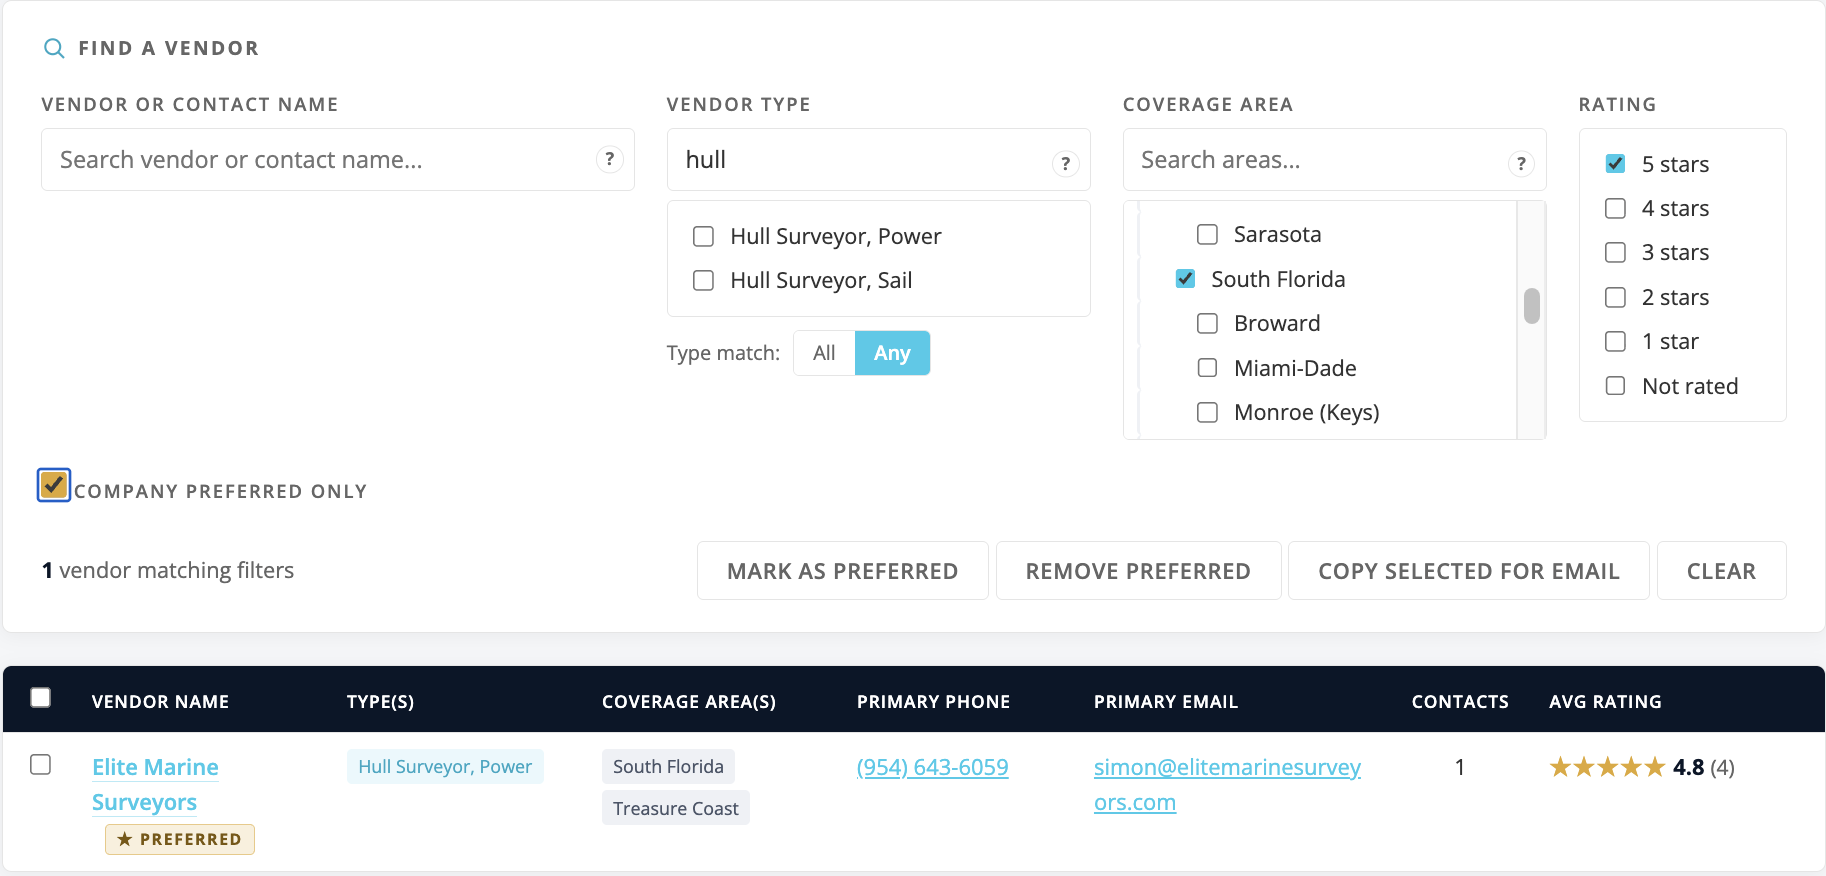
Your company can single out the vendors it recommends reaching for first by marking them as Company Preferred. A preferred vendor carries a gold Preferred badge next to its name in the list, so the ones your office trusts stand out while you scan, and a matching gold banner appears at the top of that vendor's own page.
The word on the badge is set by your company. If an administrator has renamed it under Settings, you will see that word - for example Recommended, Approved, or Gold - everywhere this guide says "Preferred."
a preferred vendor stands out with a gold badge next to its namethe matching gold banner at the top of a preferred vendor's own page
Showing only preferred vendors
In the filter box, tick Company Preferred only to narrow the list to just your company's preferred vendors. Untick it to see everyone again. It combines with the other filters, so you can show, for example, only preferred vendors of a certain type or in a certain coverage area.
the "Company Preferred only" checkbox in the filter box
Marking a vendor as preferred (admins only)
Choosing which vendors are preferred is an administrator action. There are two ways to do it:
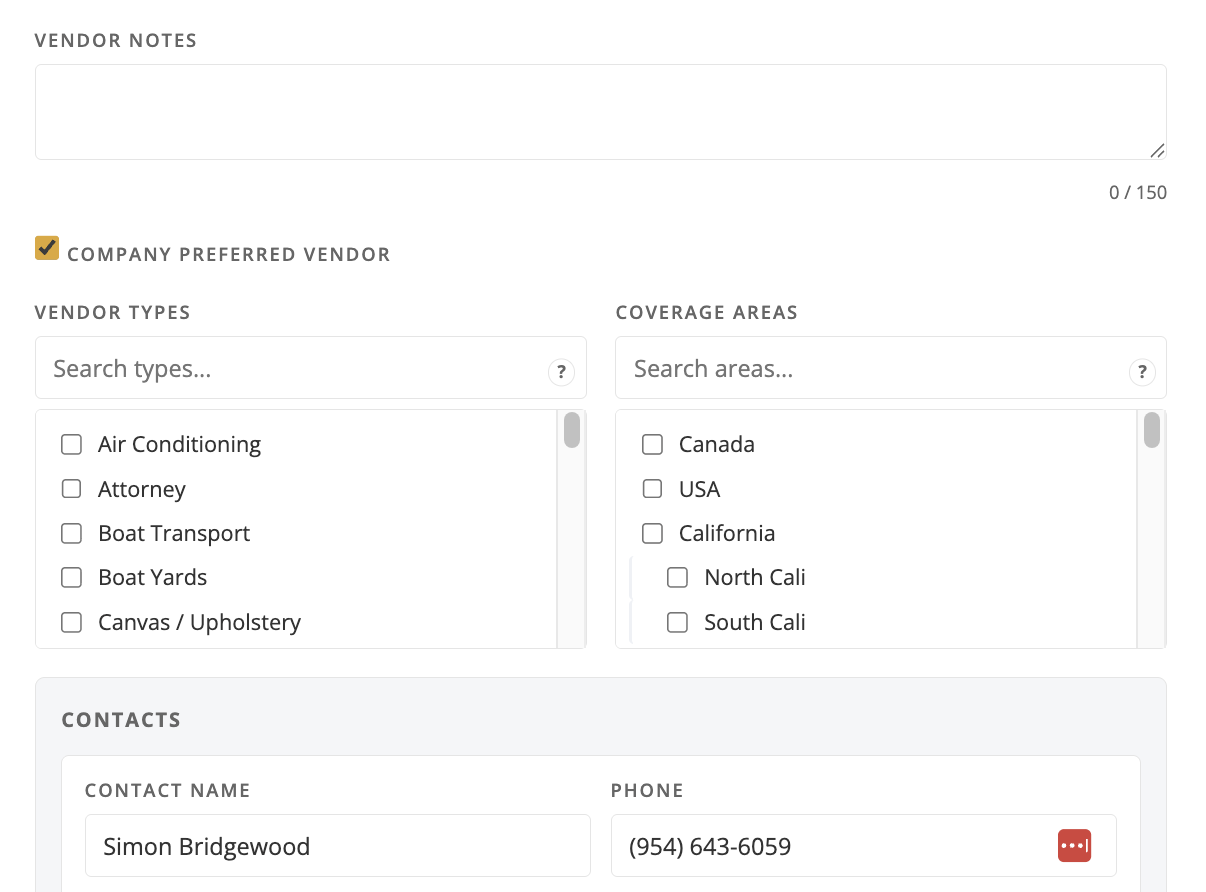
One at a time: open the vendor, click Edit Vendor, tick Company preferred vendor, and click Save.
A group at once: in the list, tick the checkbox at the left of each vendor you want, then click Mark as Preferred above the results. Use Remove Preferred the same way to take the badge off a group.
Regular brokers see the badge and can filter by it, but only administrators can add or remove it.
the "Company preferred vendor" checkbox on a vendor's edit form (admins only)check several vendors, then Mark as Preferred to flag them all at once (admins only)
On a phone
The app adjusts for small screens:
The header is slimmer, so more of the screen goes to your results.
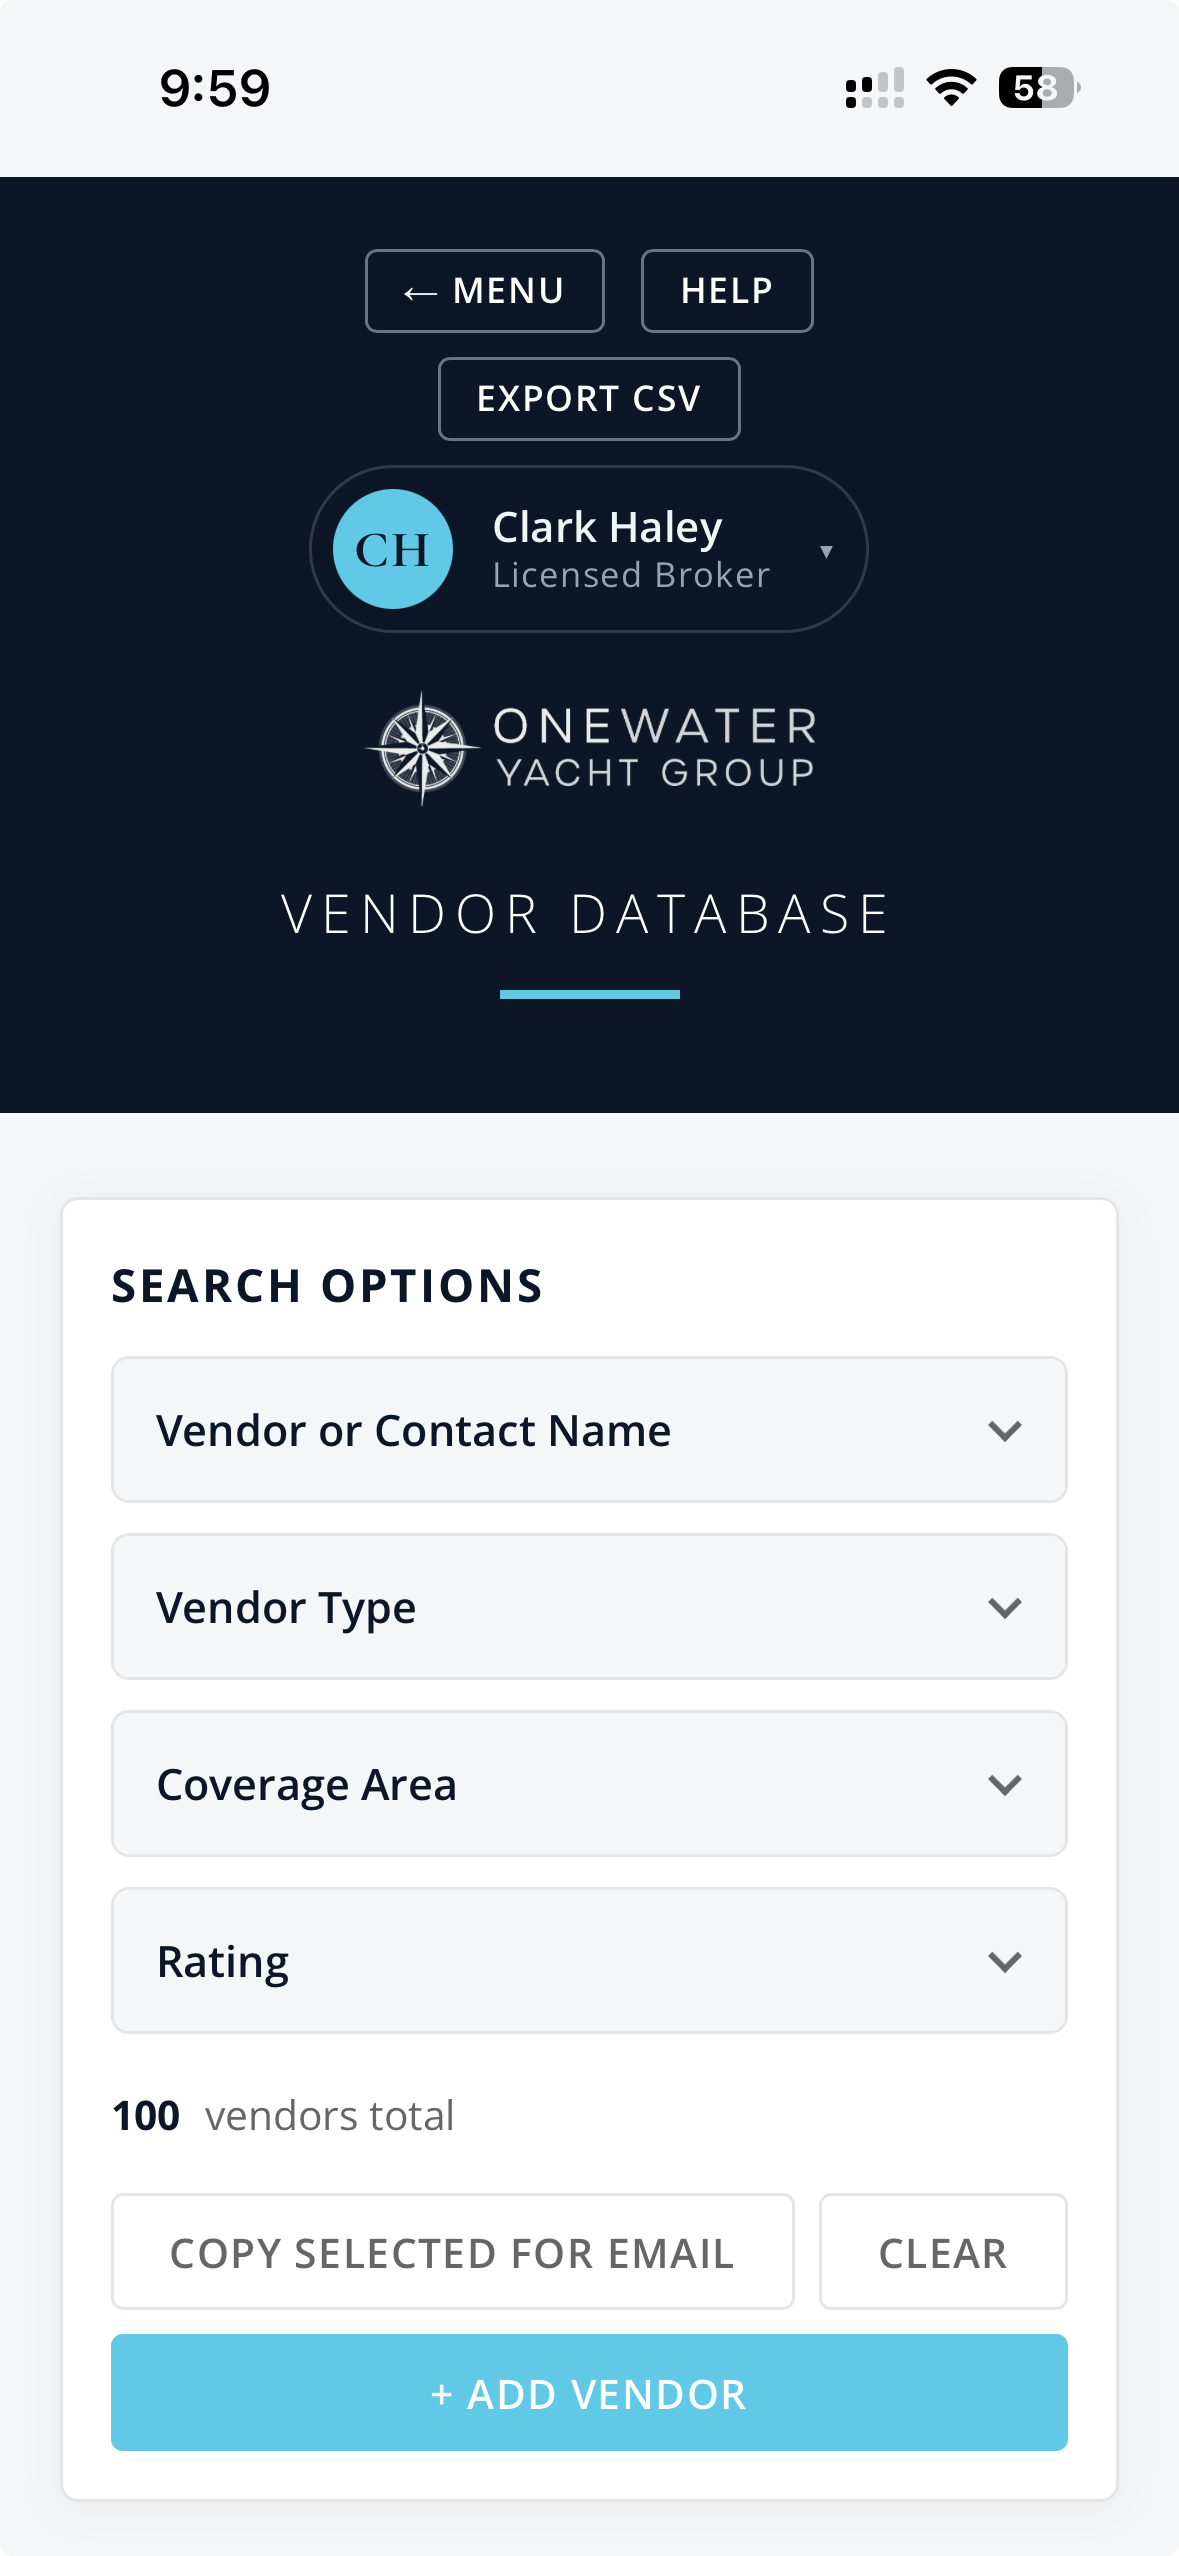
The filters collapse into a Search Options accordion to save room. Tap a category (Vendor Type, Coverage Area, Rating) to open it, set what you want, and tap again to collapse it. While a category is collapsed, a small badge shows that a filter is active inside it, so you always know a filter is on even when you cannot see it.
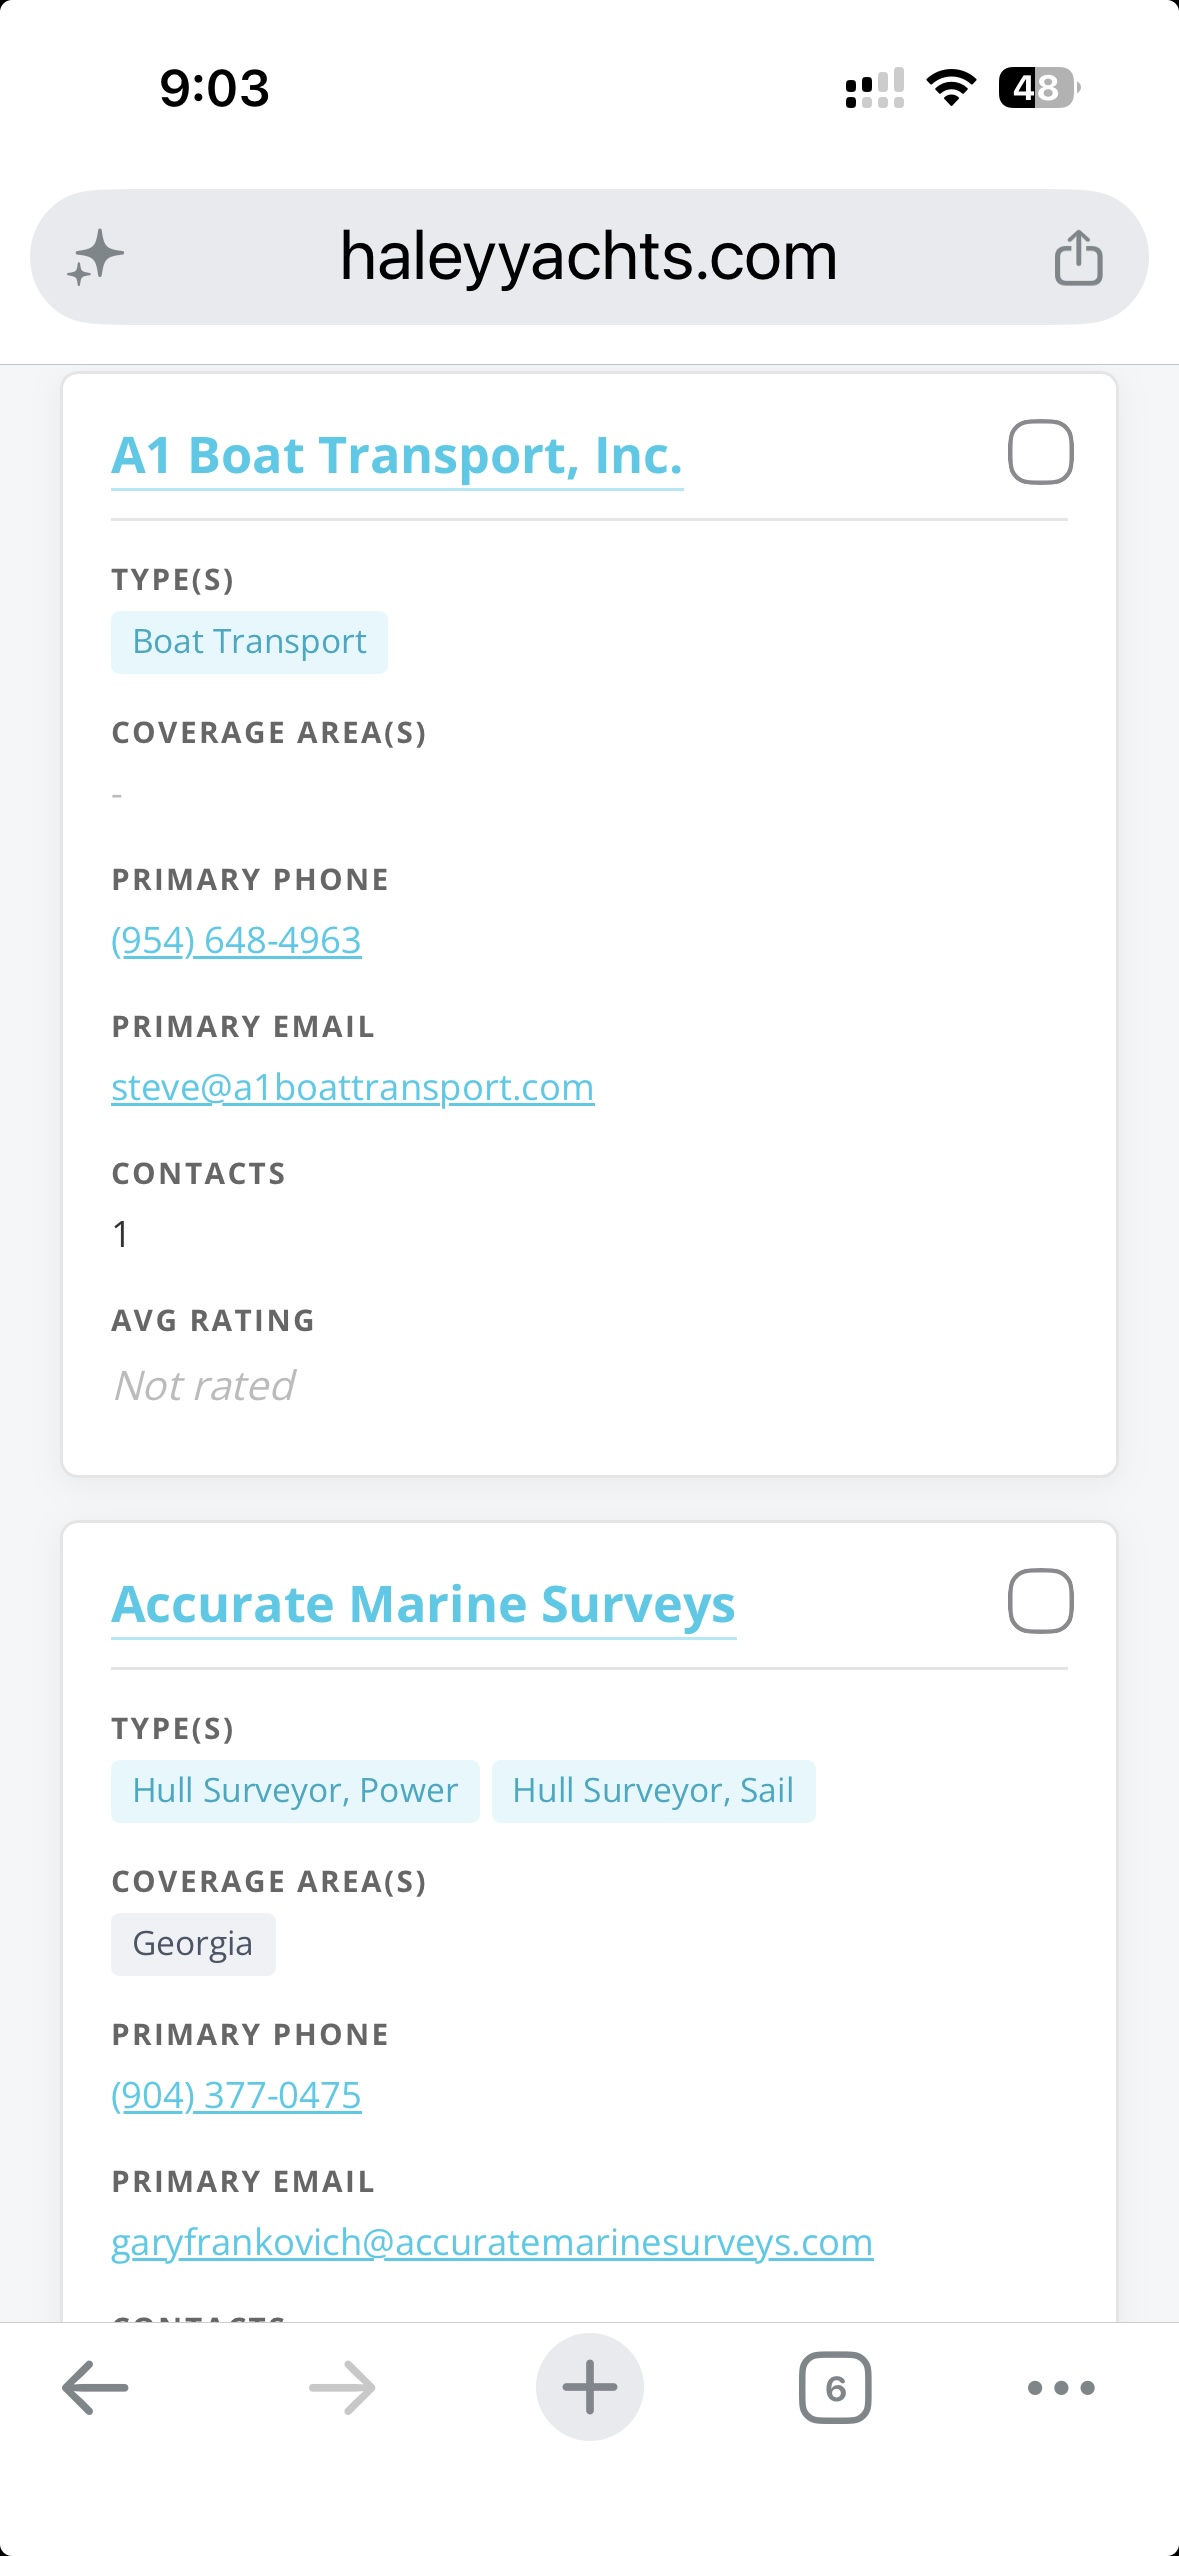
Each result shows as a stacked card instead of a wide table row, with the vendor name as the card title.
A Select all shown control appears above the results for the copy-for-email feature (see below).
Everything else works the same as on a computer. Tap a vendor name to open it.
the phone view showing stacked vendor cardsthe collapsible Search Options accordion on a phone, with each filter category closed
Viewing a vendor
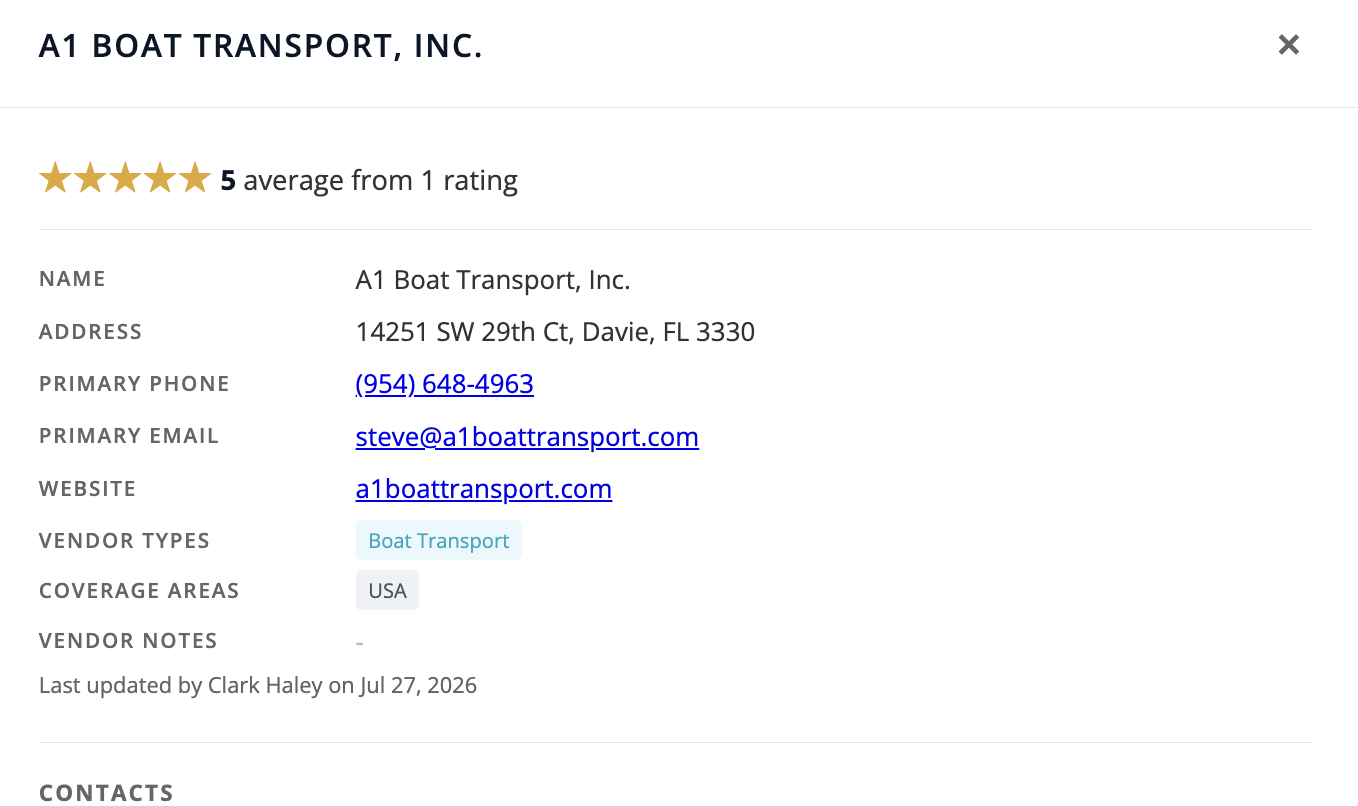
Click (or tap) a vendor name in the results to open its full detail view. You will see:
The rating summary at the top (average and number of ratings)
Name, address, primary phone, primary email, and website
Vendor types and coverage areas
Vendor notes
All contacts on file, with the primary contact marked
The ratings section, where you can rate the vendor and see its rating history
Phone numbers and email addresses are clickable, so on a phone you can tap to call or email. The website opens in a new tab.
From here you can also Edit or Delete the vendor, or Close to go back to the list.
the vendor detail view
Adding a vendor
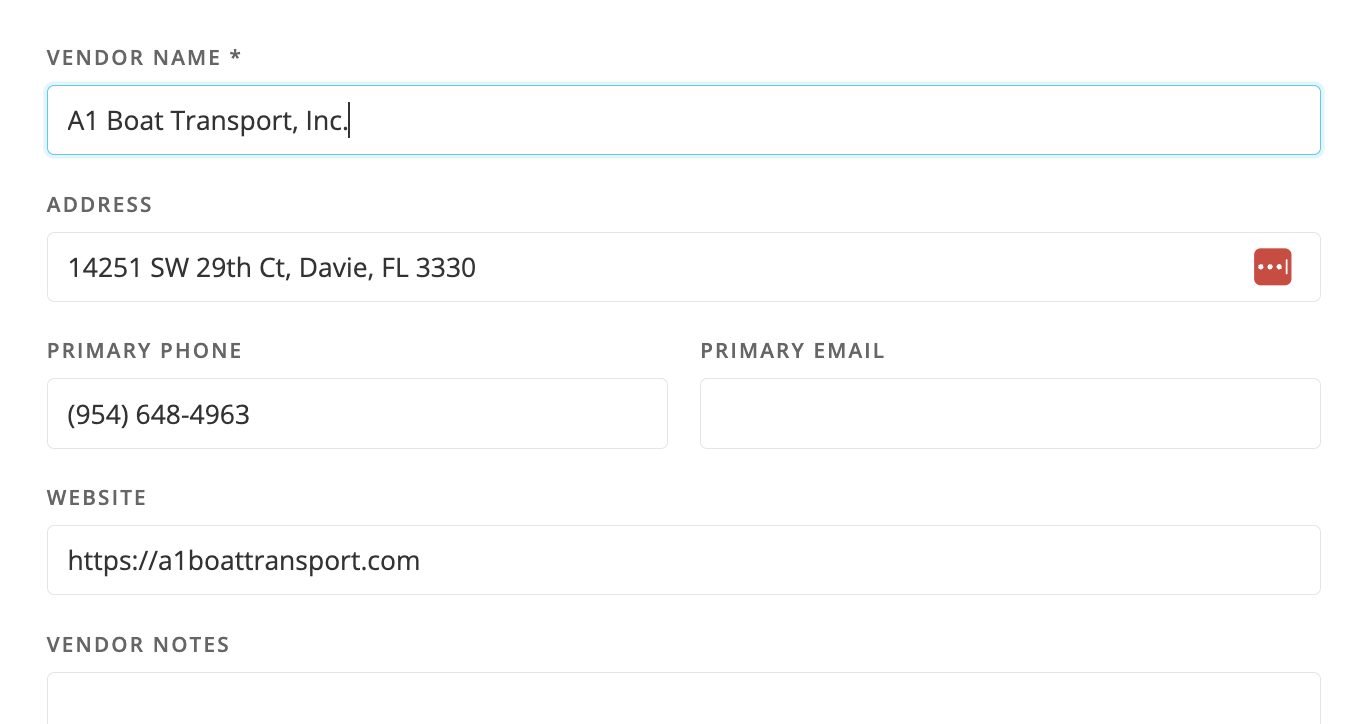
Click + Add Vendor at the top of the main screen.
Fill in the fields:
Vendor Name (required)
Address
Primary Phone and Primary Email
Website - the company's web address. You can type it plain (example.com); it is saved as a working link.
Vendor Notes (up to 150 characters)
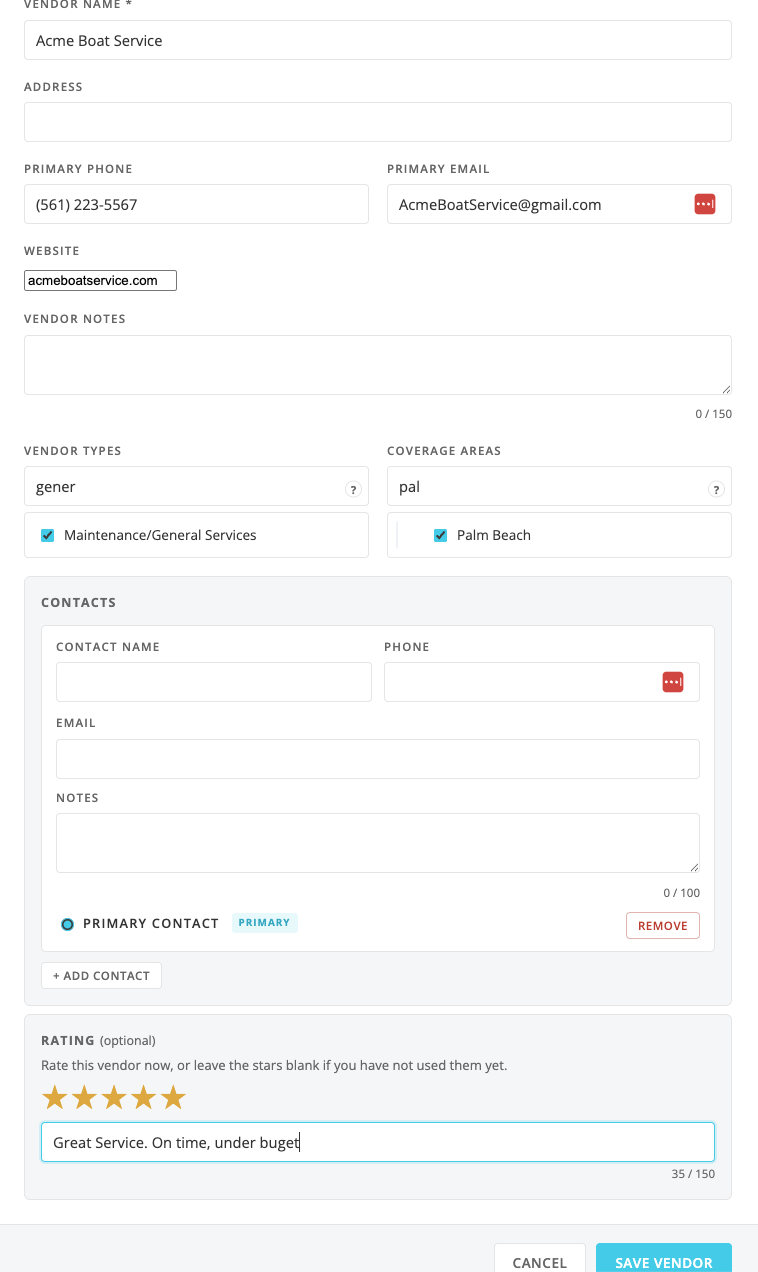
Vendor Types - check all that apply. The picker has its own Search types... box so you can jump straight to the ones you want.
Coverage Areas - check all that apply. It has a Search areas... box too.
Add one or more contacts (optional):
Click + Add Contact.
Enter the contact's name, phone, email, and optional notes.
Mark one contact as the Primary contact if you like. The first contact you add is set as primary automatically; you can change it.
Use Remove to drop a contact row.
Optionally, rate the vendor. If you have worked with them, pick a star rating and add a short note right on the form, so you do not have to save the vendor and look them up to leave your first rating. Leave the stars blank if you have not used them yet; you can always rate them later from the vendor's page. A rating always includes a note, so every star comes with the reason behind it.
Click Save Vendor.
the Vendor Types and Coverage Areas pickers on the Add Vendor form, each with its own search boxthe optional Rating section at the bottom of the Add Vendor form
The duplicate check
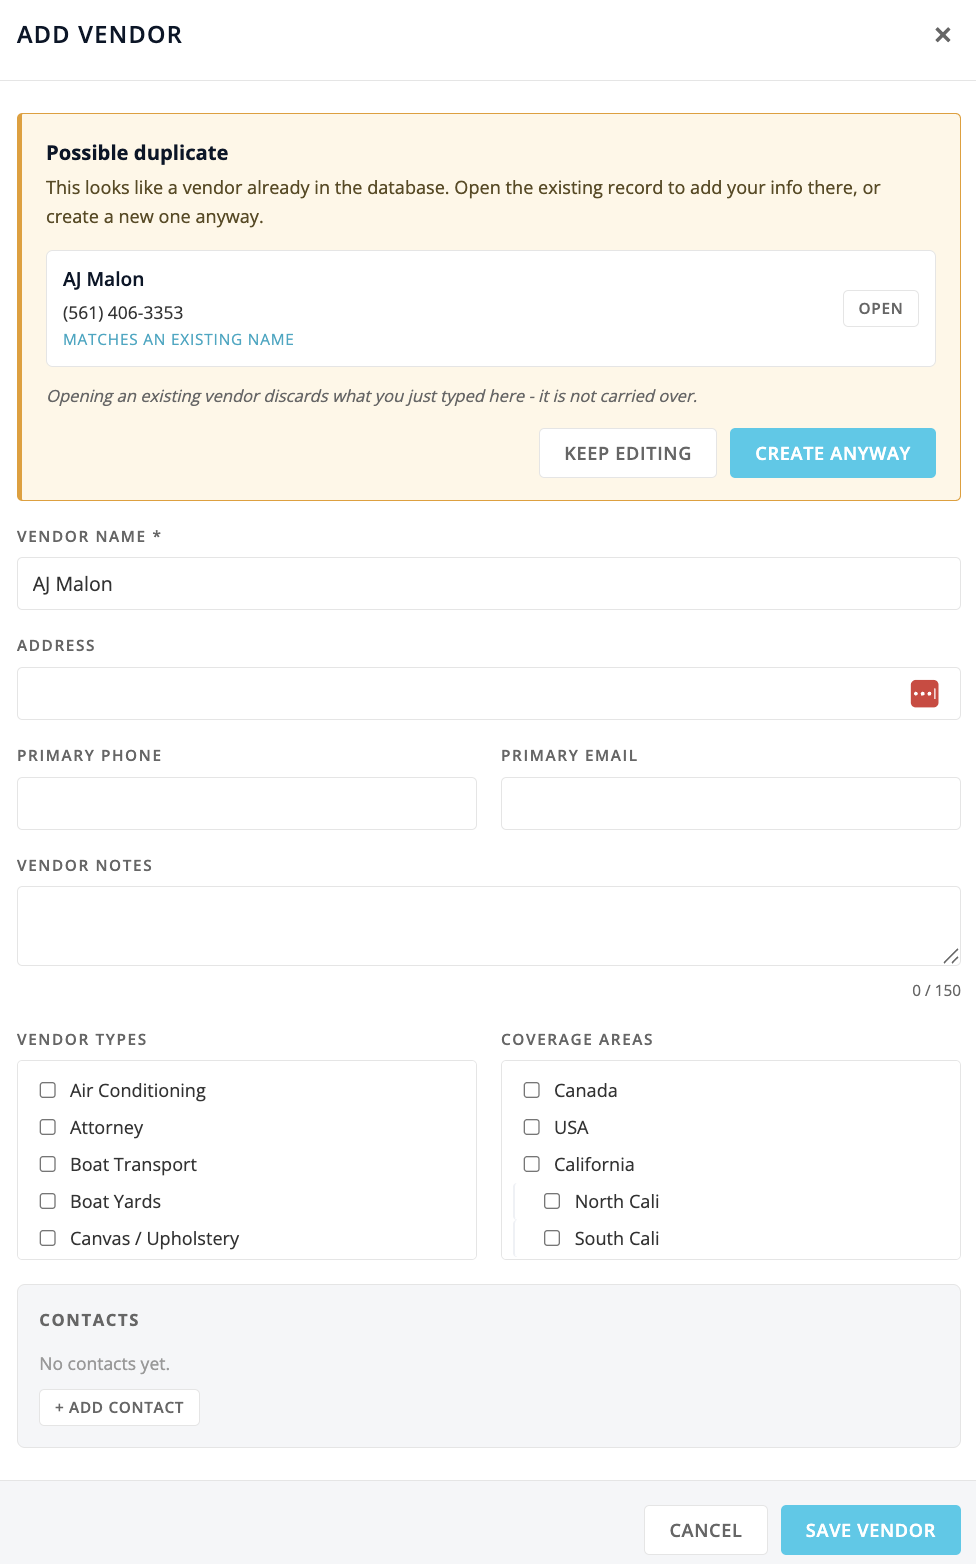
When you save a brand-new vendor, the app checks whether it might already exist. If the name matches an existing vendor, or a phone number matches, it pauses and shows a Possible duplicate panel listing the likely matches and why each one matched. You have three choices:
Open an existing match to go to that record instead. Note: this discards what you just typed.
Create anyway to save your new vendor despite the match.
Keep editing to go back to your form with everything you typed still there.
This check only runs when you add a new vendor, not when you edit an existing one.
the "Possible duplicate" panel
Editing a vendor
Open the vendor (click its name).
Click Edit Vendor.
Change any fields, types, areas, or contacts.
Click Save Vendor.
Documents
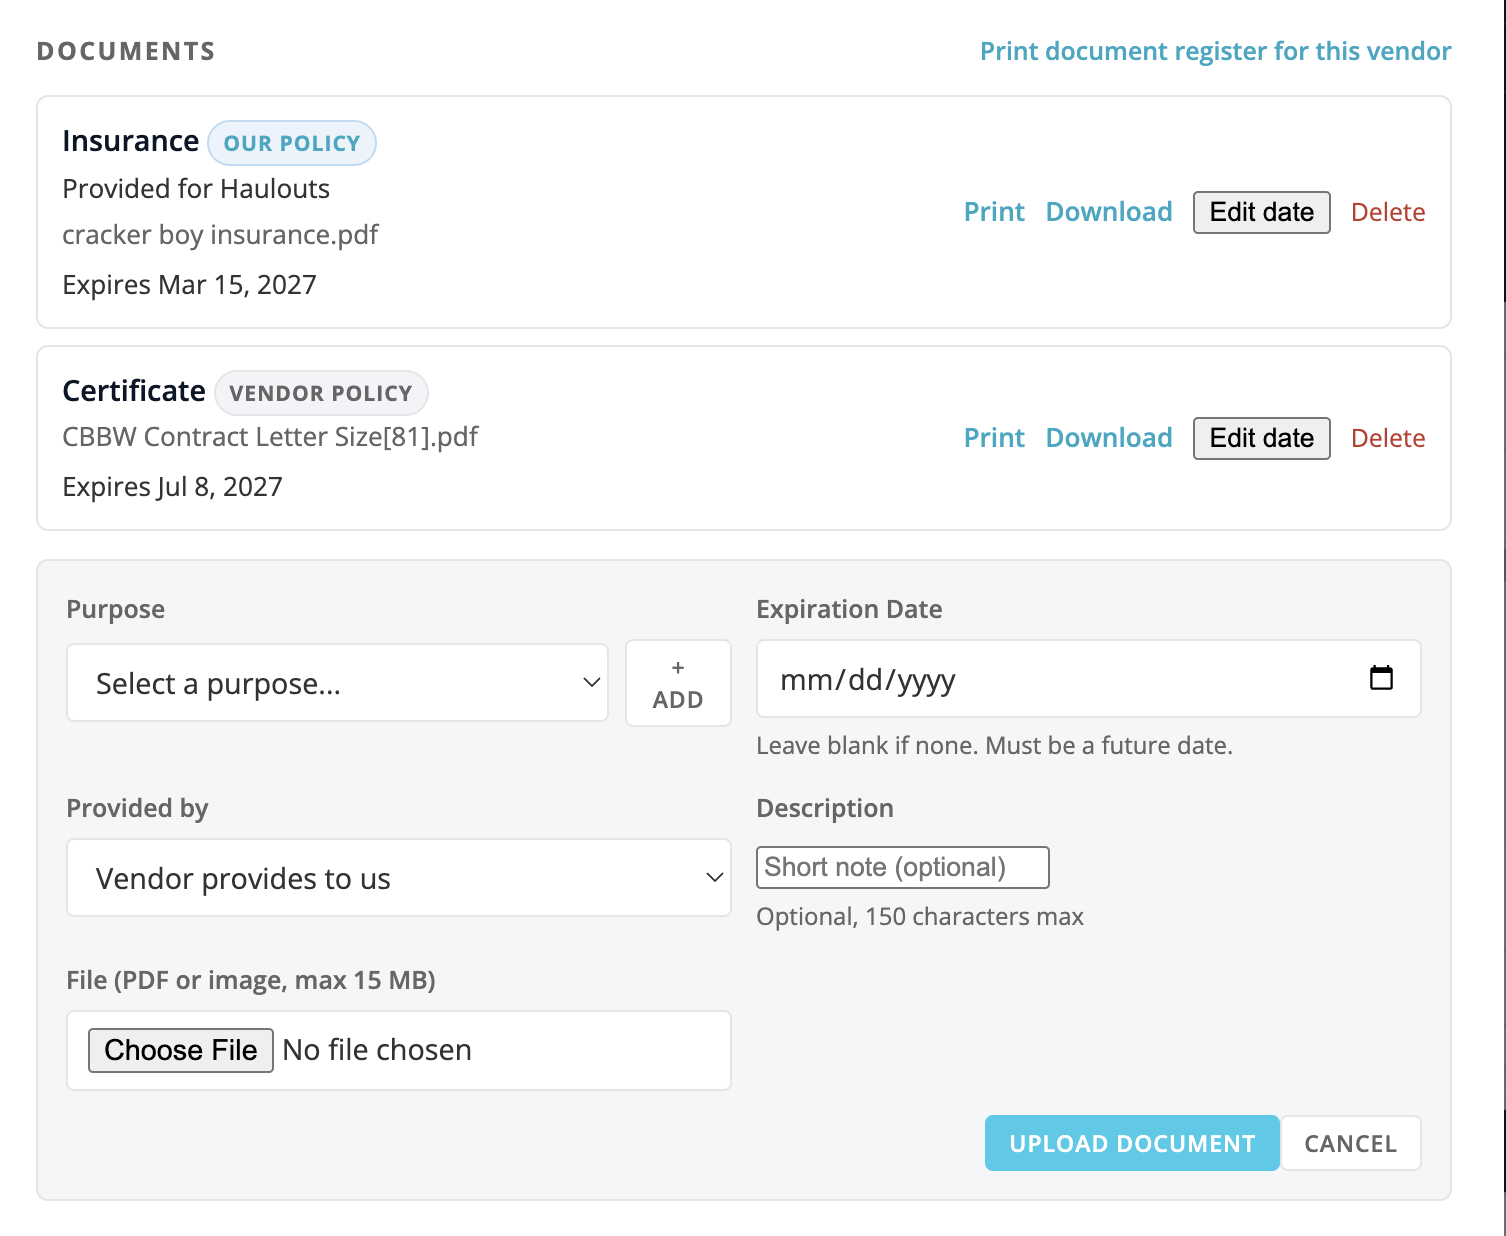
You can attach documents to a vendor, such as insurance certificates and other certificates, so the whole team can find them in one place. Everyone can view and download a vendor's documents. Only administrators can upload or delete them.
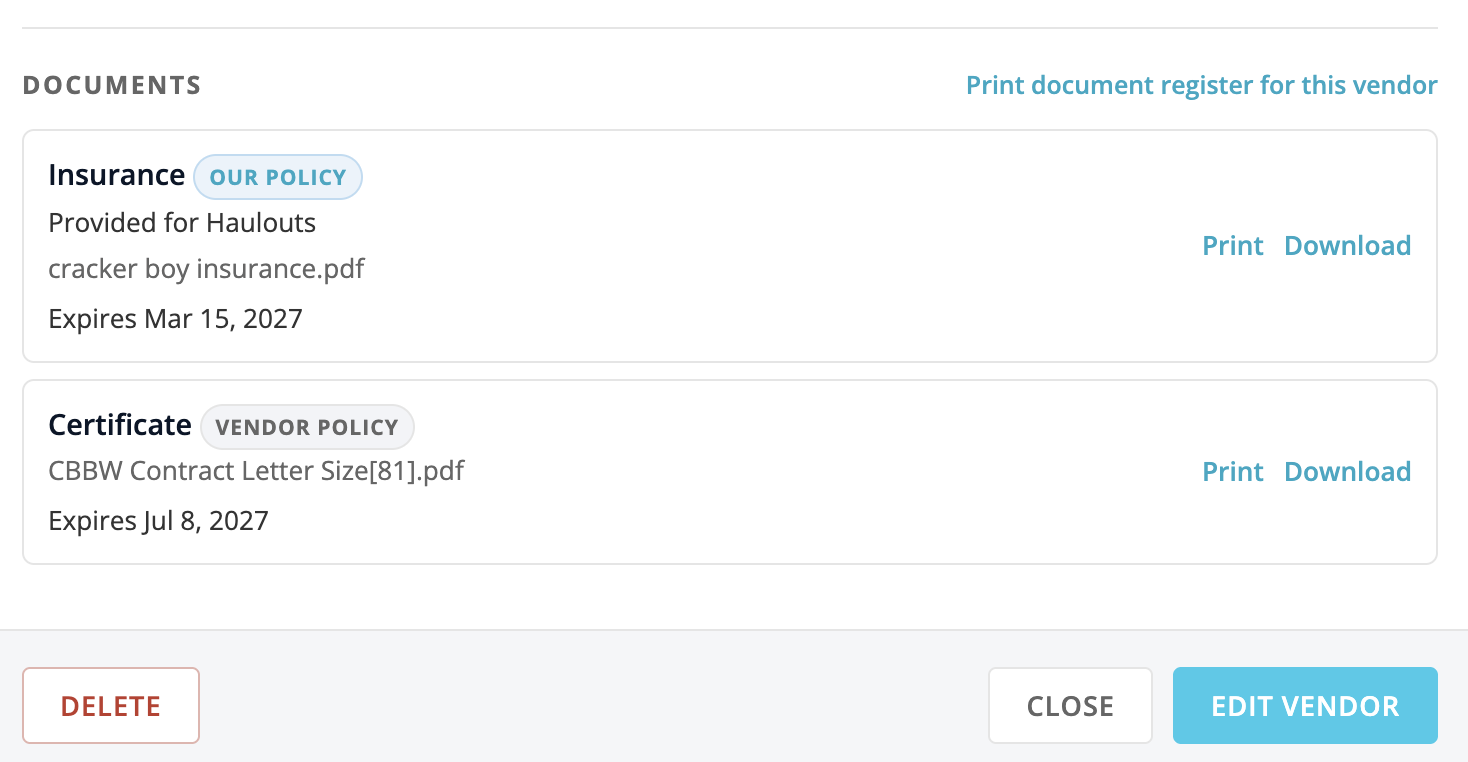
Documents live in the Documents section of a vendor's detail view. Open a vendor (click its name) and scroll to Documents.
the Documents section on a vendor's detail view
Uploading a document (admins only)
Open the vendor and find the Documents section.
Click Add Document. The upload form opens up. (When you are not adding a document the form stays tucked away, so the section shows just the button and the list of documents.)
Choose a file. Allowed formats are PDF, JPG, PNG, or WEBP, up to 15 MB.
Pick a Purpose: Insurance, Certificate, or add a new purpose of your own.
Optionally add a short Description (up to 150 characters).
Optionally set an Expiration Date. Leave it blank if the document never expires. If you do set one, it has to be today or later - the system will not accept a date in the past or a mistyped year.
Choose "Provided by":
Vendor provides to us - a policy or certificate the vendor gives us to keep on file.
We provide to the vendor - a policy of ours that we give the vendor.
Click Upload. When the upload finishes, the form closes on its own and the new document appears in the list.
Changed your mind? Click Cancel to close the form without adding anything.
the document upload form
Working with a document (Print, Download, Delete)
Each document listed in the Documents section has its own actions:
Print - opens the document ready to print.
Download - saves the file to your device.
Delete - removes the document. This is admins only; non-admins can print and download but cannot delete.
Documents are private: they are never public on the web and can only be reached by signed-in staff.
Changing a document's expiration date (admins only)
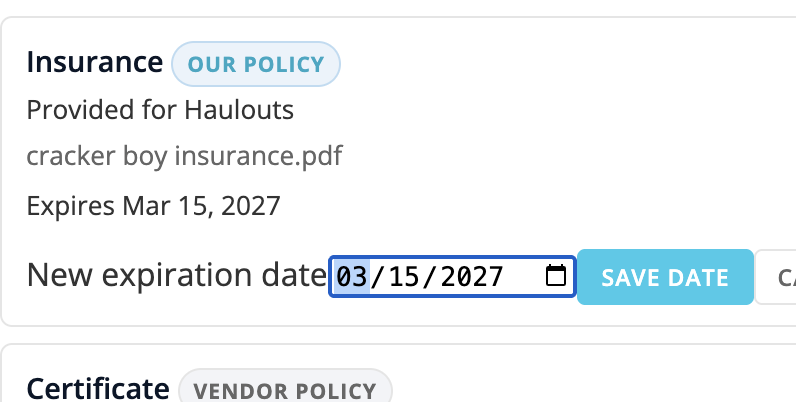
If an expiration date was entered wrong, or a certificate has been renewed for a new term, an administrator can fix the date in place - there is no need to delete the document and upload it again.
Find the document in the Documents section.
Click Edit date on that document.
Pick the new Expiration Date, or clear it to mark the document as never expiring. As with a new upload, the date has to be today or later.
Click Save. The list updates right away. Click Cancel to back out without changing anything.
This is the quickest way to clear a document that got stuck showing as expired because of a typo in the year.
changing a document's expiration date in place
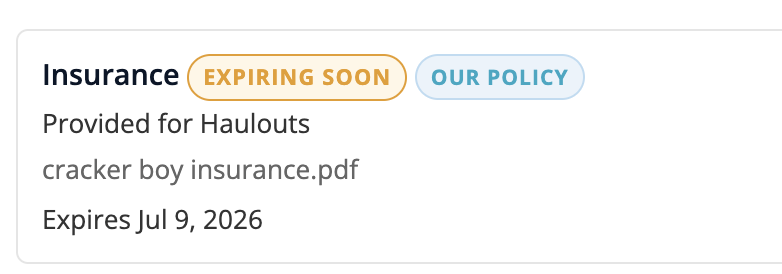
Expired documents (red flag)
If a document is past its expiration date, it shows a red flag in the list so you can spot at a glance which certificates need to be renewed.
a document showing the red expired flag, with the per-document Print / Download / Delete buttons
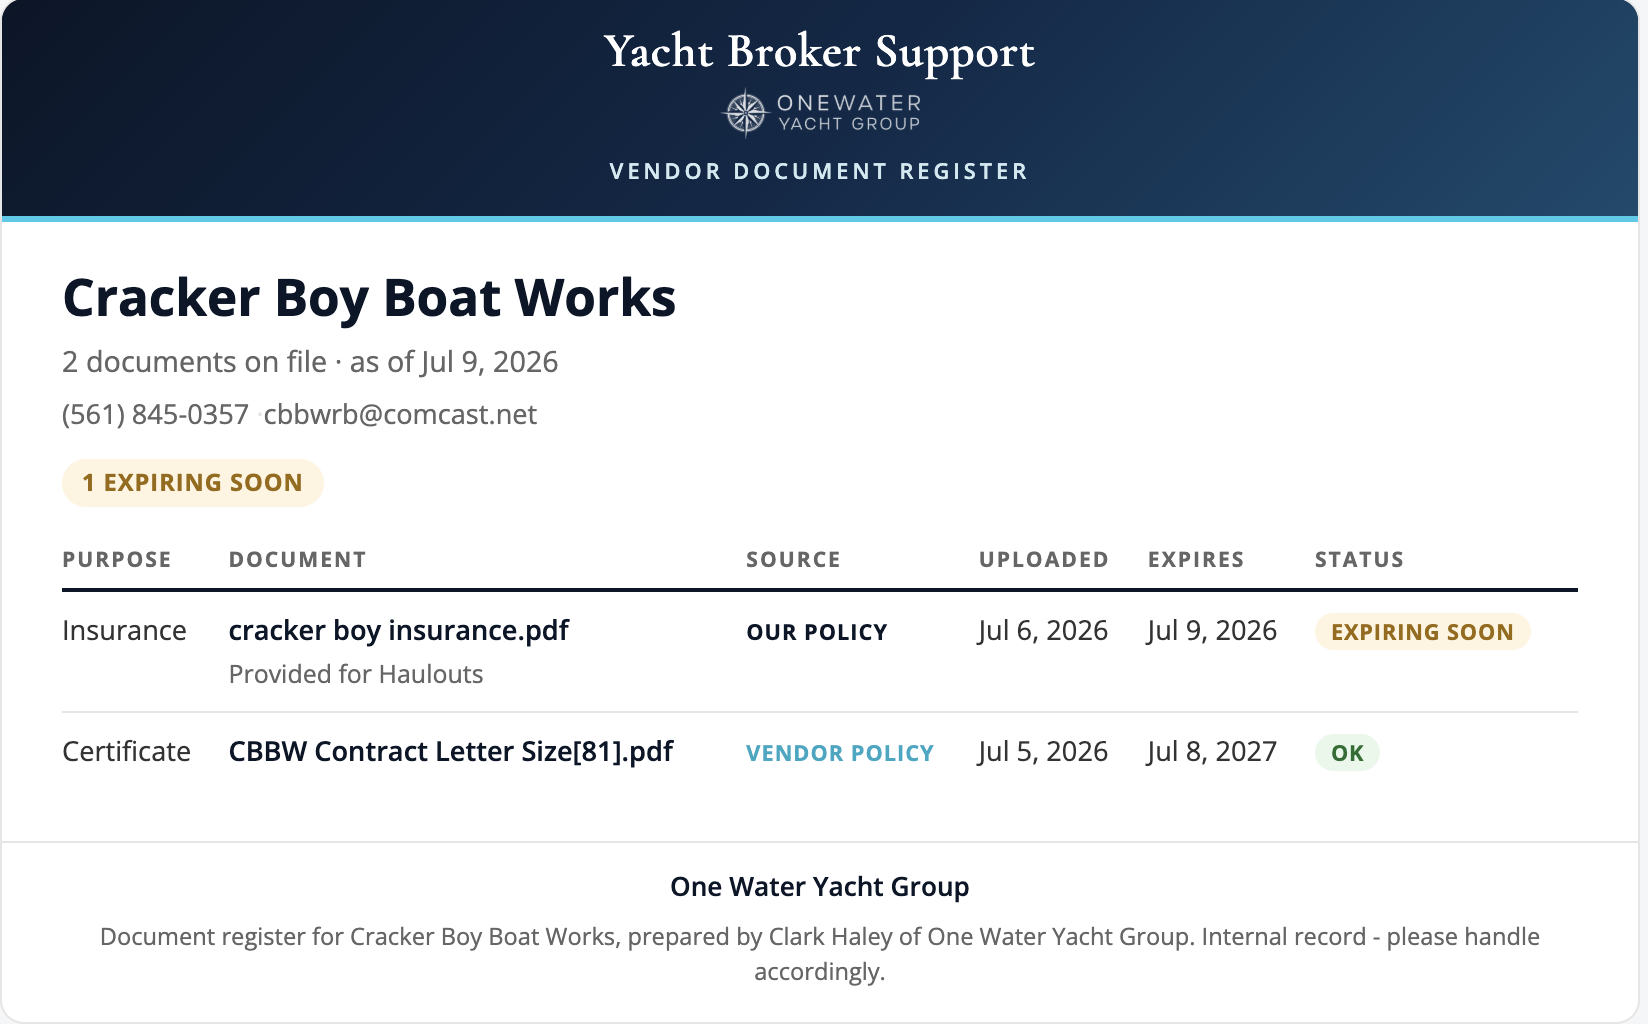
Print the document register for a vendor
The Documents section has a Print document register for this vendor button. It opens a clean, printable summary sheet that lists all of the vendor's documents in one place, with each document's purpose, description, expiration date, and status. Handy for a quick records check or for filing.
the printable document register summary sheet for a vendor
Expiration reminders
When a document has an expiration date, the system watches it for you and sends reminder emails automatically. This runs once a day.
A reminder goes out when the document is within 10 days of expiring.
Another reminder goes out on or after the expiration date if the document has not been replaced.
Who gets the reminder depends on the "Provided by" setting:
For a "Vendor provides to us" document, the reminder goes to the vendor, asking them to send an updated document to your firm's administrator.
For a "We provide to the vendor" document, the reminder goes to your firm's administrator, asking them to upload our renewed policy for that vendor.
Documents with no expiration date never trigger reminders.
Rating a vendor
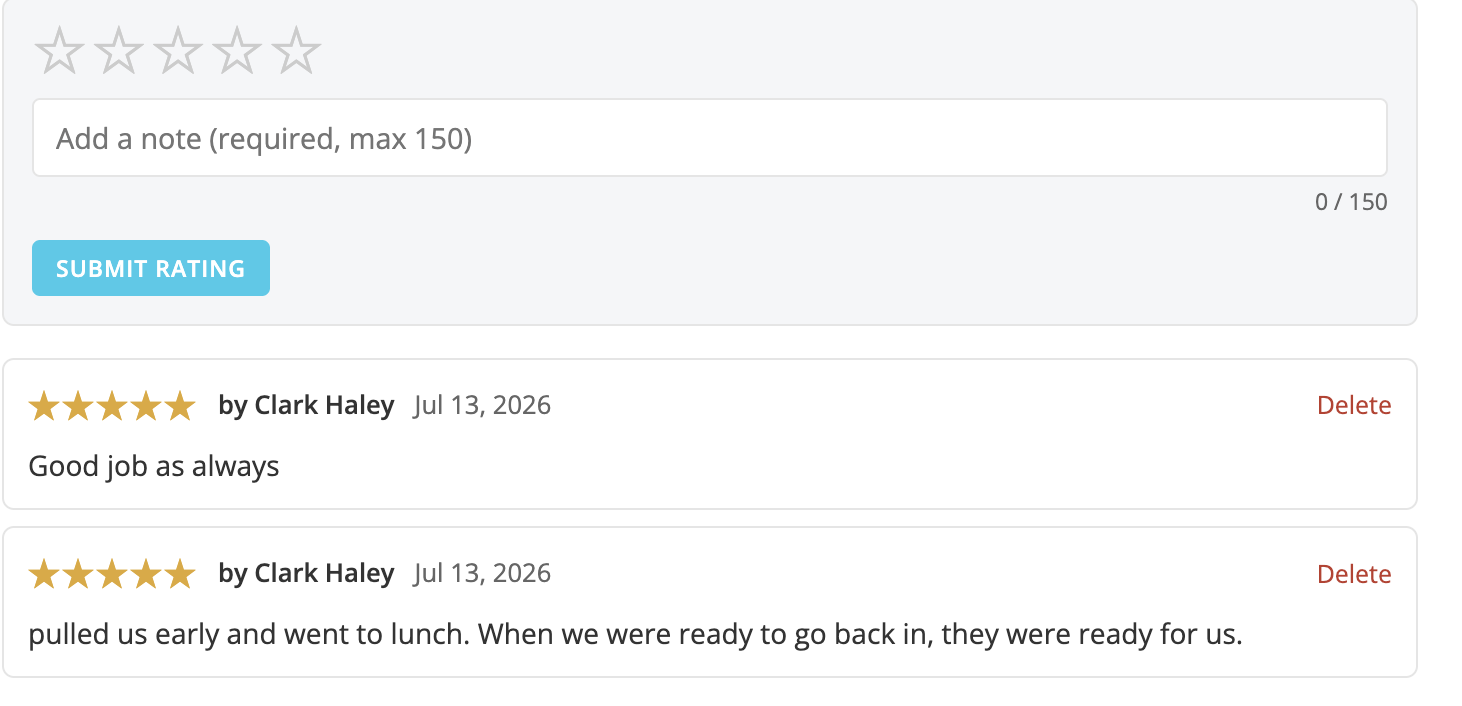
Ratings are shared with the whole team and show who left them, so they build up a useful track record over time.
Open the vendor and scroll to the Ratings section.
Click the stars to choose a rating from 1 to 5.
Optionally type a short note (up to 150 characters).
Click Submit rating.
Your rating is added to the history with your name and the date, and the vendor's average updates right away. You can rate the same vendor more than once - every rating is kept as its own entry with its date and note, so a vendor builds a real track record over repeated jobs rather than being pinned to a single score per person. Each entry in the history has a Delete button if a rating needs to be removed.
the Ratings section with the star picker and history
Deleting a vendor
How delete works depends on whether you are an administrator:
Administrators delete the vendor directly. You get a confirmation prompt, and on OK the vendor and its contacts are removed. This cannot be undone.
Everyone else cannot delete a vendor. When you click Delete, the app tells you an administrator will be notified, and it emails your request to the admin. The vendor is not deleted; an admin decides.
To start either way, open the vendor and click Delete.
Copying vendors into an email
This feature builds clean contact text for several vendors at once so you can paste it into a client email.
In the results, check the box next to each vendor you want. To grab them all, use the select-all checkbox in the table header (or Select all shown on a phone).
Click Copy ... for Email (the button shows the count, like "Copy 3 for Email").
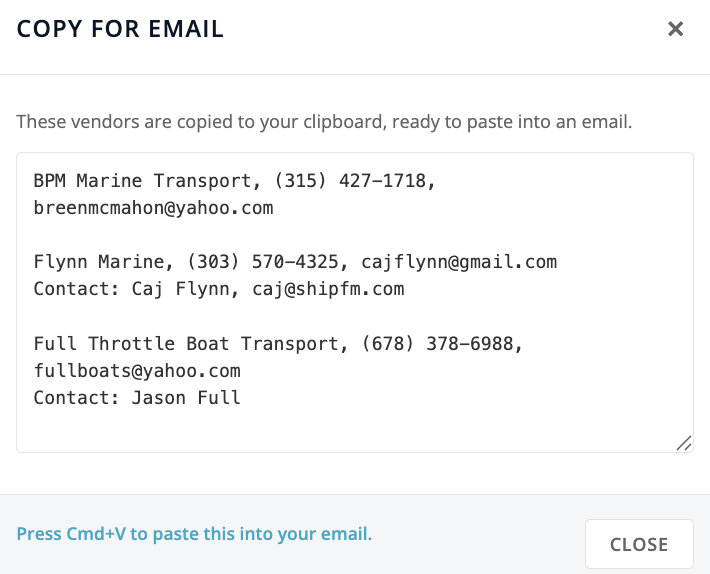
The text is copied to your clipboard, and a review box opens so you can see exactly what was copied.
Click into your email and paste with Cmd+V (Mac) or Ctrl+V (Windows).
Each vendor comes out as up to two lines:
Line 1: vendor name, primary phone, primary email
Line 2 (only if the vendor has a primary contact): Contact: name, phone, email
So a vendor with a primary contact pastes in looking like this:
Vendors are separated by a blank line, and any missing piece (say, no email) is simply left out so you never get a stray comma.
Closing the review box clears your selection, so start fresh next time.
the Copy for Email review box with sample text
View Brokers directory
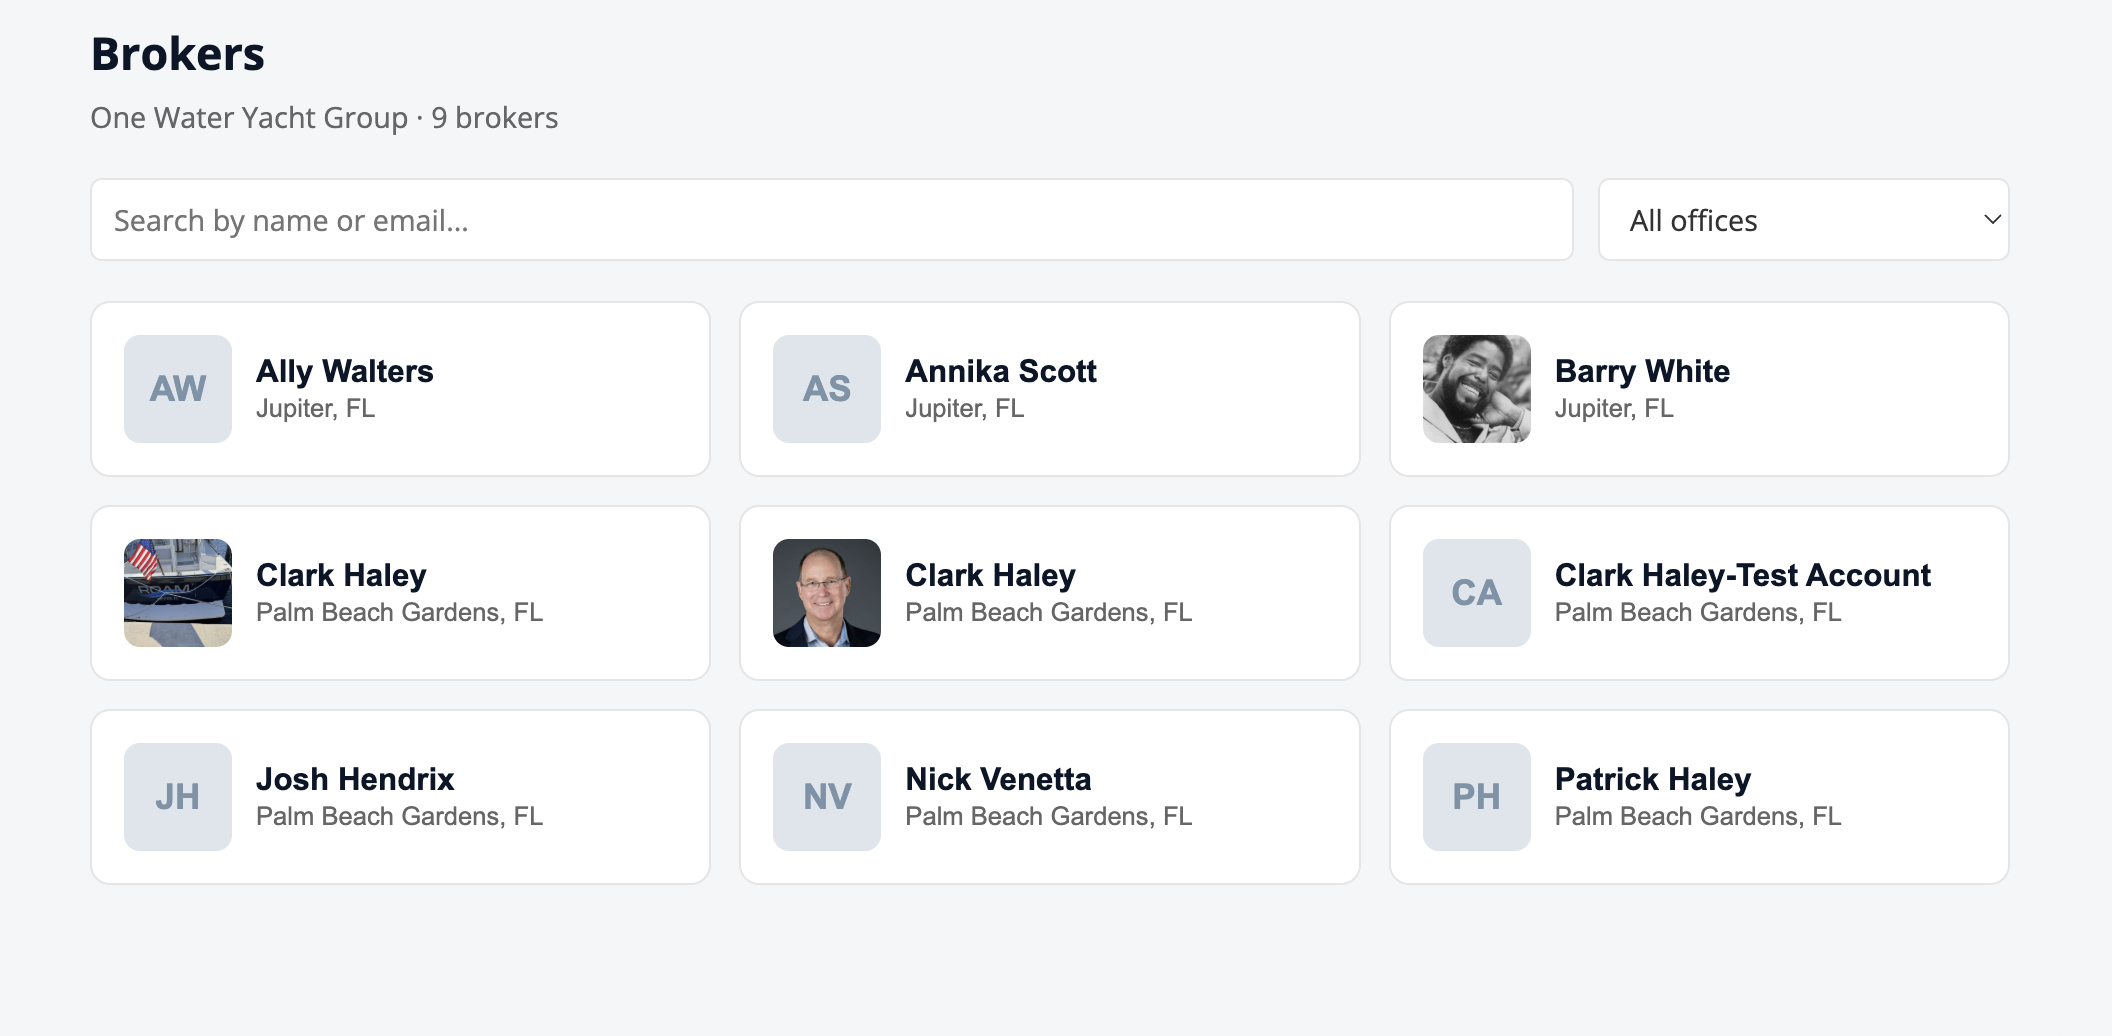
The View Brokers tile on the launcher opens a company directory of your team's active brokers. It is always available to every signed-in user. Use it to find a colleague's office, read their bio, and reach them with one tap.
To find someone:
Filter by Office to see only the brokers in one office.
Search by name or email to jump straight to a person.
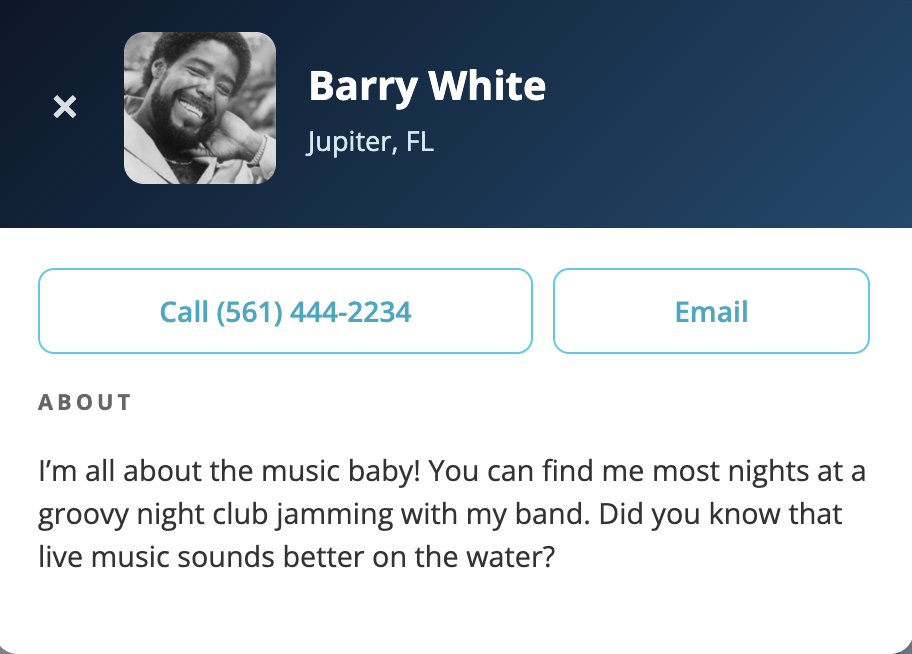
Click a broker to open their card. Each card shows their photo, bio, and office, with click-to-call and click-to-email buttons so you can reach them right away. On a phone, click-to-call places the call directly.
What appears here is what each broker fills in under My Profile (or what an admin sets in User Maintenance). If a broker has not added a photo or bio yet, the card simply notes that none was provided.
On your own card you can also pull up your license, bond, and E&O insurance with their expiration status, so you can show proof of an active credential from your phone. This is self-access only: you see your own documents here, never anyone else's.
the View Brokers directory with the office filter and name/email searcha broker's detail card with photo, bio, office, and click-to-call / click-to-email
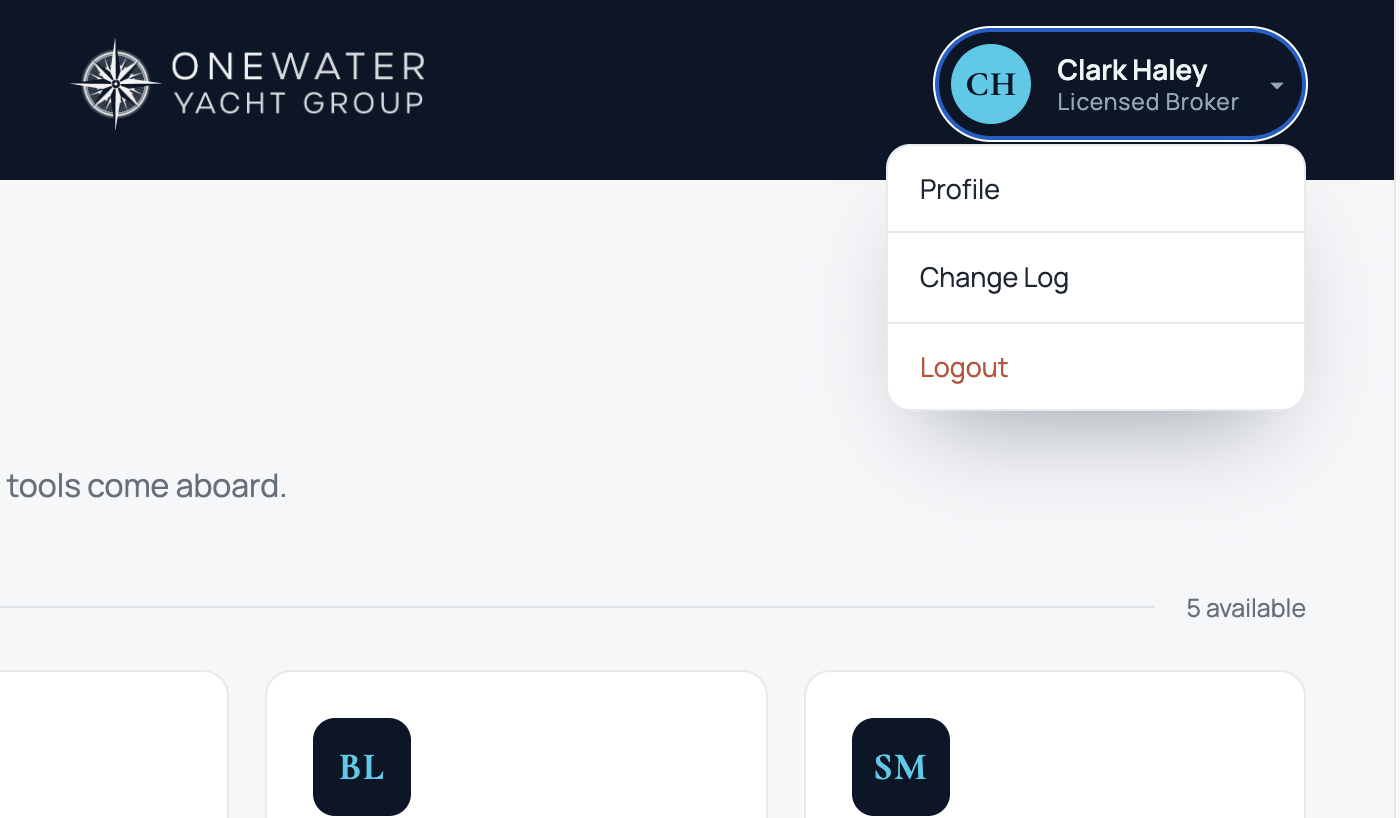
The account menu
The account menu in the top-right corner is the same everywhere in Yacht Broker Support - Vendor Management, Off Market Deals, and the View Brokers tile all share it. Open it to reach:
My Profile - a self-service card for editing your own details (see below).
Admin - the admin tools, shown to administrators only.
Log out.
Because it is consistent across the apps, you always find your profile and sign-out in the same place.
the top-right account menu, shared across the Suite, Vendor, and Off Market Deals apps
My Profile
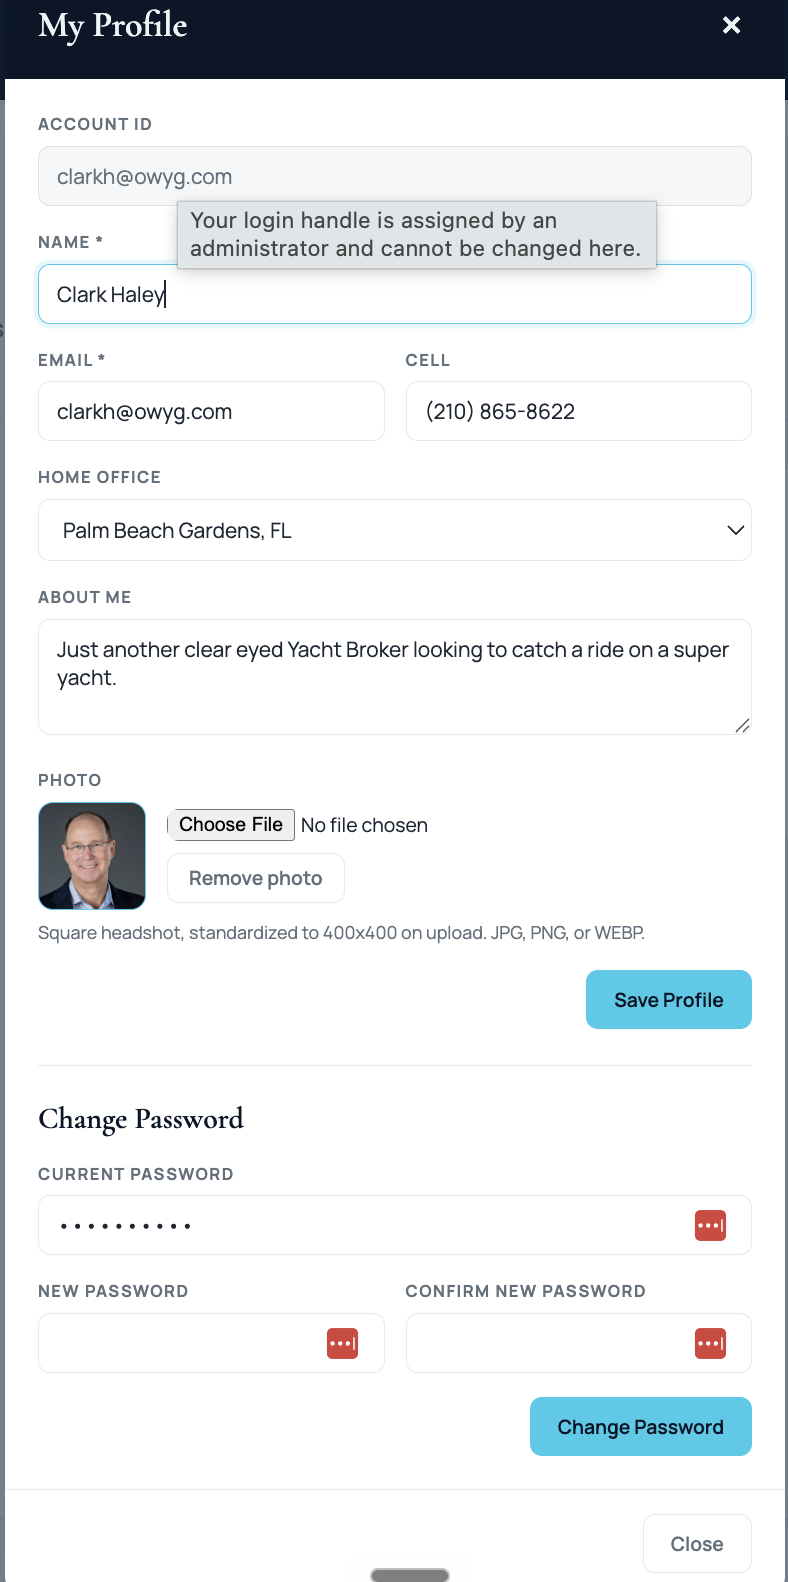
Open the account menu in the top-right corner and choose My Profile to manage your own account. This is the self-service version of what an admin can set for you in User Maintenance.
You can update your:
Name
Email
Cell - type the digits and the app formats the number for you.
Home Office - chosen from the office list your administrator manages. You pick from the list; you cannot create a new office here.
Bio - a short, free-text description of yourself. This is what colleagues see on your card in View Brokers.
Photo - a square headshot. It is standardized to a square on upload. JPG, PNG, or WEBP. This photo is what shows in View Brokers.
Your Account ID is shown but cannot be changed here; an administrator assigns it.
The same screen has a Change Password section. Enter your current password, then your new password twice (at least 8 characters), and click Change Password.
the My Profile screen with photo, bio, cell, Home Office, and the change-password section
License, bond, and E&O insurance
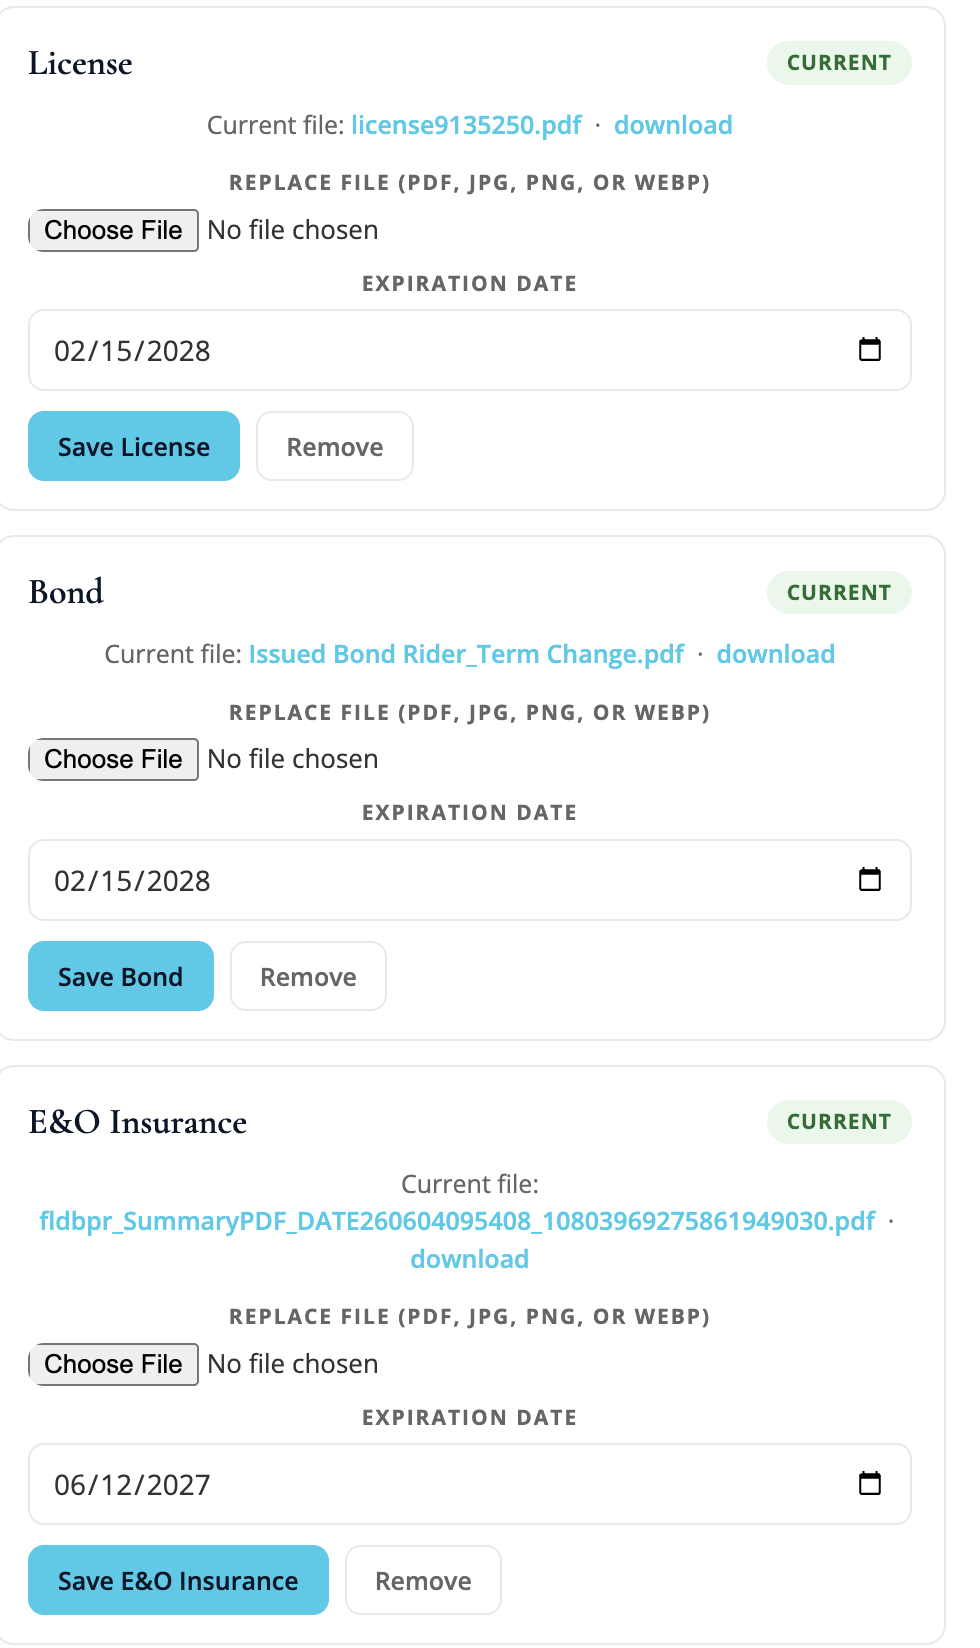
Open My Profile from the account menu and scroll to Licensing, Bond & E&O. You can keep three documents on file, each with its own expiration date:
License - your broker license.
Bond - your surety bond.
E&O Insurance - your errors and omissions insurance.
For each one, choose a file (PDF, JPG, PNG, or WEBP), set the expiration date, and click Save. To swap in a renewed document later, pick a new file and save again; to correct just the date, change the date and save without choosing a file. A status badge shows Current, Expiring in N days, or Expired at a glance.
Reminders. The app emails you automatically as an expiration approaches, so nothing lapses by surprise:
90 days before it expires - to you.
60 days before - to you.
30 days before - to you.
On the expiration date - to you, and your administrator is notified as well.
These documents are private. Only you and an administrator can see or open them; a colleague never sees them. An administrator can also upload or update any broker's license, bond, and E&O insurance from User Maintenance.
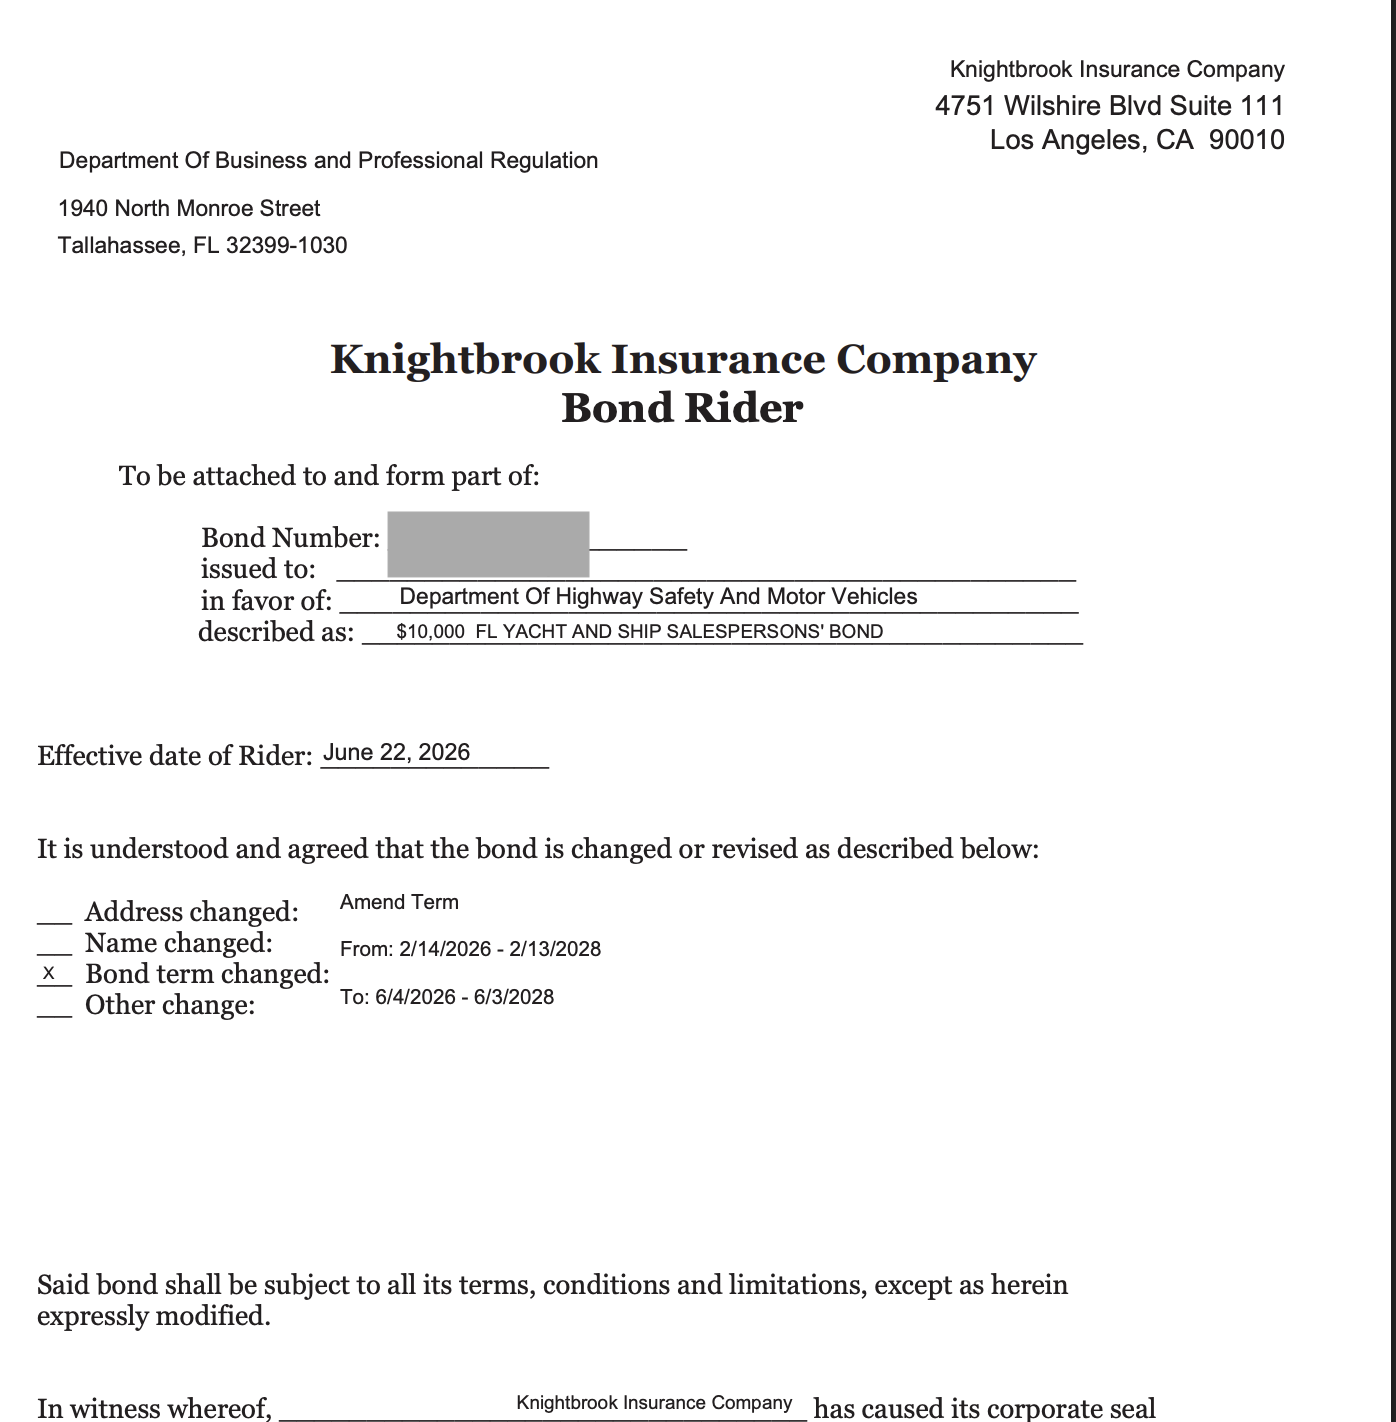
Pulling them up in View Brokers. Open View Brokers and tap your own card. Under My License, Bond & E&O Insurance you get a View button for each document, with its Current / Expiring / Expired badge. This is self-access only: your own documents show here, never anyone else's. Tapping View opens the document in an in-app viewer so you can show proof of an active credential right on your phone. Close it with the X in the top-right, the Esc key, or by tapping outside the document, and you are back where you were.
the Licensing, Bond & E&O section in My Profile, with expiration dates and status badgesyour license, bond, or E&O insurance open in the in-app viewer, with the X to close (Esc and tapping outside also close)
Need help?
If something is not working or you are locked out, contact your firm's administrator and they can reset your access.
 Software built by a broker, for brokers